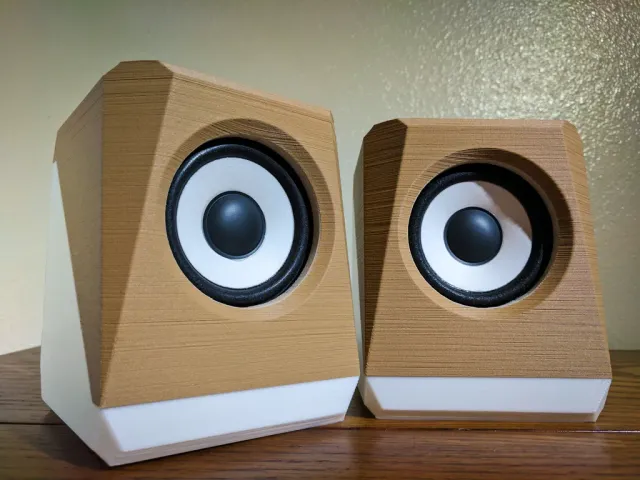
Angular Speaker Box
prusaprinters
An angular speaker enclosure for 3 in speaker drivers.Printed in two pieces, top/front, and bottom/back. Then sealed together with epoxy after the speaker and binding posts are mounted internally.The internal of the enclosure features additional angular panels to help reduce the standing wave effect of sound bouncing off the flat back wall. Some say this is not a real concern, (and it certainly shouldn't be on a small speaker like this,) but hey it looks cool, it might help in some way, and I like it!I printed mine in PLA, though ABS and PETG should work just as well.Hatchbox Wood for the top/front and eSun Warm White for the bottom/back. Printed in 0.3mm layer height for both pieces because I liked the inconsistent, heavy layered look of the wood filament for this project.Print SettingsPrinter:Custom Kossel MiniRafts:NoSupports:NoResolution:0.3Infill:25%Notes:Print with 3 perimeter layers to increase the likelihood of an airtight seal. Proper layer bonding is critical to avoid rattles or buzzing sounds in the future.Post-PrintingClean UpYou may need to (or wish to) do some light sanding and filing on the inside section of the speaker cutout. Note that this part prints upside-down, so any overhang nastiness will be visible in the bottom of the speaker hole when assembled.Mount HardwareUse the 4 3M screws to attach the speaker to the front of the case from the inside. If you choose to use nylon washers, those will be implemented here to keep the metal of the screw heads from contacting the speaker casing.Mount the binding post terminal in the back through the two holes. You will only need the front plastic piece, one lock washer on each side, and two nuts on each side if you are using the parts linked below.WiringSolder speaker wire to the speaker terminals. Cut to an appropriate length so you can still open the case enough to tighten the nuts on the binding post terminals. Attach each wire to the appropriate binding post terminal.This would be an excellent time to test the wiring and speaker. After the case is glued together in the next step, there will be no going back to fix things in a non-destructive way.GlueApply glue to the inside track of the bottom piece and along the shelf that faces toward the front. Be careful not to pull on your wiring or drip glue on the outside of the speaker enclosure.Lightly clamp the two pieces together while they dry. I simply used some masking tape in place of clamps and it worked well.Parts Needed3in Speaker Driver2 Neededhttp://www.ebay.com/itm/172123969777?_trksid=p2057872.m2749.l2649&ssPageName=STRK%3AMEBIDX%3AITThe speakers at the link above are the ones I used and can confirm fit well (and sound pretty great considering the price!) You do not have to use those, any standard 3in speaker should fit as well.Speaker Terminal Binding Post2 Neededhttps://amzn.to/3gRRV1rThey tend to be difficult to find or expensive to buy in quantities smaller than 10 pieces.Screws4 x 8mm 3M screws4 x 3M nylon washers (optional)WireAny wire suitable for speakers will do. A very small amount is needed, less than 1 ft.GlueYou will need some kind of glue to seal the two halve together. These speakers are not intended to come apart once assembled (so be sure your connections are solid internally before sealing.)Any epoxy or other glue with good "gap-filling" properties will work well. We need the gap-filling ability to help maintain a good seal where layer lines meet at the seam.Category: Audio
With this file you will be able to print Angular Speaker Box with your 3D printer. Click on the button and save the file on your computer to work, edit or customize your design. You can also find more 3D designs for printers on Angular Speaker Box.
