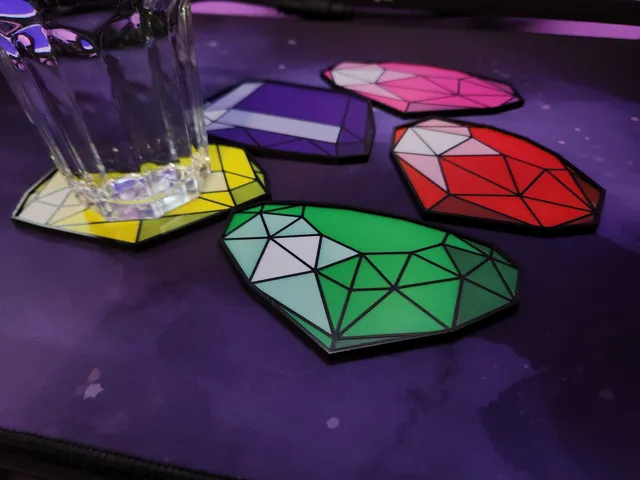
Angled View Gem Coasters (Spyro 2 & 3)
prusaprinters
5 coasters resembling a 3D view of the gems from Spyro 2 & 3! Each one uses Black, White, and a primary color.Part of a larger series of coasters I've designed based on the Gems from Insomniac's original Spyro the Dragon trilogy for the Sony Playstation. Printing:*Includes a .3MF Bambu Studio project file for Bambu Lab printers.*I have printed them out scaling the X/Y values of each to 120%! Even then, they may be a bit small for your liking. Scale as desired!I've printed mine out on a Bambu Lab P1S using Bambu PLA Basic colors for everything EXCEPT the dark purple gem. That purple is Voxelab PLA I got from Amazon. There is a total of 7 colors needed for the whole coaster set.It's designed to be printed in 0.16mm layer height, so that the color blending can work right (with the filaments I've chosen to use). You may need to make height adjustments for different filaments. Preferably, solid infill will be used (I did).When printing one at a time, it takes 14 color swaps per coaster. However, you can save on time and purged filament by putting more than one on the plate at a time. with most Bambu Lab printers, you can comfortably fit all 5 coasters on just 2 plates. You can also save on color swaps by making all layers taller, save for the final multicolor layer. But it won't save you that much, and it will result in a slightly odd-looking side wall with more than one layer height in my opinion. While you don't NEED an AMS or similar to print these, it will make things MUCH easier for you! (I use one).I used ironing, and it makes the surface look so much nicer! Enjoy! Notes:If you print yours in PLA (as I've done with mine), you will need to be careful not to put overly hot things on it. Depending on the mug and temperature of the liquid inside, you might be okay. I did a test microwaving a mug of water and placing it on one of the coasters, and it left small rings of melt in it. While it may not be necessary, I recommend sticking something to the bottoms like cork. This way you can keep it from sliding around, and protect the surface underneath. The current photo provided is from before I added 1mm of height to the outer wall. This was the first coaster set I made in the series, and so I printed it out before deciding on the ideal outer wall height (to keep drips from flowing off the coasters). Thanks so much to user rainbowkrash for your Set of Spyro Gems post! They proved to be very helpful references! For the rest of the collection, see:Top View Gem Coasters (Spyro 2 & 3)Angled View Gem Coasters (Spyro 1)Side View Gem Coasters (Spyro 1)
With this file you will be able to print Angled View Gem Coasters (Spyro 2 & 3) with your 3D printer. Click on the button and save the file on your computer to work, edit or customize your design. You can also find more 3D designs for printers on Angled View Gem Coasters (Spyro 2 & 3).
