Anet A8 Swappable X Carriage
prusaprinters
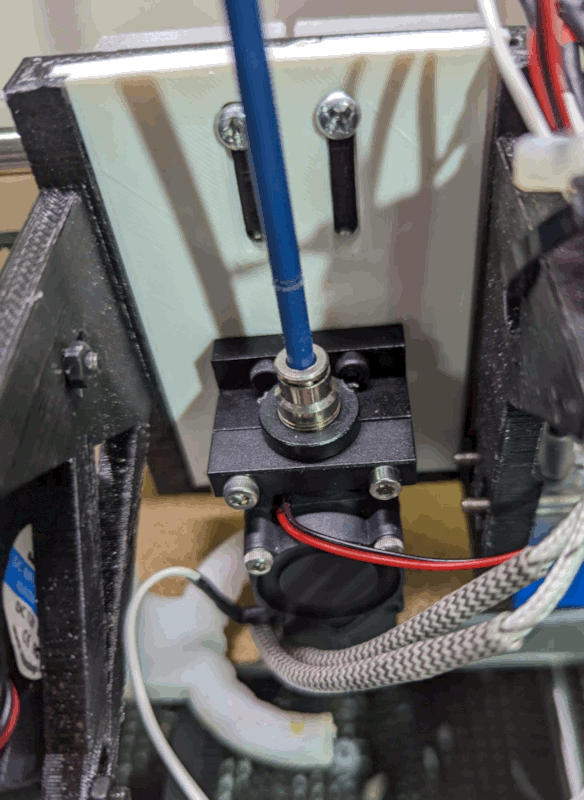
<p>This is a remix for the quick change X carriage for Anet A8/AM8. The carriage itself is my remix of another carriage that has a part fan and sensor mount.This should fix "standard" plates from the source, however, I had problems with it either fitting too tight or too loose. So in this remix, there are two slots. You remove two M4 bolts from the mounting plate and use longer M4s to affix the plate to the bearing block through the X carriage. This is quick and easy to change since the two bolts are up top and easy to access but keeps the plate very stable. The slots allow you to raise the whole assembly up if you need to hit the fan zone or adjust the distance for the sensor. Once you have it how you like, you can measure the offset easily at the top and move your mounting holes accordingly.</p> <p>The mounting holes in the plate are made for M3 threaded inserts (heat set) and then they accept a metal hotend holder (a few bucks from any of the usual China sources). For example: https://www.amazon.com/Aluminum-Bracket-Compatible-Upgrade-Creality/dp/B096VSNBSN</p> <p>The biggest problem is wiring. The pictures don't have the wires dressed nicely and are not quite in the correct position (note the slots). I used JST connectors for everything except the heating element where I used an XT30 connector.</p> <p>The original (tested) plate was cut from an existing STL file. I have recaptured it into SCAD but have not printed it yet, so it could be slightly off but they subtract out nicely. I did not reproduce the little dimple on the back since I think with the bolts it is less necessary, but we shall see.</p> <p>Added one for the 3 in 1 hotend you see under a few different brands. I have mounted it but don't know yet how it will fit relative to the fan, sensor, etc.</p> <p>You may find it useful to use an adjustable fan: <a href="https://www.thingiverse.com/thing:1996843">https://www.thingiverse.com/thing:1996843</a> -- note that if the fan is too loose on the mount a little bit of duct tape -- maybe even on just one side -- will fix that right up.</p> <p>Update: A 17mm "bump" for the bracket puts the hotend in the center of the cooling fan for me. Added a file for that. Set bump_size to 0 in the OpenSCAD if you don't want it. Combined with 23mm for the bracket, the center line is at 40mm off the surface of the plate.</p> <h3>Print Settings</h3> <p><strong>Printer:</strong></p> <p>Anet AM8 (highly modified)</p> <p class="detail-setting rafts"><strong>Rafts: </strong> <div><p>No</p></div> <p><strong>Supports:</strong></p> <p>No</p> <p class="detail-setting resolution"><strong>Resolution: </strong> <div><p>0.3</p></div> <p><strong>Infill:</strong></p> <p>30%</p> <p><strong>Filament:</strong></p> N/A N/A <p>N/A Post-Printing =============</p> <p>You may have to shave the edges of the plate to make it fit although with the bolt slots I have shrunk the plate a little to help get a no tool fit. Still, your experience may vary.</p> </p></p> Category: 3D Printer Parts
With this file you will be able to print Anet A8 Swappable X Carriage with your 3D printer. Click on the button and save the file on your computer to work, edit or customize your design. You can also find more 3D designs for printers on Anet A8 Swappable X Carriage.
