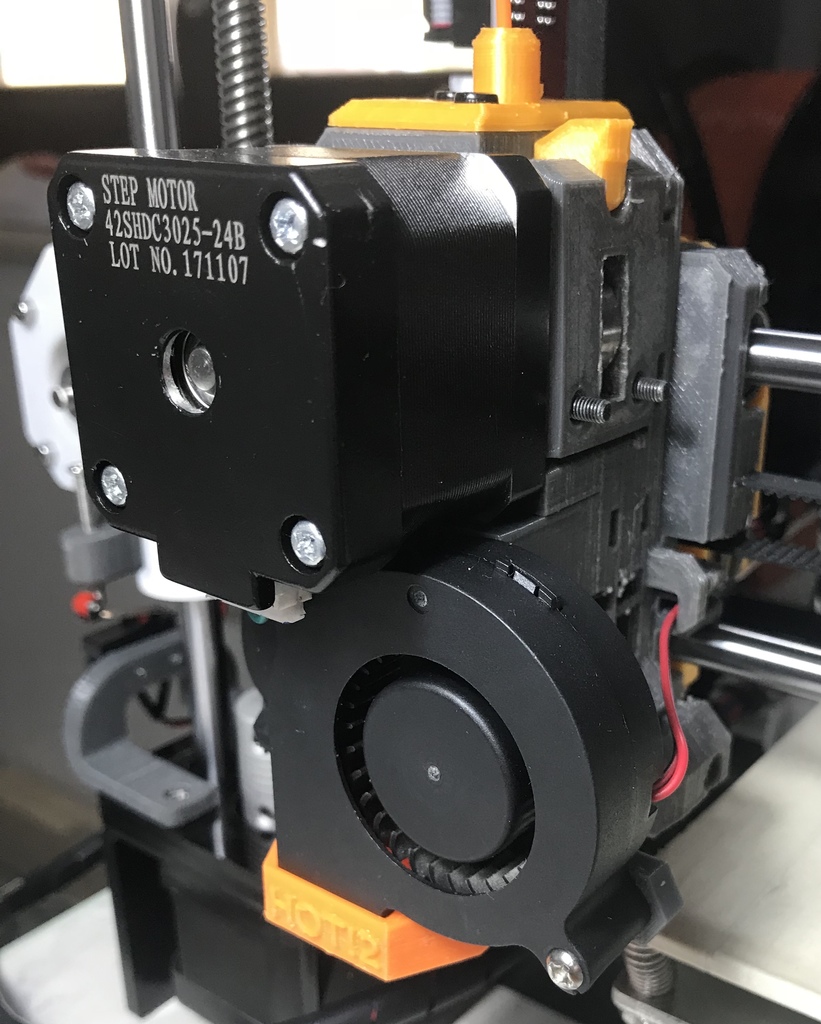
Anet A8 - Prusa MK3 Extruder Mod
thingiverse
Introduction -------------- This text explains how to adapt the Prusa I3 MK3’s extruder for use with the Anet A8 printer. It is recommended to print the body parts in PETG and the nozzle fan in ABS, as PLA will melt even at low temperatures. Some modifications were made to the extruder idler to accommodate standard gears. The ability to quickly change filament was a key reason for creating this adaptation. This extruder is highly recommended due to its light and silent operation, even with stock bearings. Before You Begin ----------------- To print the Prusa I3 MK3’s extruder on the Anet A8, you will need to make some modifications first. The Z End Stop cannot be lowered enough for the nozzle to reach the hotbed, so you must print this part or another of your choice before starting. What You Need ------------- To assemble the Prusa I3 MK3’s extruder on the Anet A8, you will need: * An E3D V6 extruder heater (or a clone) * 20cm PTFE tube (usually included with Bowden E3D V6) * Screws and nuts as described in the Prusa instruction manual (M3n, M3nS, M3x10, M3x30, M3x40, M3x25, M3x18) * 1xMK8 extruder gear (concave side) * 1x625ZZ bearing * Nema 17 Extruder Step motor (use the one shipped with Anet A8) * Nozzle fan (use the one shipped with Anet A8) * Extruder fan (use the one shipped with Anet A8) Instructions ------------ First, print all parts using PETG for everything except the nozzle fan, which must be printed in ABS. PLA is not recommended for body parts as it will melt even at low temperatures. The only different assembly instruction is for the idler part, which has been modified to use standard extruder gears instead of Prusa’s original Bondtech. - Sand the printed shaft and check that it can fit into the idler's guides. If not, just sand it more until you can insert it with a slightly friction. - Pick the 625ZZ bearing and the washer and insert them into the idler's guides. Do not force too much as the plastic can crack. The washer must be positioned on the right of the idler guides as seen from the inside. For the instructions on how to mount the whole extruder, you'll have to follow the original Prusa’s MK3 assembly (just skip the filament sensor and the auto leveling probe parts): https://manual.prusa3d.com/Guide/5.+E-axis+assembly/510?lang=en Firmware Changes ----------------- You need the latest Marlin configured for Anet A8. The following changes must be made in your config.h: - Reverse the X axis direction: `// @section machine` `// Invert the stepper direction. Change (or reverse the motor connector) if an axis goes the wrong way.` `#define INVERT_X_DIR true // << Set it to true to invert the extruder X Axis direction` `#define INVERT_Y_DIR false` `#define INVERT_Z_DIR true` - Adjust the travel limits (to center the nozzle to the bed): `// Travel limits (mm) after homing, corresponding to endstop positions.` `#define X_MIN_POS -20.7 // Anet A8 Default Marlin Config is -33` `#define Y_MIN_POS -1 // Anet A8 Default Marling Config is -10` Conclusion ---------- Next (highly recommended) step is to calibrate your extruder by following the steps as described here: https://mattshub.com/2017/04/19/extruder-calibration/ That's all. Hope you find it useful! Source ------- This work is based on the original Prusa's MK3 Parts that can be found here: https://www.prusa3d.com/download-printable-parts-stl-mk3
With this file you will be able to print Anet A8 - Prusa MK3 Extruder Mod with your 3D printer. Click on the button and save the file on your computer to work, edit or customize your design. You can also find more 3D designs for printers on Anet A8 - Prusa MK3 Extruder Mod.
