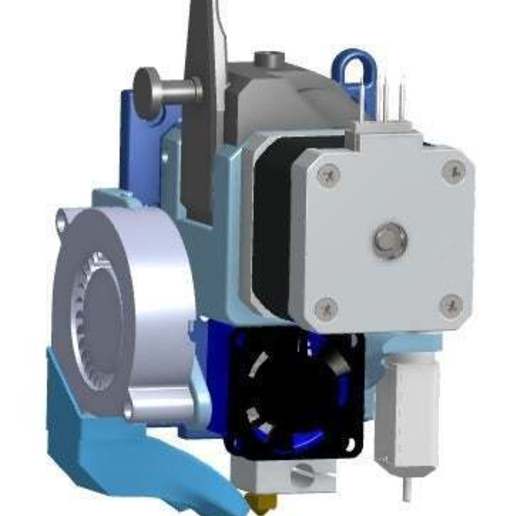
ANET A8 E3DV6 BMG Direct Drive X Carriage
cults3d
Yet another X carriage for Anet A8! This one was designed specifically for use with: - BMG extruder (a clone, but should work fine with the original one) in direct drive - E3D V6 hot end or clone - Any Nema stepper (I personally use the original stepper provided with the A8) - 3D Touch (a clone of BLtouch) Its standout feature is that it's designed to: use the original fan, fan ducts, or fan ducts compatible with the original X carriage, like this fantastic Mistral fan duct: https://www.thingiverse.com/thing:2121279 use the original X belt holders/tensioners, such as this incredible one: https://www.thingiverse.com/thing:2134573 utilize the original Anet A8 bearing blocks or any remix you prefer be extremely easy to remove (just a few accessible screws are required to take off the BMG+ hotend + stepper block); it's very simple to maintain and modify if needed. You can even remove the entire thing without removing the bearing blocks or the X bars. Here's how it works: Print the baseplate, the stepper&BMG holder, and the fan holder Make sure the BMG&stepper holder fits properly on the baseplate: it should slide from top to bottom. Tighten the two small holes in the top of slots on the baseplate with an M3 screw. Optionally, tap the M3 hole at the bottom of the BMG place. If desired, print the BLtouch mount. If you don't have a belt holder/tensioner, print one; I recommend: https://www.thingiverse.com/thing:2134573 If you don't have the original fan duct or a compatible one, print one; I suggest: https://www.thingiverse.com/thing:2121279 Screw the BLtouch mount onto the baseplate (two M3 screws and nuts should be fine), and then screw the Bltouch onto the mount (use washers to adjust height if necessary). Screw the fan holder onto the baseplate (two M3 screws and nuts should be fine). Screw the fan onto the fan mount (with M3 screws, nuts, and washers). Install all the bearing blocks on the baseplate with the original screws. Attach the belt tensioner behind the baseplate. (use two M3 nuts in the two hexagonal prints in front of the baseplate, and M3 screws) Mount the stepper and the BMG extruder in direct drive configuration (with the E3D V6 hotend and a little PTFE tube) on the BMG&stepper holder. Slide the BMG&stepper holder into place on the Baseplate. You can leave the hotend cables between the Baseplate and the BMG extruder. Secure the BMG & Stepper holder with 2 or 3 small M3 screws: two mandatory screws on the sides in the top of the part, and one optional screw below the part. Install the fan duct. If necessary, you can use tape if it's too loose. Adjust the height of the duct using the two screws of the fan. Do your cable management (you can use zip ties). Modify the offset in the firmware. If you're using Marlin, here are my parameters; please check your configuration: define X_MIN_POS -5.6 define Y_MIN_POS -10 define Z_MIN_POS 0 define X_MAX_POS 220 define Y_MAX_POS 220 define Z_MAX_POS 240 For the 3D Touch: define X_PROBE_OFFSET_FROM_EXTRUDER 36 define Y_PROBE_OFFSET_FROM_EXTRUDER 0 define Z_PROBE_OFFSET_FROM_EXTRUDER 0 I won't give Probe Bed Position because it depends too much on how your bed is set up (glass, clips, etc.). Please manually check that you don't probe too far on your bed to avoid damage. Step files are provided if you want to remix! (and please do share!)
With this file you will be able to print ANET A8 E3DV6 BMG Direct Drive X Carriage with your 3D printer. Click on the button and save the file on your computer to work, edit or customize your design. You can also find more 3D designs for printers on ANET A8 E3DV6 BMG Direct Drive X Carriage.
