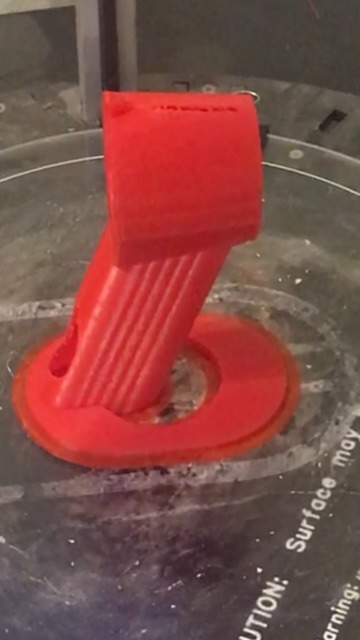
amg8833 up to 64x64 Arduino thermal camera pointer single part print
thingiverse
I have just added a LCD extender mod that enables the use of an ILI9341 240x320 display. This file is ili9341extender.stl, which includes an open scan file for modifying. Note that the code running the display now supports any Adafruit display that supports the setwindow() and pushcolor() commands. Download the latest version (thermalcamv3b.stl), which features a built-in stand and a battery hole for a 9V battery. This version includes an internal battery holder, a built-in stand, and easier angles for printing. This single-body print holds Arduino or Arduino Mega boards on top and has through holes for wires to the LCD display and AMG8833 sensor. It is designed to be assembled and disassembled in minutes. For information on achieving performance on Arduino, visit https://youtu.be/tLwYMQjD0l4 project details. Color tables can be found at https://www.youtube.com/watch?v=PFyu2S1H0v0. One reason for fast performance is explained at https://hackaday.io/project/160498-arduino-spi-up-to-30-times-more-performance. Draw speed and AMG8833 sensor information are available at https://learn.adafruit.com/adafruit-amg8833-8x8-thermal-camera-sensor and https://www.youtube.com/watch?v=0mqAF3Cc7Co, respectively. When the Instructable is complete, I will update it with the latest version of thermal casing, which features a longer handle and more room for the LCD display. This version also includes a larger hole at the top for wires to exit. Later versions have even more enhancements. If using the LCD extender, note that it was imported upside down; this should be an easy fix to correct, but I will re-upload it with the correct orientation later. This is a single print body shell for the AMG8833 or equivalent sensor and Adafruit ST77xx display to be mounted and used as a thermal camera pointer device. The software to load onto the Arduino board can be found at https://github.com/jamesdanielv/thermalcam/. The top has holes for two screws that can be used to mount the display. You can also use double-sided tape or drill holes to secure the AMG8833 sensor, with one screw at the bottom holding it in place. It allows a sub-sampled resolution of 32x32 for Arduino. To modify the thermalcam.ino file, change the following lines: #define optimize 2 // Change to 2 #define interpolatemode 2 // This enables 32x32 resolution #define noisefilter 5 // Can be set to 0 or 5 to reduce screen noise #define show_temp_readout true // Displays text temperature data on the LCD #define colorMode 2 // Can be set to 0, 1, 2, 21, 22, or 23 for various effects #define spi_optimized_st77xx true // Uses high-speed SPI bursting #define subpixelcoloroptimized 2 // Draws 16 areas at once for faster LCD updates If you want to change color data tables, they can be generated from https://www.thingiverse.com/thing:3017556. The wiring of Arduino pins is as follows: Using the ISP header for SPI pin: MISO [1][2]+5v SCK [3][4]MOSI Reset [5][6]GND Use at least 6V or a 9V battery on the Arduino, looking for the VIN pin. This uses an internal regulator. For the AMG8833 sensor: VIN----> 5V pin on Arduino GND to GND on GND pin (there are a few) SDA pin 5 or pin21 SCL pin 4 or pin20 Refer to https://www.arduino.cc/en/Reference/Wire for more information. For the LCD ST77xx display: Pinout using ISP header: (GND) GND---> [1][2]<----- VIN (to 5V) SCK to SCK: SCK---> [3][4]<---MISO to MISO MOSI to MOSI: MOSI->[5][6] The rest of the LCD display pinout is: TCS pin to Arduino pin 10 RST to Arduino pin 9 D/C to Arduino pin 8
With this file you will be able to print amg8833 up to 64x64 Arduino thermal camera pointer single part print with your 3D printer. Click on the button and save the file on your computer to work, edit or customize your design. You can also find more 3D designs for printers on amg8833 up to 64x64 Arduino thermal camera pointer single part print.
