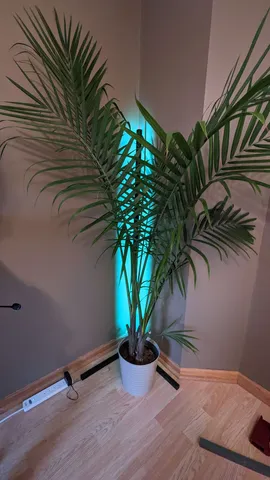
AmbiLamp
prusaprinters
The price on ready-made corner ambient lighting is out of control, with the cheapest I've been able to find being ~$66 USD. So, I wanted to design and build one of my own with an LED Strip and 3D Printing! Enter The AmbiLamp How to print & assemble the AmbiLampYou can fit all parts on a single bed in the vertical orientation. It is recommended that you rotate the parts to have the registration holes on the build plate, and the registration pegs on top. You will need to print: - 1x base- 1x cable leg intermediate- 1x cable leg end- 1x non-cable leg intermediate- 1x non-cable leg end- 1x vertical top- 6x vertical intermediate Optionally, you can add/remove "intermediate" parts to make the legs longer or the vertical part taller. You will need to source an LED strip with adhesive back. I used this one. (Note: with that linked LED Strip, 100 ft. is two spools of LEDs and 1 single power cable and receiver. I would highly recommend that you purchase a single 50 ft. spool for each individual lamp you make.)Recommended Print Settings- Material: PLA- Outer Walls: 2- Infill: 15%- Supports: Painted on base registration pegs and from build plate only.This build does not see a lot of stresses (it's a lamp, after all), so it doesn't need to be very sturdy print-wise. The important part is…Assembly InstructionsFor best results: keep things as straight as possible when assembling. You can achieve this by allowing the super glue to fully dry before attempting to glue one section to another.You will need:- quick set CA (super) glue- super glue activator1. The non-cable legGlue the non-cable leg intermediate to the base, then, when dry glue the non-cable leg end.2. The cable legTo assemble the cable leg, first glue together the cable leg end and cable leg intermediate pieces together (the ones with the hole running through the middle) using the registration holes & pegs as a guide. Once dry, run LED power cable through hole of leg and through hole in base.Next, glue the cable leg to the base using the registration marks, making sure not to get any glue on the cable.3. The vertical piecesIt is recommended to glue two pieces of the vertical pieces to each other first so that straightness can be maintained. Ensure that the vertical top piece is on the top (it does not have registration pegs on the top of it).Note: please pay close attention to the orientation of the vertical pieces and placement of registration holes and pegs.4. The LED StripFirst, plug the power end of the LED strip into the power cable that was run through the base, without peeling the adhesive.Then, peel the adhesive off the bottom (closest to the power cable) and as the adhesive backing is peeled off, press the exposed adhesive of the LED strip onto the flat side. Use scissors to trim the LED strip at the top of the lamp.Congrats! You've got an assembled AmbiLamp ready to use!You can read more about the AmbiLamp in my blog post.
With this file you will be able to print AmbiLamp with your 3D printer. Click on the button and save the file on your computer to work, edit or customize your design. You can also find more 3D designs for printers on AmbiLamp.
