Alpha Wire Hanger
prusaprinters
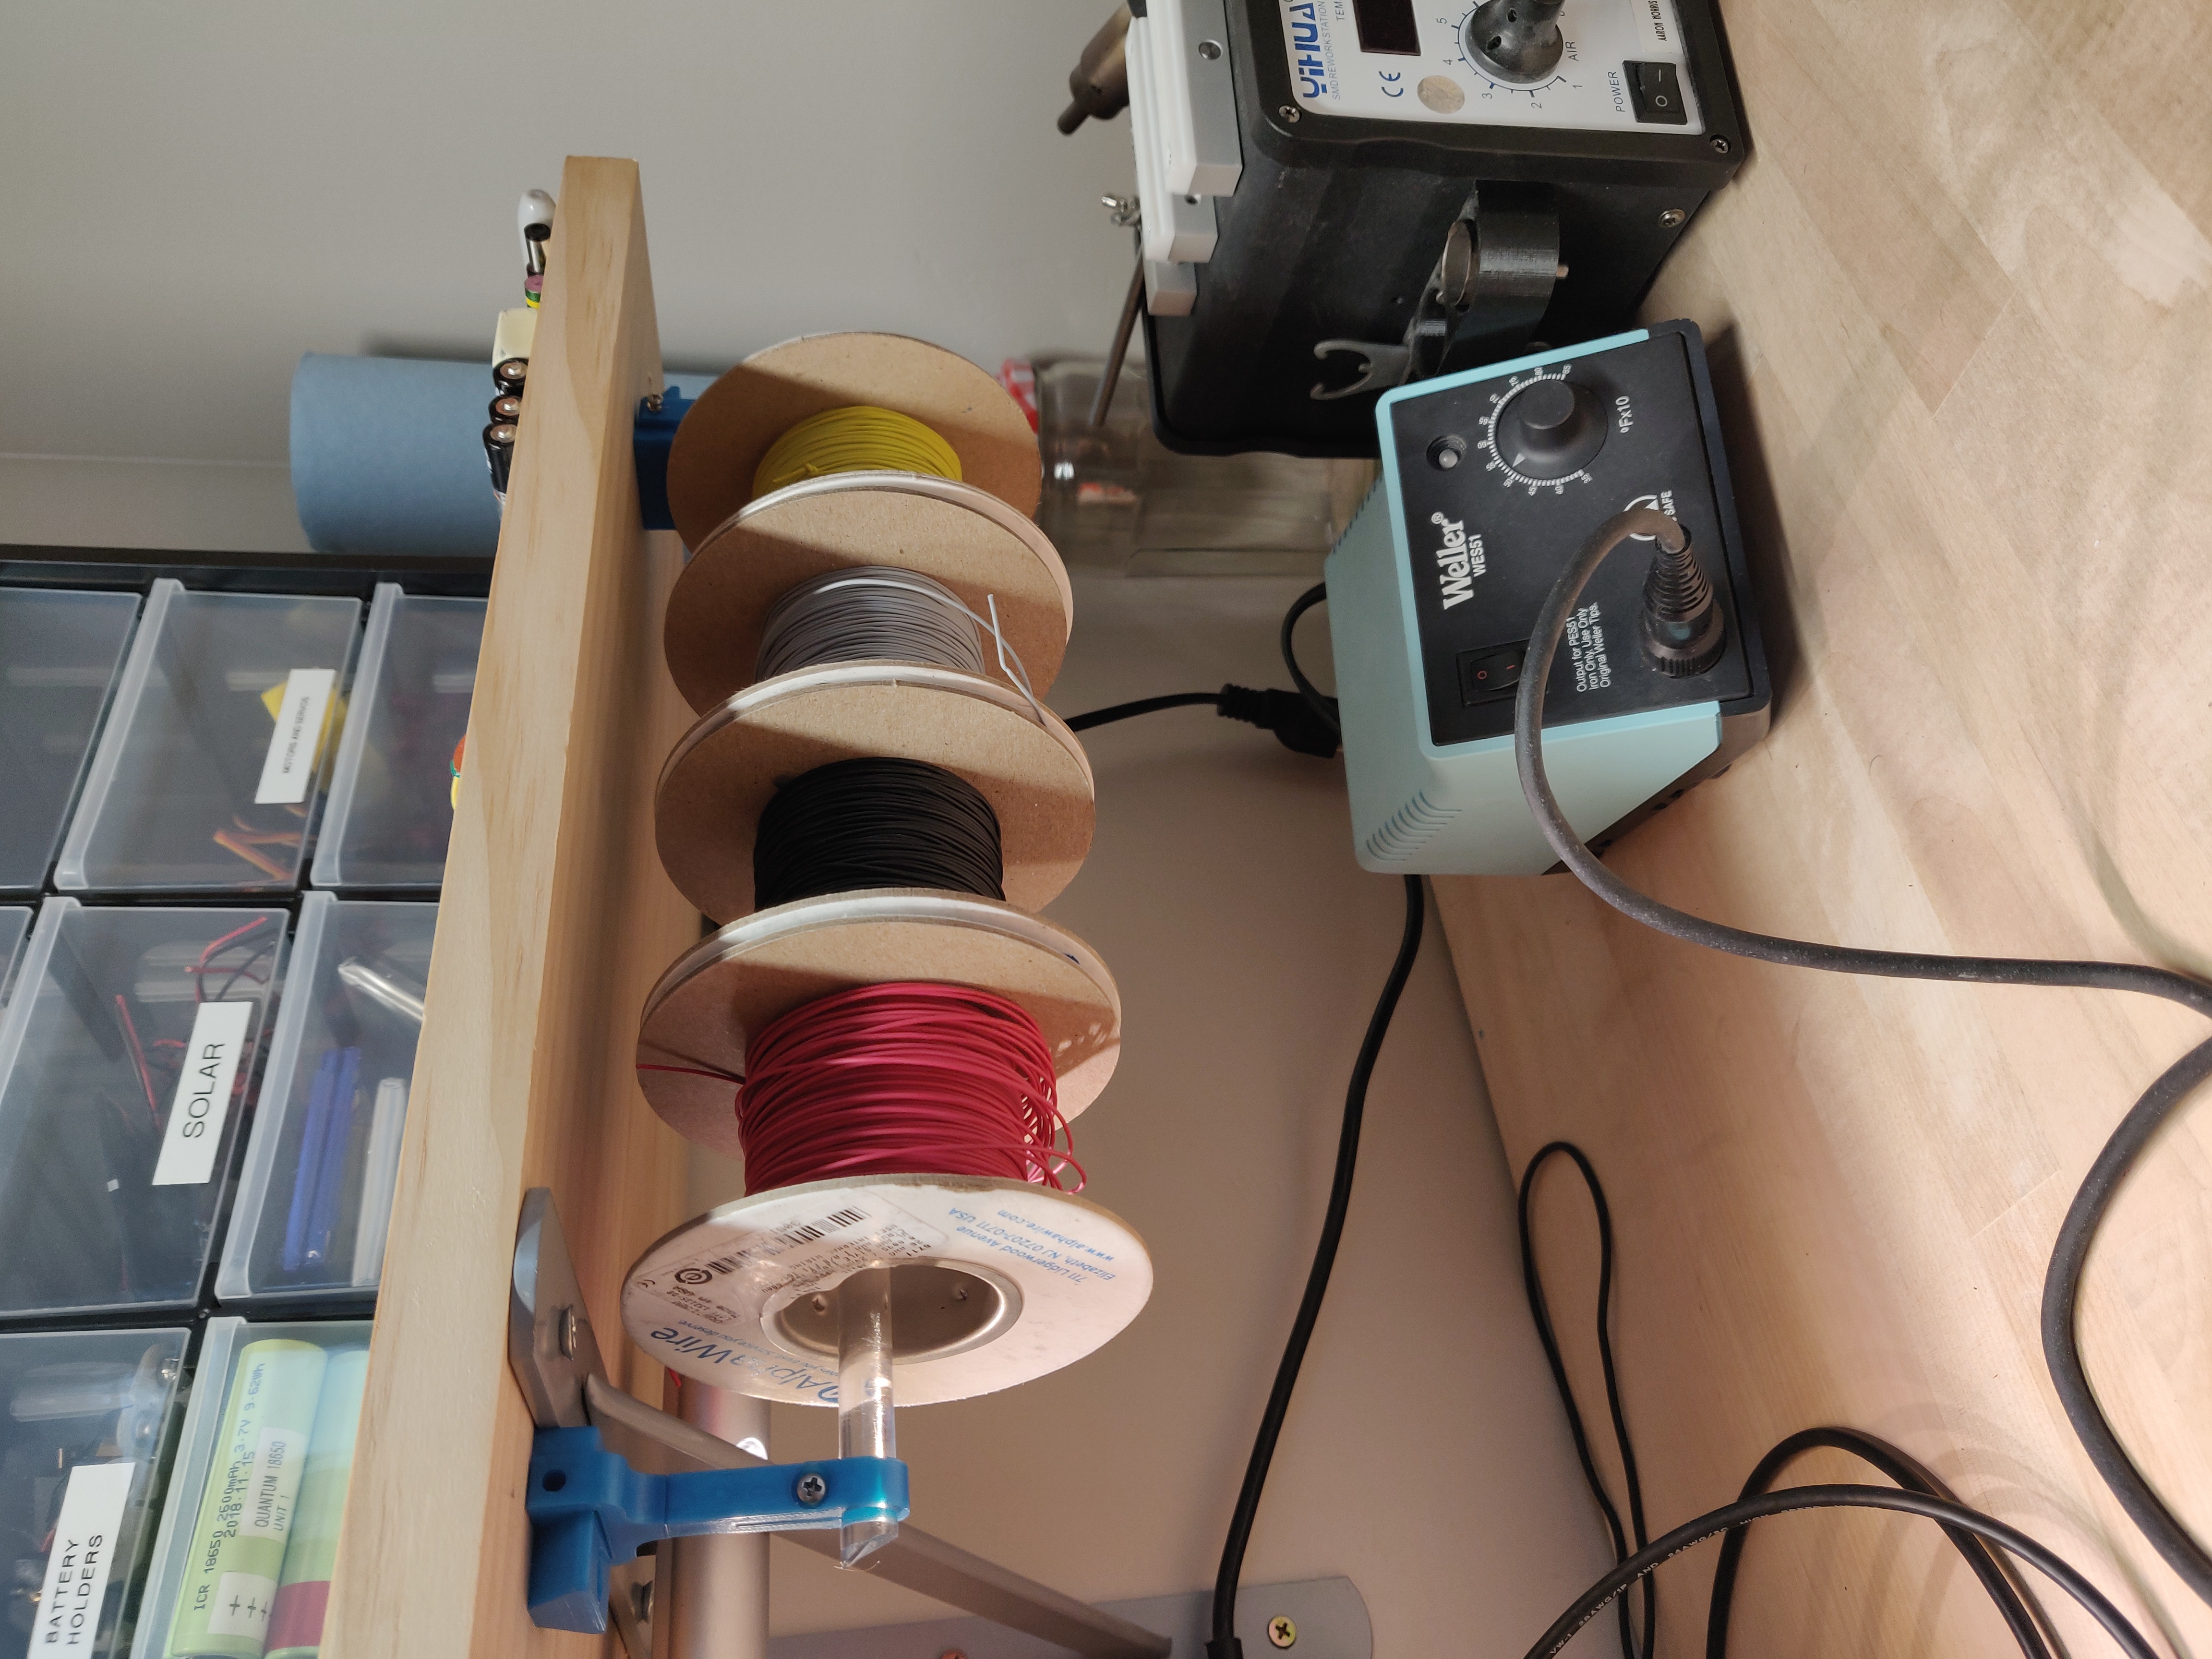
<p>I have been working on cleaning up my lab bench. To this end, I wanted to get my wire rolls off the bench. This makes it easier to use the rolls.</p><p>A similar solution would work for solder spools.</p><p>Pictures show this mounted to my shelf, but it would just as easily mount to the wall.</p><p>In the past I've used a single print to be the holder. This time, I wanted the ability to iterate and change what was hanging. To this end, I've developed a cleat system.</p><h3><strong>Required Parts</strong></h3><p>There are currently two different hanger designs on this repo, but both use the same cleat system.</p><h4><strong>3D Printed Parts</strong></h4><ol><li>x2 Cleats</li><li>x2 Hangers (Either “Beefy” <i>or</i> “Skinny”)</li></ol><h4><strong>Mechanical Parts</strong></h4><p>Common Parts (per set of two hangers)</p><ol><li>x4 #6 ¾ wood screw</li><li>x2 M3x12 pan head bolts</li><li>x2 M3 nuts</li><li>(optional) M3 washer</li></ol><p>Beefy (per hanger)</p><ol><li>x1 M2x3 heat set insert</li><li>x1 M2x12 pan head bolt</li><li>9.9-10.3mm rod of desired length</li></ol><p>Skinny (per hanger)</p><ol><li>x2-3 M2x3 heat set inserts</li><li>x2-3 M2x12 pan head bolts</li><li>9.5 -9.8mm rod of desired length</li></ol><h3><strong>Printing Parameters</strong></h3><p>I use the default 0.15mm Quality PLA profile built into PrusaSlicer. This just as easily could be printed in PETG or ABS.</p><p>Only one part requires support. The included project has that done, but it you slice this on your own, the Skinny Hanger Bottom needs support on the male end of the key. </p><h3><strong>Assembly</strong></h3><p>Both style hangers have a hole in the top for a heat set nut. This acts as a grub screw to hold the hangers to the cleats. This isn't required, depending on how the system is used. Here is an example of it in use.</p><figure class="image"><img src="https://media.prusaprinters.org/media/prints/151854/rich_content/5466da01-fdf4-4766-b9e1-984cdf661bdc/image.png#%7B%22uuid%22%3A%228b8a6a1d-1e8b-4292-9d79-370e2f3fc65f%22%2C%22w%22%3A412%2C%22h%22%3A240%7D"></figure><p>Install the cleats using the #6 screws, two per cleat. </p><figure class="image image_resized" style="width:42.27%;"><img src="https://media.prusaprinters.org/media/prints/151854/rich_content/8e1dee8f-6801-4285-91c6-be92e3c3d529/image.png#%7B%22uuid%22%3A%22b63575dc-8e98-49b1-9f53-745b66712275%22%2C%22w%22%3A977%2C%22h%22%3A851%7D"></figure><p>Follow instructions based on which hanger you will use.</p><h4>Beefy</h4><p>This hanger also has a captured M3 nut. Put the nut in place, and insert the M3 pan head nut and washer on the other side. Tighten until the nut just catches, but do not tighten more yet.</p><p>Put the rod into the hanger, and tighten until firm. Do not over torque, or you will break the plastic, as shown here.</p><figure class="image image_resized" style="width:31.75%;"><img src="https://media.prusaprinters.org/media/prints/151854/rich_content/1c79dc57-32a1-4f3a-a101-a72c99011998/image.png#%7B%22uuid%22%3A%225f46797f-bdb6-4949-9cd7-2a9ba394a848%22%2C%22w%22%3A657%2C%22h%22%3A1058%7D"></figure><p>Slide the hanger on the cleat, and tighten the grub screw until firm. Do not over torque, or you will break the cleat.</p><h4>Skinny</h4><p>Start by adding the heat set insert into the bottom section of the hanger.</p><figure class="image"><img src="https://media.prusaprinters.org/media/prints/151854/rich_content/b3b23963-dfe3-4dfe-8f42-d7ab68b8ed47/image.png#%7B%22uuid%22%3A%22b1d90c8d-75ee-43d4-b4ca-e8a358ed4316%22%2C%22w%22%3A1177%2C%22h%22%3A316%7D"></figure><p>You can now screw this part into the top in either a flat or rotated orientation.</p><figure class="image image_resized" style="width:54.87%;"><img src="https://media.prusaprinters.org/media/prints/151854/rich_content/5d4d177b-a96d-4826-980f-cc851518d885/image.png#%7B%22uuid%22%3A%22a0ca40c6-dbec-44d2-817b-074db9c17e64%22%2C%22w%22%3A764%2C%22h%22%3A511%7D"></figure><figure class="image image_resized" style="width:35.21%;"><img src="https://media.prusaprinters.org/media/prints/151854/rich_content/b3a9f73d-5fba-4cad-b564-c6a3b84be4b4/image.png#%7B%22uuid%22%3A%22d84bdf4d-cce7-4902-8359-e376d73c312f%22%2C%22w%22%3A591%2C%22h%22%3A1007%7D"></figure><p>Add the captive M3 nut and bolt. Do not fully tighten until there is a rod, or you may break the 3D printed hanger.</p><p>Insert the rod and tighten.</p><p>Install on the cleats.</p><h3><strong>Notes/Commentary</strong></h3><p>You can easily over torque the mechanism if the rod is too small of a diameter. If the rod is just a bit too small, a bit of electrical tape wrapped around the end will add just a little bit of diameter.</p><p>Cleats can be installed in either a left-to-right or front-to-back orientation.</p><p>A small amount of glue may be needed on the Skinny captive nut, depending on the nut size. My assortment from overseas has some terribly different versions of the ‘same’ nut. Some fit, some needed glue.</p><p>Eventually I'll post a parametric version of this. Look for a link here when that happens.</p><p>I got my acrylic rod from a local supplier. Wood dowels also work, or Amazon has an assortment of brass rods for fairly cheap.</p><p>I wouldn't put much more than 4kgs on a set of hangers. If you are going to go that heavy, I'd suggest a steel or metal rod or tube instead of the wood or acrylic rod.</p>
With this file you will be able to print Alpha Wire Hanger with your 3D printer. Click on the button and save the file on your computer to work, edit or customize your design. You can also find more 3D designs for printers on Alpha Wire Hanger.