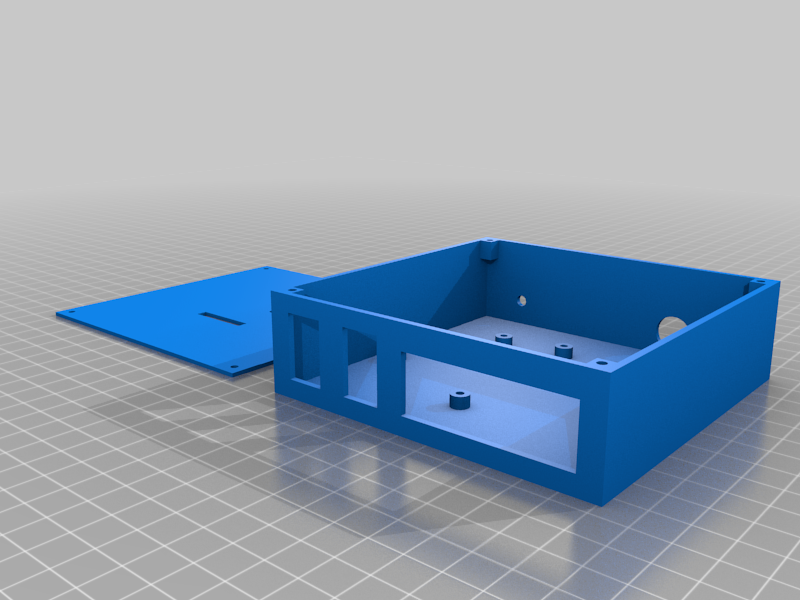
All-in-one Ender 3 enclosure for Raspberry Pi 4
prusaprinters
<p>EDIT2: Design V3 over at <a href="https://www.prusaprinters.org/prints/149843-raspberry-pi4b-octoprint-enclosure-ender-3-compati">https://www.prusaprinters.org/prints/149843-raspberry-pi4b-octoprint-enclosure-ender-3-compati</a> </p><p> </p><p>EDIT:</p><p>Uploaded V2 of the enclosure, which addresses some of the issues with the old design. Firstly, I removed the XL4015 and started using the original USB-C Adapter from Raspberry. The LEDs' connector is also now embedded into the box design (rectangular hole) and glued permanently. Fan hole is now aimed better at the hot spots and the slit currently sits perfectly above the connector, so the cable does not crease or bend. </p><p>This isn't necessarily an upgrade, just a different design. Both work just fine.</p><p> </p><p> </p><p>Enclosure for Raspberry Pi 4 that sits under the print bed of an Ender 3. It features:</p><ul><li>Standoffs for a Raspberry Pi 4 and an XL4015 buck converter to power it;</li><li>Holes for rocker switches, one for the Pi and one for the 12V LEDs (I got these from <a href="https://www.amazon.com?linkCode=ll2&tag=thingiverse09-20&linkId=e4759bff1fa9a55a0f897d801ce2d765&language=en_US&ref_=as_li_ss_tl">Amazon</a>: <a href="https://www.amazon.it/gp/product/B01N2U8PK0/ref=ppx_yo_dt_b_asin_title_o00_s00?ie=UTF8&psc=1&tag=thingiverse09-20">https://www.amazon.it/gp/product/B01N2U8PK0/ref=ppx_yo_dt_b_asin_title_o00_s00?ie=UTF8&psc=1</a>);</li><li>Holes in the back for a 12V plug and two inlets for the wires (I'm currently using the right one only since I stuck a plug into it, so I can move the box if needed);</li><li>30mm fan grill to keep the whole thing cooled;</li><li>slit for Pi cam ribbon cable.</li></ul><p>The power comes from a 12V 5A wall adapter into the DC jack, and is then split between the XL4015, which converts it to 5V and sends it to the Raspberry through a USB-C cable (one end soldered to the converter, the other end plugged into the USB-C), and the LEDs. Both of the devices go through a rocker switch so I can control them.</p><p>I can provide a schematic and pictures of my connections and, if necessary, make any modification to the original .stl file.</p><p>TODO:</p><ul><li>modify the square inlet to fit one of these for the LEDs, it only fits in by the two prongs currently (<a href="https://www.google.com/url?sa=i&url=https%3A%2F%2Fpicclick.it%2FMorsetto-a-innesto-Grigio-8-poli-25-mm%25C2%25B2-353063502500.html&psig=AOvVaw0mZ3PNE99jN6DOCVLQAD2T&ust=1635266658915000&source=images&cd=vfe&ved=0CAsQjRxqFwoTCPDM7paB5vMCFQAAAAAdAAAAABAL">https://www.google.com/url?sa=i&url=https%3A%2F%2Fpicclick.it%2FMorsetto-a-innesto-Grigio-8-poli-25-mm%25C2%25B2-353063502500.html&psig=AOvVaw0mZ3PNE99jN6DOCVLQAD2T&ust=1635266658915000&source=images&cd=vfe&ved=0CAsQjRxqFwoTCPDM7paB5vMCFQAAAAAdAAAAABAL</a>);</li><li>add another fan grill on one of the walls to push air out, only if Octoprint were to complain about overheating (never happened so far);</li><li>add two bars to fit into the aluminium extrusion;</li><li>control the LEDs via Gpiocontrol plugin in Octoprint (controlled via MOSFET driven by GPIO).</li></ul><p>Category: 3D Printer Accessories</p>
With this file you will be able to print All-in-one Ender 3 enclosure for Raspberry Pi 4 with your 3D printer. Click on the button and save the file on your computer to work, edit or customize your design. You can also find more 3D designs for printers on All-in-one Ender 3 enclosure for Raspberry Pi 4.
