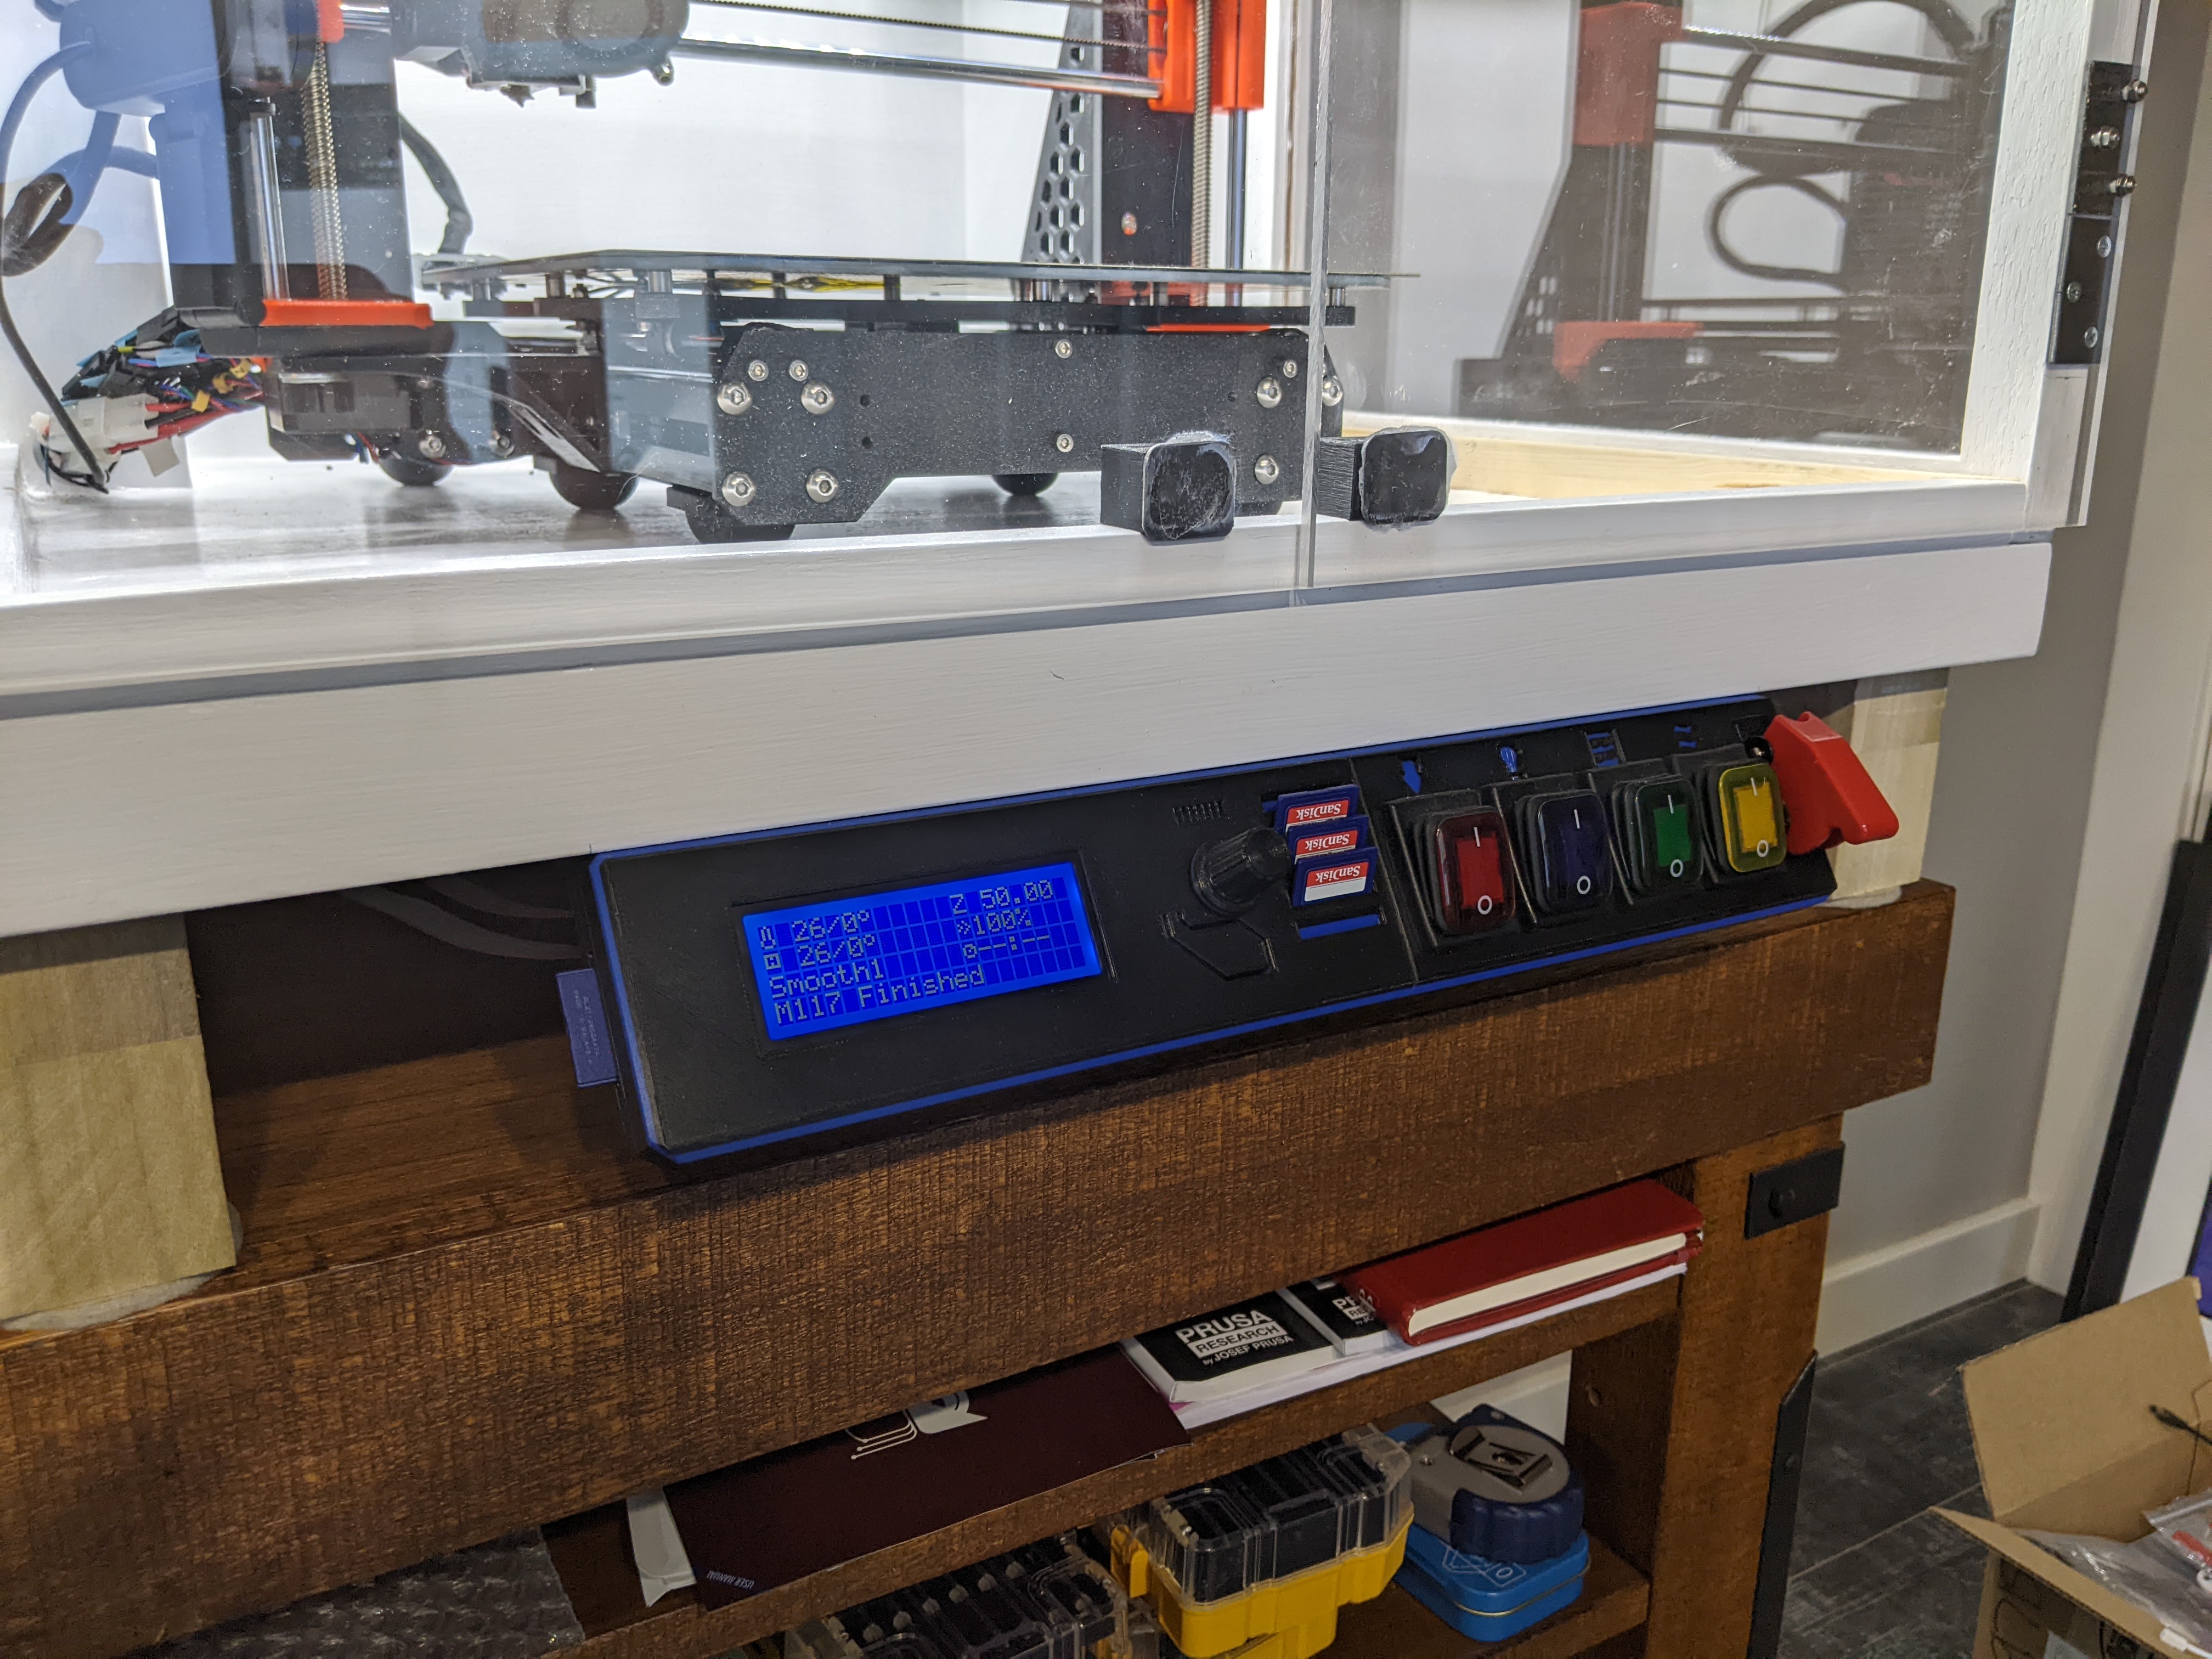
All-in Control Panel for Enclosure
prusaprinters
<p>I am in the process of pulling together a DIY enclosure for my new MK3S+</p><p>The box will include remote mounting of the PSU and LCD units, as well as several add-on systems: an internal recirculating filter, heat management exhaust system and LED lighting so I needed a panel for controlling the electronics, as well as relocating the LCD.</p><p>I like the look of the stock LCD panel so I kept the basic shape with the faceted corners and whatnot, just elongated and made mating pairs.</p><p>The panel will mount simply to the underside of the front fascia (flat through the first face behind the LCD screen) so I've included some screw holes for that. The enclosure doesn't exist yet, so in the main picture the panel is simply sitting on the desk…. second pic I'm holding it under my desk fascia to simulate what the final positioning will look like.</p><p>There are mating pins on the flat faces between the two sections. I glued the halves together but that's not really necessary.</p><p>The reg toggle aircraft style covered switch on the far right will be a “kill everything” 110v switch that chops power at the wall and the balance will be 12v.</p><p>My first pass here is not bad, but there are a few things I'd like to improve on:</p><ol><li>The switch lettering. I ran a single layer of white on the back wall of the lettering to get the lettering to show, but it wasn't enough to make it really visible (trust me, there's lettering for each switch). I've been printing for about 3 days now, so a lot to learn….I'm wondering if I ran a couple more layers if the white would pop better? I know I get a stripe along the sides, but oh well. Maybe I'll have to abandon the words for symbols.</li><li>I made the switch openings the MFR's call-size for the panel cutouts and they are tight on the side with the friction clips. I think I'll open that up a little bit.</li><li>I'm still learning…well, everything…but PETG in particular. Need to try some of the tips and tricks to eliminate strings and boogers. It came out decent, but I know the machine can do better once the pilot is less dumb. Might also just go with PLA since that would be just fine but all I had was grey, so I used PETG for black.</li><li>The LCD selector wheel just BARELY rubs the first rubber switch housing. Not a problem really, but since I'll be rejiggering anyway, may as well respace slightly.</li><li>I think the shell at the switches is just a tiny bit too thin, so I'll thicken that up too. It works but it's pretty flexy and feels like it wants to break when installing the switches. that'll get better with the wider mount hole, but still.</li></ol><p>2/2/22:</p><p>New Pic. </p><p>Technical changes made as noted above. Also switched to symbols in lieu of lettering, printed in PLA on the smooth sheet and made the stripe blue to match some other stuff I'm doing (and thicker for a better visual). Lettering is a PITA….much to learn there.</p><p>On the left side I added SD card slots and decided to go with a blank LCD panel (no lettering). Too much going on there, I like a cleaner look better.</p><p>2/2/22 again:</p><p>Printed out the left half (the LCD half), totally rocks. I glued them and also melted the alignment pegs, so it's rock solid. And for bonus points, the blue is semi-transparent the way I laid it up so I will put a couple of LED's behind there and the switch symbology will be lighted. Tried it with a flashlight and it looks really cool. ;-)</p><p>Main pic is now the final product.</p>
With this file you will be able to print All-in Control Panel for Enclosure with your 3D printer. Click on the button and save the file on your computer to work, edit or customize your design. You can also find more 3D designs for printers on All-in Control Panel for Enclosure.
