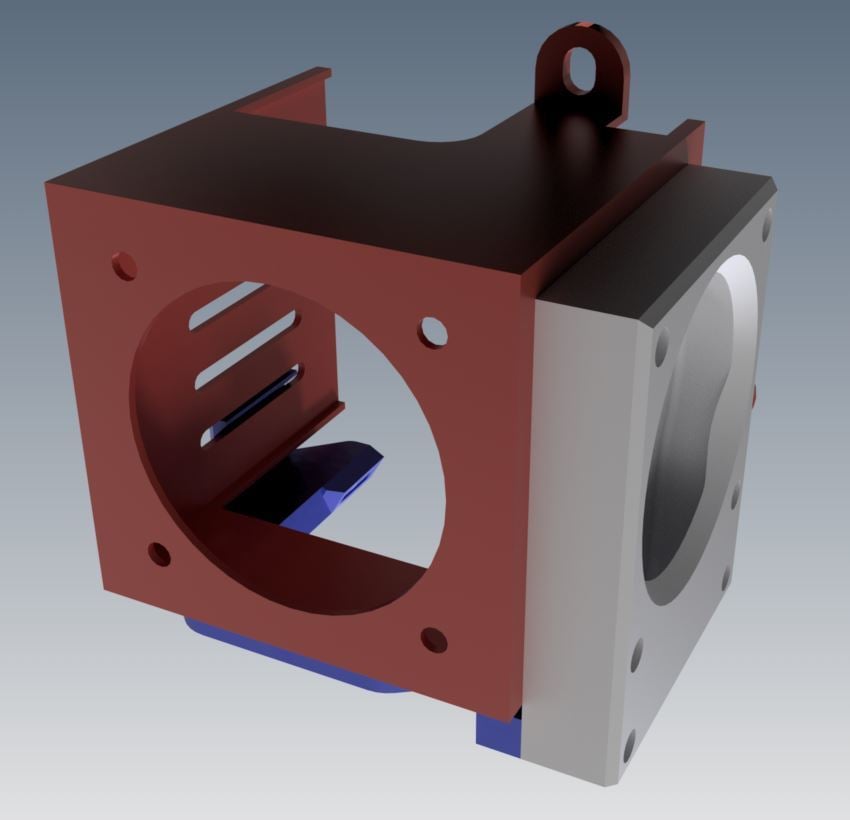
Alfawise U10 Part Cooling Upgrade (made simple)
thingiverse
As all owners of the Alfawise U10 know, part cooling on this particular printer is not the best option available. It works, but that's about all you can say for it, as the standard cooling simply consists of opening vents and doesn't direct cooling where it's needed most. Special consideration must be given to the fact that there are also vent holes in the housing to release hot air from the hot end cooling, which causes part cooler air to vanish through those slotted holes due to this open structure. A simple upgrade was desired to correct the mismatch created by the printer's designers. Of course, some upgrades are already available, but many of these require difficult prints. This option utilizes the same 40mm fan provided with the printer, aiming to use a minimum amount of plastic while keeping print complexity low and support usage minimal. The cooling duct is made up of two parts: "Cooling P1V2-3" and "Cooling P2V2-4," both printed with PLA. You can also print "Cooling P2V2-4" in ABS or PETG if you're not comfortable using PLA on this part. If your printer's bridging performance is satisfactory, then support should be avoided during printing. However, if the bridging leaves something to be desired and you do need to use support, a few adjustments are recommended: When loading "Cooling P1V2-3" into your slicer, turn it 90 degrees over Z to make removing supports from the air exit area easier. When printing the second part, "Cooling P2V2-4," rotate it 270 degrees over X and refrain from using support entirely. Your Alfawise should be able to handle standard cooling while printing this part without any issues. To install this upgrade, you'll need the following components: * 4x M3x20mm flat head screws * 2x M3x16mm hex head screws (the standard type used for mounting the 40mm fan) Installation involves two steps: First, mount "Cooling P1V2-3" to the housing with the fan attached using the 4x M3x20mm screws. Second, install "Cooling P2V2-4" once "Cooling P1V2-3" is in place. When screwing part "Cooling P2V2-4" into position with the 2x M3x16mm screws, ensure that the notch engages with the first slotted hole of the housing. Be cautious when tightening the screws for part 2 as they are being screwed directly into plastic. Have fun with this simple upgrade! Additional photos have been added to demonstrate the effectiveness of this part cooling upgrade. These prints were achieved at a layer height of 0.2mm and 20% infill using very cheap filament.
With this file you will be able to print Alfawise U10 Part Cooling Upgrade (made simple) with your 3D printer. Click on the button and save the file on your computer to work, edit or customize your design. You can also find more 3D designs for printers on Alfawise U10 Part Cooling Upgrade (made simple).
