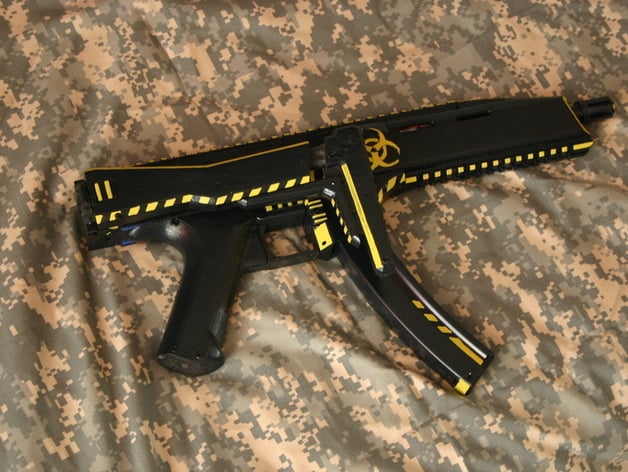
Airsoft electric toy gun
thingiverse
UPDATE Other AEG Project Details Revealed https://www.thingiverse.com/thing:2916390 Warnings ================================ Caution Required! This intricate project comprises many detailed components. The provided STL is just the upper part of a massive gearbox. To achieve seamless gun operation, extensive expertise and meticulous planning are necessary. The creator spent approximately 1.5 years perfecting this AEG design. Contents ============= Upper Gearbox: This Part Explained Lower Gearbox: http://www.thingiverse.com/thing:461970 Grip Assembly: http://www.thingiverse.com/thing:462057 Magazine Holder: http://www.thingiverse.com/thing:462840 Hop-Up Unit and Front Rail Details: http://www.thingiverse.com/thing:463221 Frontset Instructions: http://www.thingiverse.com/thing:470987 Components Still to be Published: Stock Design Unveiled The stock is removable and mounts on a 20-mm rail, making it possible to build an AEG without a stock or attaching any Picatinny-style stock. About the Project Inspired by Scorpion EVO 3 A1, this design focused on creating TM-compatible parts as small as feasible. The AEG measures 431mm in overall length and 32mm in width. It uses standard gear components and maintains exceptional thinness with an optimized shape. Key Specifications Revealed - Overall Length: 431 mm - Width: 32 mm - Barrel Length: 223 mm - Height: 173 mm (bottom of grip to top of upper rail) Genuine TM-Compatible Parts Employed: Standard Gears Short-Type Motor 6.03mm 223mm Barrel Hop-Up Rubber Tappet Plate (V3) Nozzle (AK) Cylinder Piston with Piston Head Spring Spring Guide (V2) Creator's Custom-Designed Components - Cylinder Head - Gearbox Assembly Process Requires Extreme Attention to Detail Instructions Components and Materials Needed ============================== Parts to Assemble Genuine TM-compatible parts are recommended, especially for experienced modelers. Required Tools and Materials: M3 Nuts M3 Screws (collection with lengths between 8 and 40mm) One M5 Screw AK-type Plastic Cylinder Head AK-type Nozzle TM-Compatible Piston TM-compatible Cylinder V3 Tappet Plate Spring Guide V2 Spring The Recommended Assembly Procedure 1. All parts should be printed first. 2. Glue the m3 nuts to the top rail and bottom part securely. Step 4: Prepare and Assemble Parts for Operation * For cylinder head installation, remove o-ring from the AK non-boreup cylinder head. * Remove the support pieces of the 3D-printed cylinder head and drill a hole in it for brass tube installation. * Install both the brass tube and o-ring into the printed cylinder head. Carefully Assemble Other Components Try to assemble all parts, focusing on the TM-compatible components like cylinder, piston, AK-type nozzle, and V3 tappet plate. Be sure to install Spring Guide Version 2 at the rear gearbox portion using an M5 screw. Ensure Smoooth Operation To guarantee proper performance and reduce stress in movable components during gun operation, make certain to file them down or sand using a dremel to achieve precise fitments for effortless movement
With this file you will be able to print Airsoft electric toy gun with your 3D printer. Click on the button and save the file on your computer to work, edit or customize your design. You can also find more 3D designs for printers on Airsoft electric toy gun.