Airglow
prusaprinters
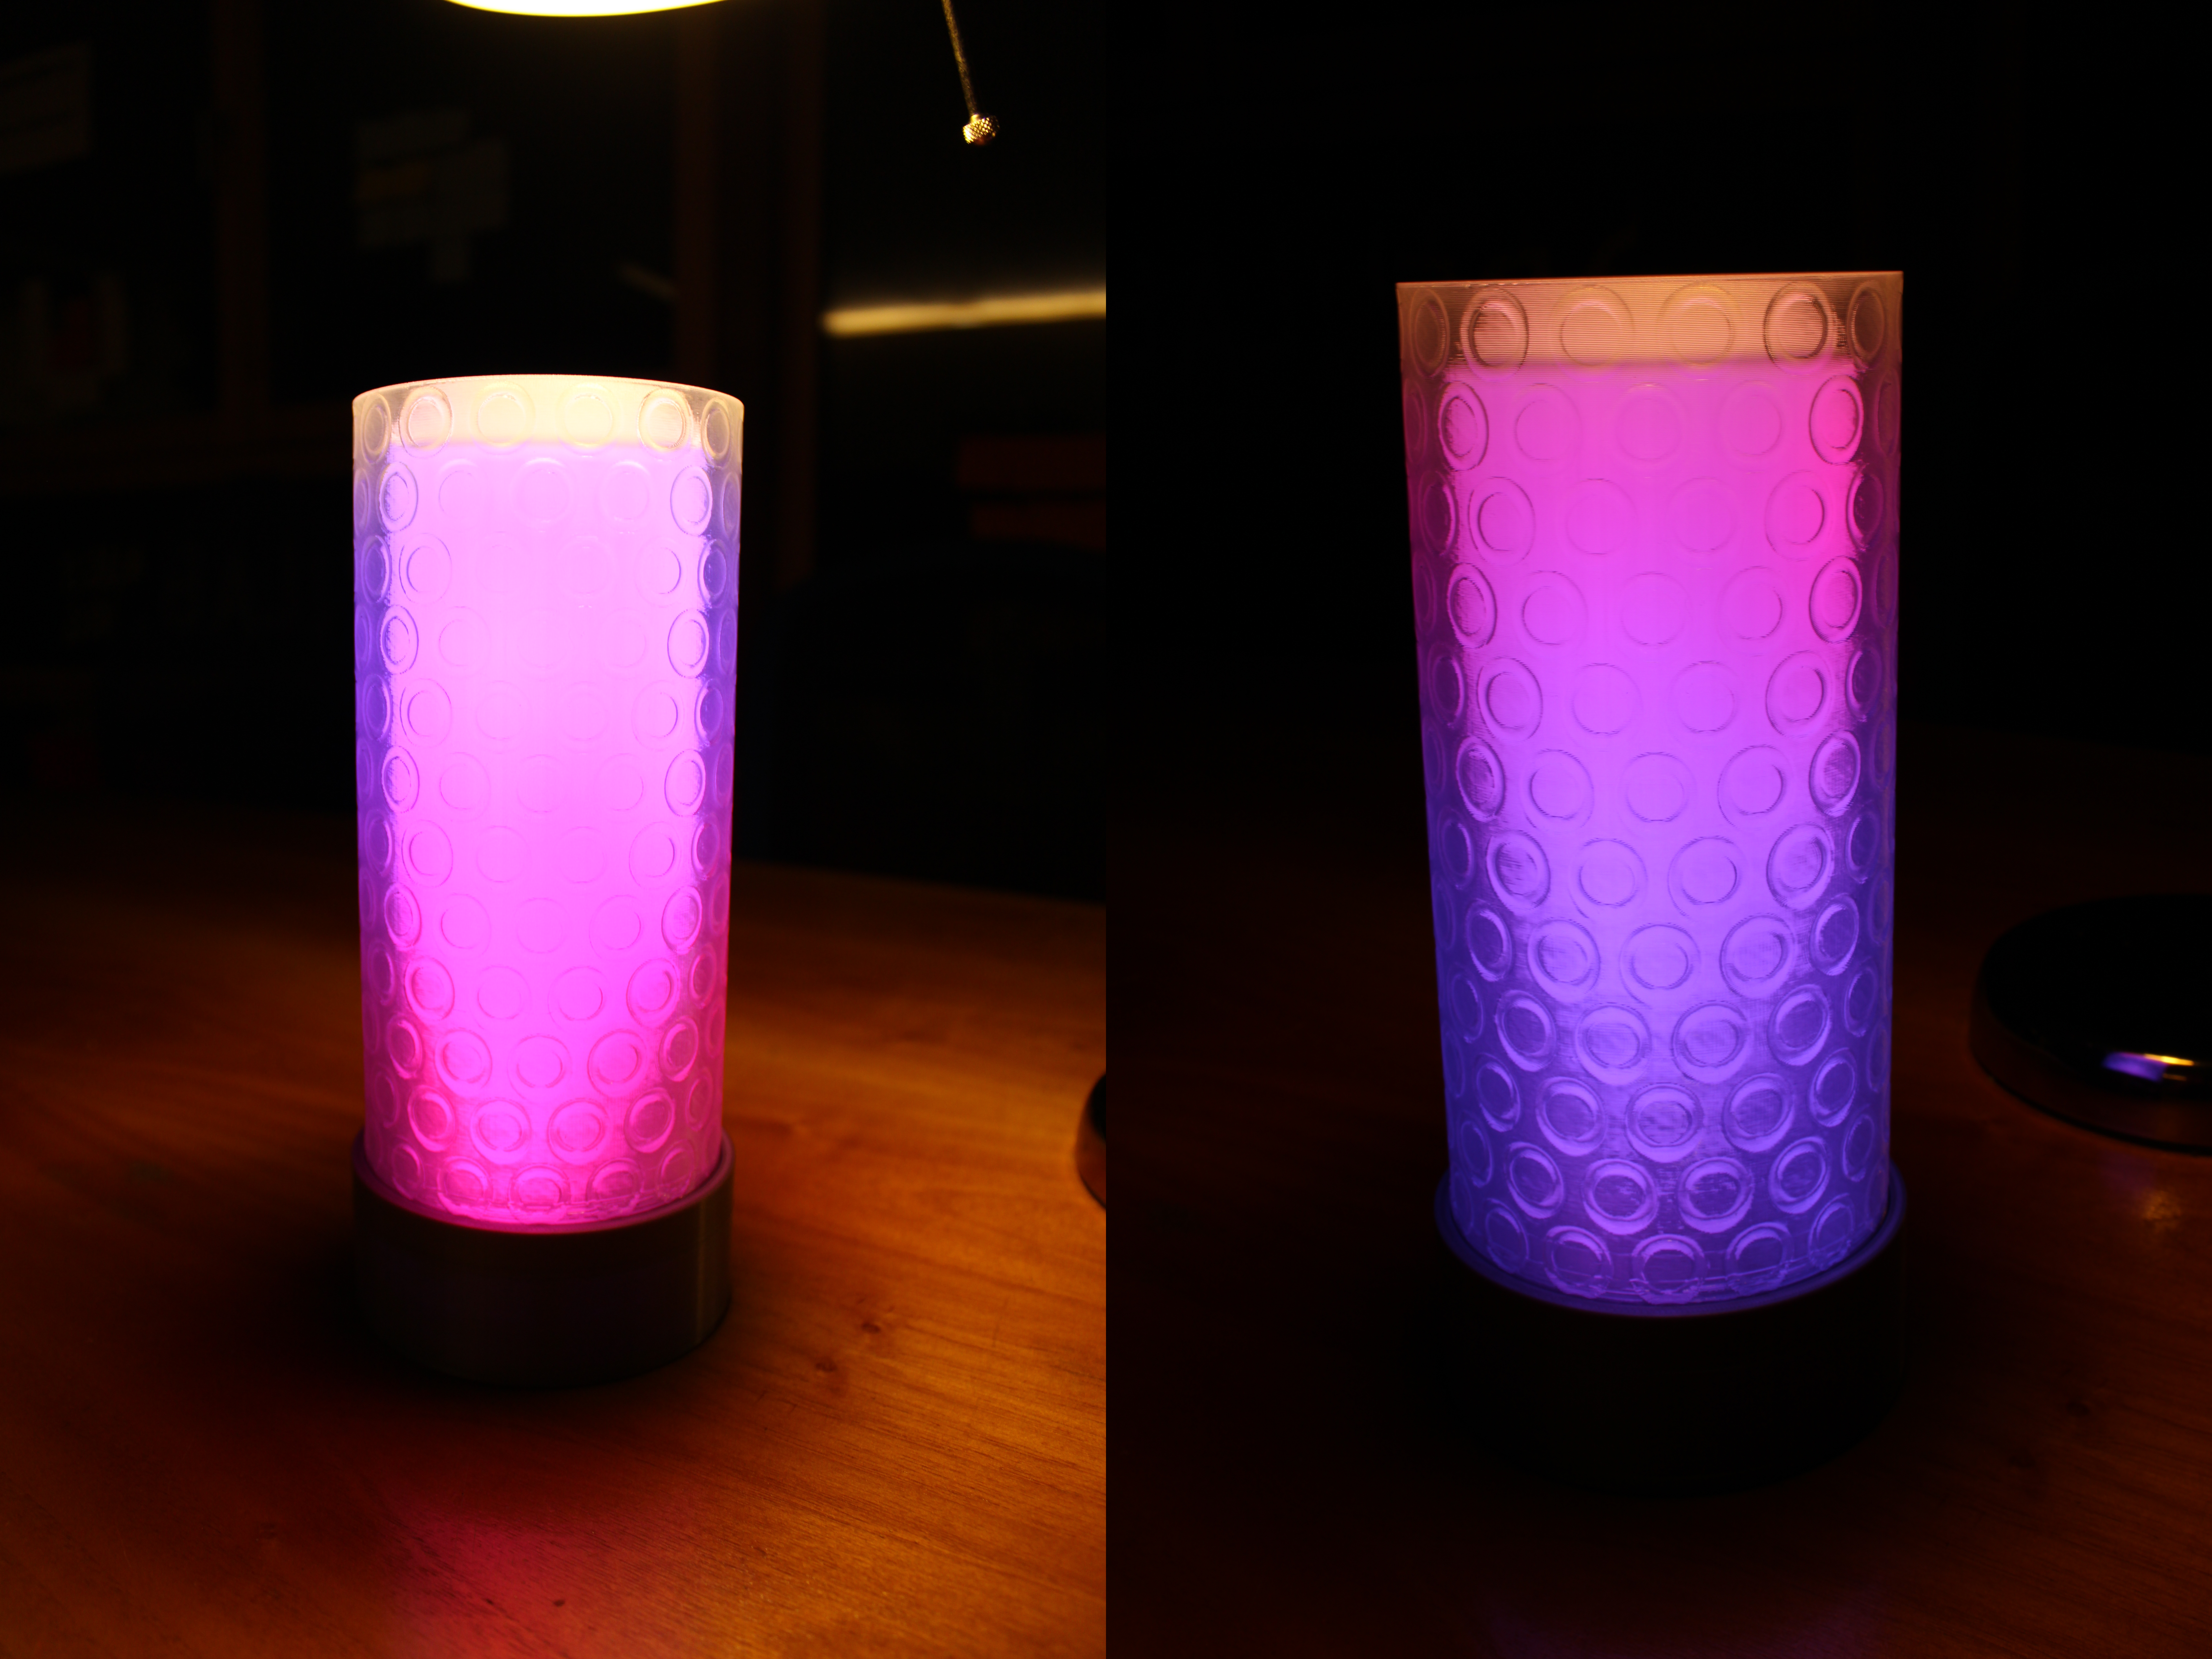
<p>A parametric lamp design using WS2812B / Neopixels LEDs and a NodeMCU v3.</p><p> </p><h4><strong>Printing Instructions</strong></h4><p> </p><p>Before you print anything, make sure your parts' dimensions fit together. Since</p><p>this design is compatible with a whole variety of lampshades, be aware that some</p><p>lampshades will have to be scaled down or up to fit the base's default settings.</p><p> </p><h5>Base</h5><p><br>- Layer height: up to 0.3mm is fine, there's little detail on the Z-axis</p><p>- Seam: Rear (hidden on the back of the lamp, along with the USB port)</p><p>- Infill: 5% would be enough, 10 or 15% is recommended for cleaner prints</p><p> </p><h5><strong>Cover</strong></h5><p> </p><p>- Layer height: up to 0.3mm is fine, there's little detail on the Z-axis</p><p>- Seam: Rear (hidden on the back of the lamp, along with the USB port)</p><p>- Infill: 5% would be enough, 10 or 15% is recommended for cleaner prints</p><p> </p><h5><strong>LED Strip Holder</strong></h5><p><br> Print this part in vase/spiral mode!</p><p> </p><p>- Layer height: use the biggest layer height your printer can handle</p><p>- Bottom layers: 0</p><p>- Infill: 0% as it's printed in spiral mode</p><p> </p><h5><strong>Diffuser</strong></h5><p><br> Print this part in vase/spiral mode!</p><p><br>- Layer height: use the biggest layer height your printer can handle</p><p>- Bottom layers: 2</p><p>- Infill: 0% as it's printed in spiral mode</p><p> </p><h5><strong>Lampshades</strong></h5><p><br> Print this part in vase/spiral mode!</p><p><br>- Layer height: depends on the model and size of the lampshade</p><p>- Bottom layers: 2</p><p>- Infill: 0% as it's printed in spiral mode</p><p> </p><h4><strong>Assembly</strong></h4><p><br>Stick the LED strips into the strip holder's channels. Note that each segment</p><p>has a direction (indicated by an arrow printed on it). Route them in a zig-zag</p><p>fashion: first segment points upwards, second segment downwards, third one</p><p>upwards again, and so on. The WS2812 strips can be powered from either end, just</p><p>make sure you match the polarity indicated on the strips. Connect each DI pin</p><p>with the DO pin of the segment next to it. The first segment's DI pin gets</p><p>connected to the micro controller.</p><p> </p><p>The NodeMCU v3 has a VUSB pin, which you can use to supply the strips with 5V,</p><p>directly from its USB port.</p><h4><br><strong>Software</strong></h4><p><br>Use WLED! Make sure you set up multiple segments, with their `Reverse Direction`</p><p>setting enabled alternating. Configure the maximum power draw to match your</p><p>power supply's rating. Store a preset with your favorite effect and colors, and</p><p>enable it to be the default on boot-up.</p><p> </p><h4><strong>Notes</strong></h4><p> </p><p>This design was heavily inspired by BRUXXUS's amazing Chromalux design, and is</p><p>even compatible with some of its components, like the lampshades. The reason I</p><p>decided to come up with my own design, is that I wanted to make a parametric and</p><p>free design that can be customized to fit any LED strip, micro-controller, or</p><p>lampshade, and can be scaled up or down as desired (or as required by your</p><p>printer's dimensions). It also improves on the original design idea in various</p><p>ways, allowing for a tighter fit of the components.</p><p> </p><p>Make your own stunning lamps!</p>
With this file you will be able to print Airglow with your 3D printer. Click on the button and save the file on your computer to work, edit or customize your design. You can also find more 3D designs for printers on Airglow.