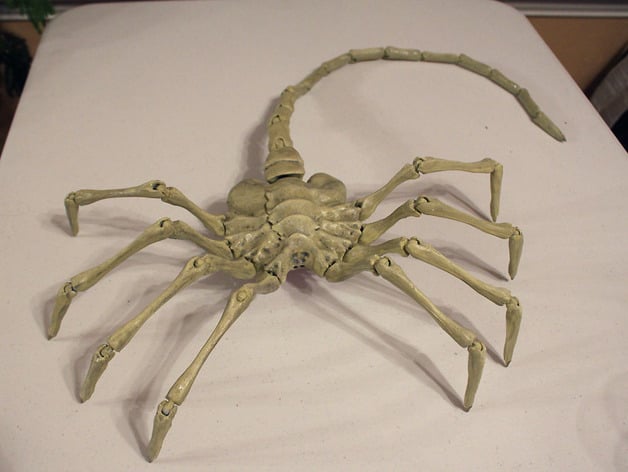
Agisis Ultimate Alien Face Hugger (40in x 23in - LIFE SIZE!)
thingiverse
Hello there, first off I want to give a huge shout-out to a few very special people: JULEZ_NZ for his amazing original mini-face hugger model that started it all, ANGRYCHANO for coming up with the brilliant idea of using ball joints to make it poseable, and DAZZADAZZADAZZADAZZA for creating an awesome remix of this project that features solid pieces - if you have a dual-extruder printer or want to print it with supports, check out his version! It's hard to believe but DECEMBER 2019 just flew by and we hit the 250,000 view milestone! And I'm not surprised, folks are crazy about printing this facehugger monster. If you're one of the lucky makers who have already printed it, don't be shy - show us your pics! As a treat to celebrate this achievement, let's check out some amazing remixes that our community has come up with - and they're all compatible with the original base model! Choices are indeed the spice of life. Are you ready for something really special? EntityUnknown has created an epic Alien Egg that houses this fearsome creature, and if you're feeling adventurous, it's a challenge worth taking. Visit https://www.thingiverse.com/thing:2302809 to get started! And because Weyland Yutani Corporation always comes up with top-notch designs, Djkirkdenall has made an awesome stand for this facehugger model - just take a look at the picture in the description to see it in action! And speaking of which... The moment you've all been waiting for - let's get into how to assemble this behemoth! To stick everything together, you'll need some adhesive. If you're printing with PLA, I recommend using Super Glue and some sandpaper to make sure they bond properly. However, if ABS is your thing, Superglue works great but making an ABS slurry is highly recommended - just be careful of the vapors. Now, here are the specific settings that worked wonders for me: Print the body with as little infill as possible (like 15-20%) because it makes a big difference in stability. I printed it at 0.15mm layer height with a 4-count perimeter - this helped make the outer joints sturdy and resistant to breaking when you put them together. A tip: print it just a bit hotter than usual to ensure a strong bond between layers. You might also consider using ABS for the legs and tail because it has a little more give, which is great for posing. Once your parts are printed, take some rough sandpaper to the flat surfaces of the joints before gluing them together - this ensures they're securely stuck. If you're using ABS, don't forget to make that ABS slurry glue for even stronger bonds. Here's a helpful guide on how to put everything together: * The tail grouping files need to be printed in left-to-right, top-to-bottom order. I included an STL with two legs if your printer has the space - if not, just use OneLeg_PLA.stl. * Glue the big piece that attaches to the body so it doesn't bend, but feel free to make it bendy if you like. * If any part of your leg print fails (which can happen), I've got STLs for individual leg pieces - no worries! The most important thing: if the joints are too tight and not fitting together, it might be because you over-extruded. Dial back the extrusion a bit until they snap into place. Happy printing, everyone!
With this file you will be able to print Agisis Ultimate Alien Face Hugger (40in x 23in - LIFE SIZE!) with your 3D printer. Click on the button and save the file on your computer to work, edit or customize your design. You can also find more 3D designs for printers on Agisis Ultimate Alien Face Hugger (40in x 23in - LIFE SIZE!).
