Adjustable Speaker Bracket
prusaprinters
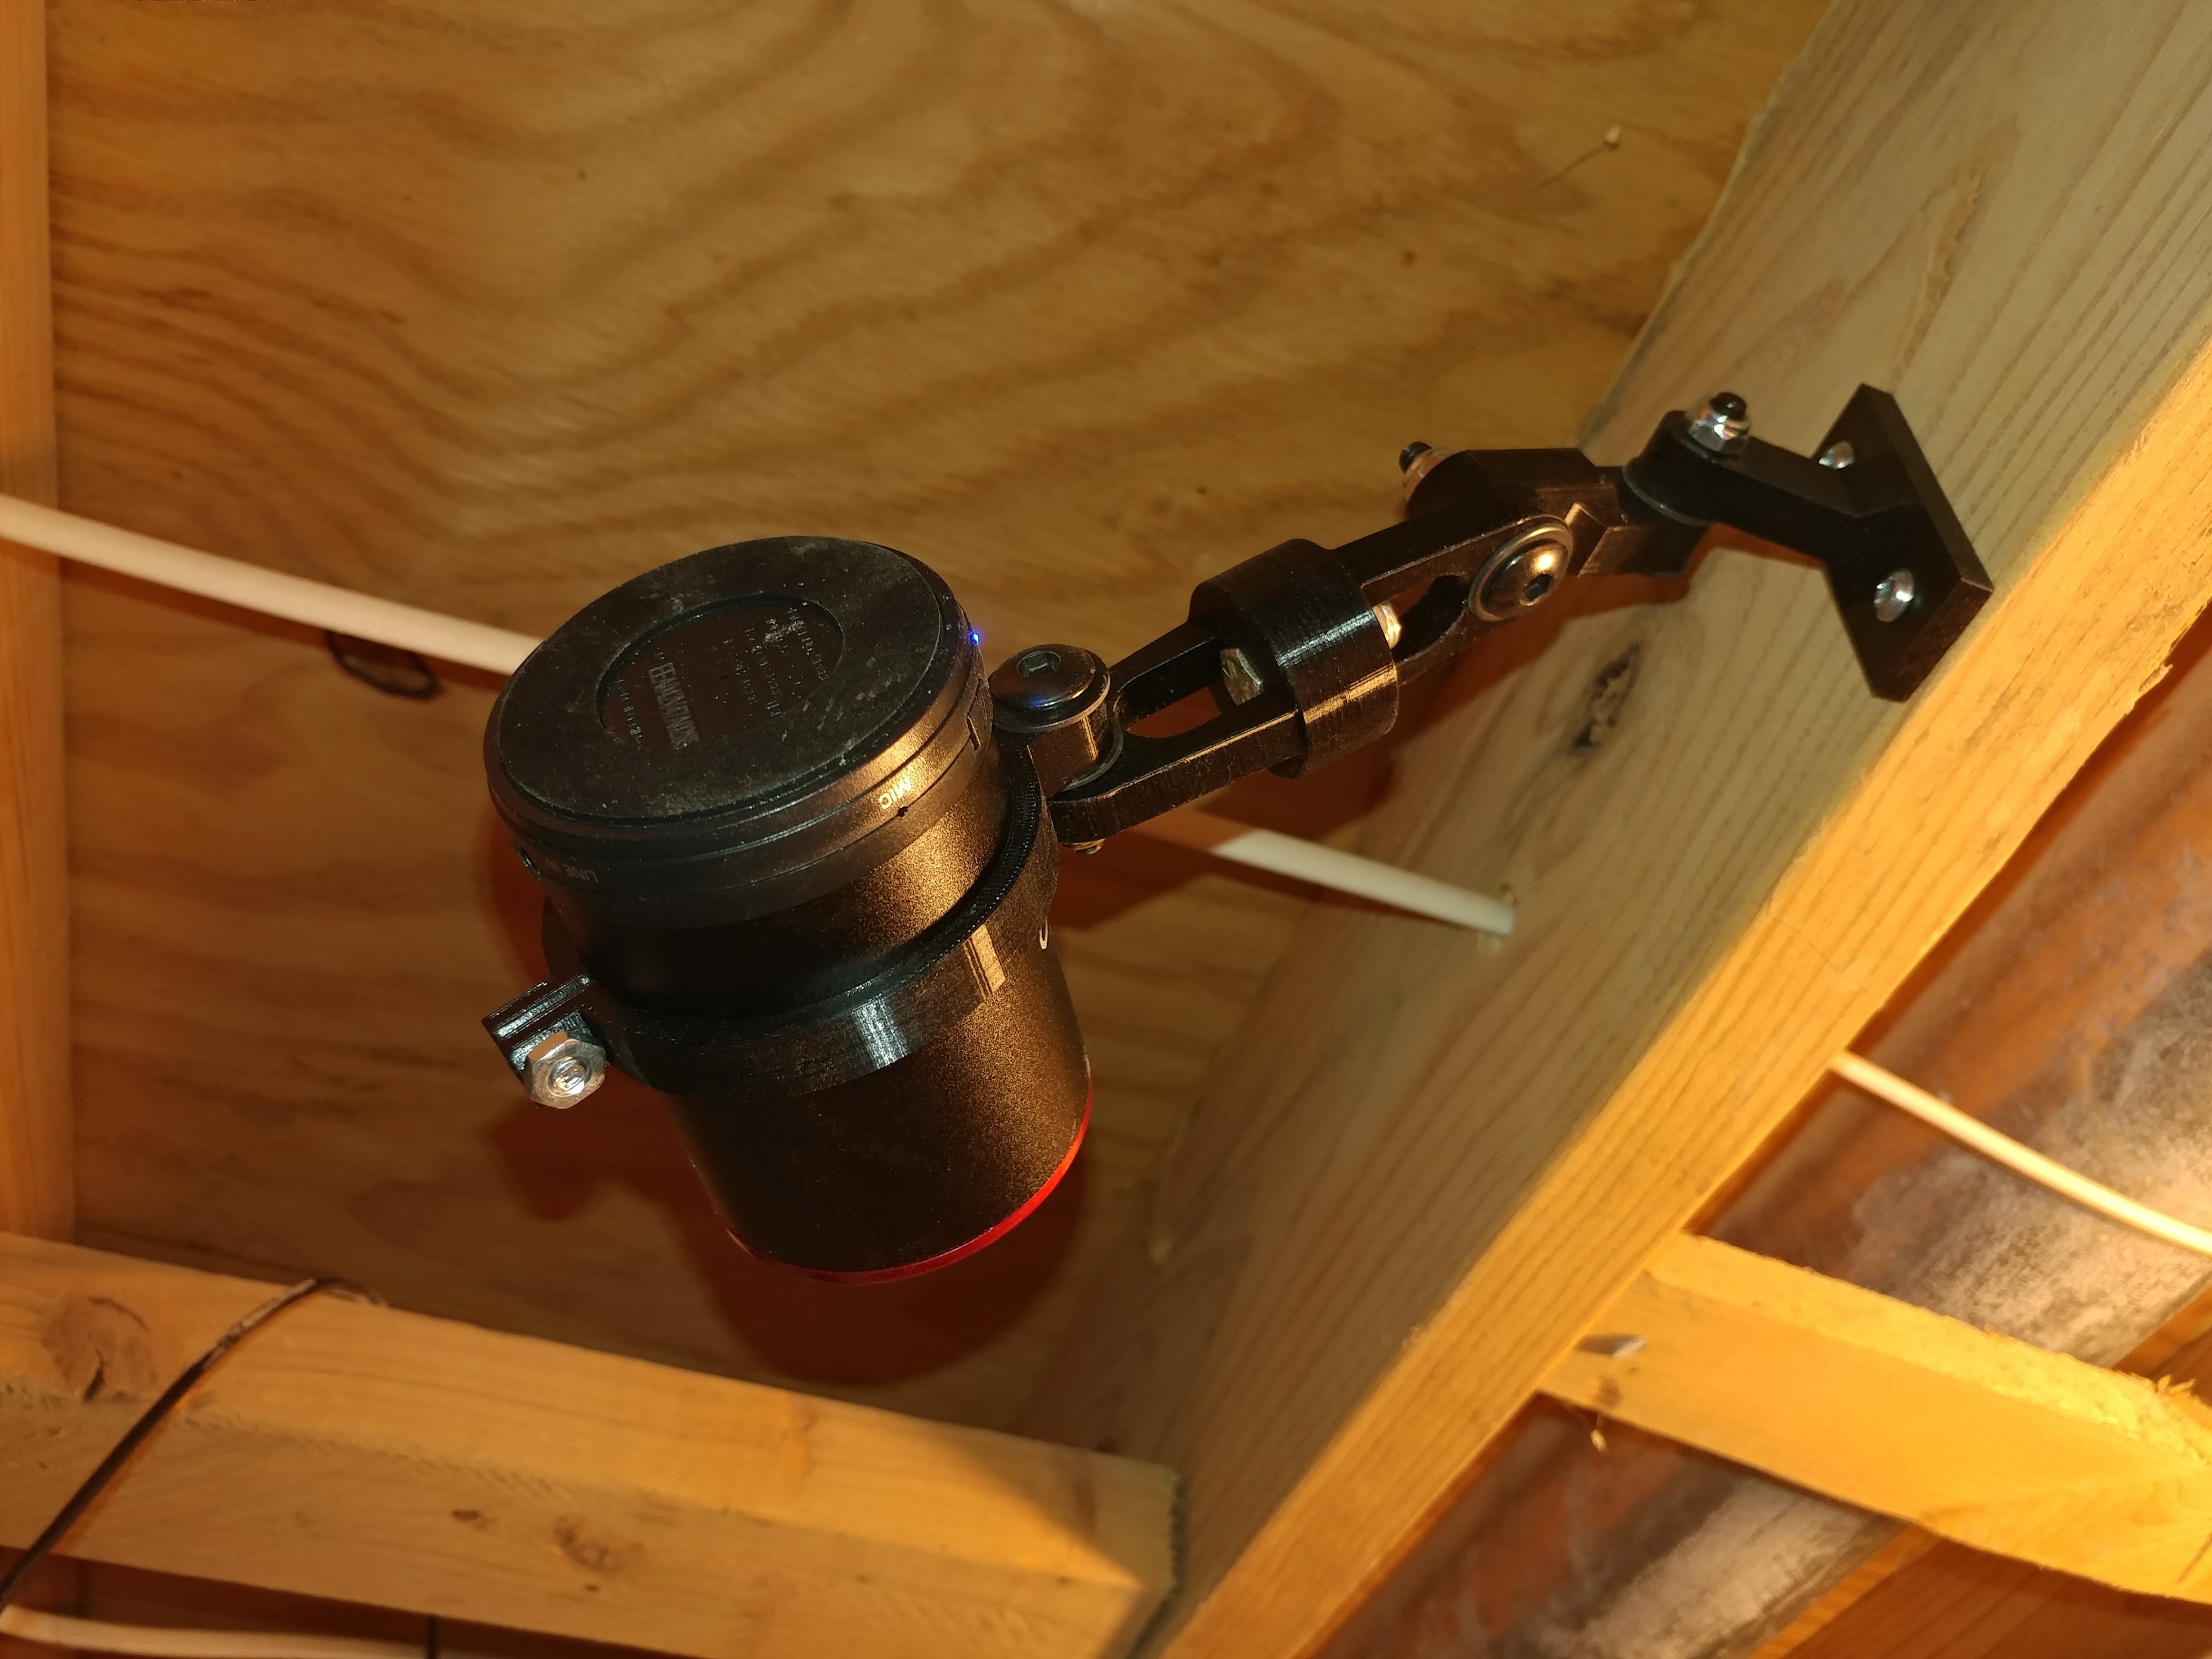
<p>I built these to add speakers in my basement ceiling (I mounted four of them!).</p> <p>The circular speaker holder "loop" was designed to fit a CANZ WIRELESS BLUETOOTH SPEAKER Model: SP888</p> <p>This speaker has Bluetooth, Audio Auxiliary jacks, and a mini USB power input.</p> <p>I have the speakers wired using the auxiliary jacks and the usb power input.</p> <h3>Print instructions</h3><h3>Category: Audio Print Settings</h3> <p><strong>Printer Brand:</strong> Prusa</p> <p><strong>Printer:</strong> I3 MK3S</p> <p><strong>Rafts:</strong> No</p> <p><strong>Supports:</strong> No</p> <p><strong>Resolution:</strong> 0.15 mm Quality</p> <p><strong>Infill:</strong> 20 Percent</p> <p><strong>Filament:</strong> Prusament PLA Black<br/> <strong>Notes:</strong></p> <p>Prints easily without any supports on my Prusa MK3</p> <h3> Post-Printing</h3> <p><strong>To Assemble:</strong></p> <p>In addition to the printed parts, you will need the following:</p> <p>(1) #10 x 1/2" Cap screw and nut (for the speaker holder)</p> <p>(1) 1/4-20 x 1" and locknut (360 Degree bracket)</p> <p>(3) M6 x 30mm Cap head bolt, washers, and locknuts (interconnections)</p> <p>Assembly is very easy (look at the pictures)</p> <p>I used a pair of needle nose pliers to hold the nut in position to tighten the 360 degree assembly. The bolt end is held in position by the hole in the assembly.</p>
With this file you will be able to print Adjustable Speaker Bracket with your 3D printer. Click on the button and save the file on your computer to work, edit or customize your design. You can also find more 3D designs for printers on Adjustable Speaker Bracket.