Adjustable Pocket Hole Jig with Vise
pinshape
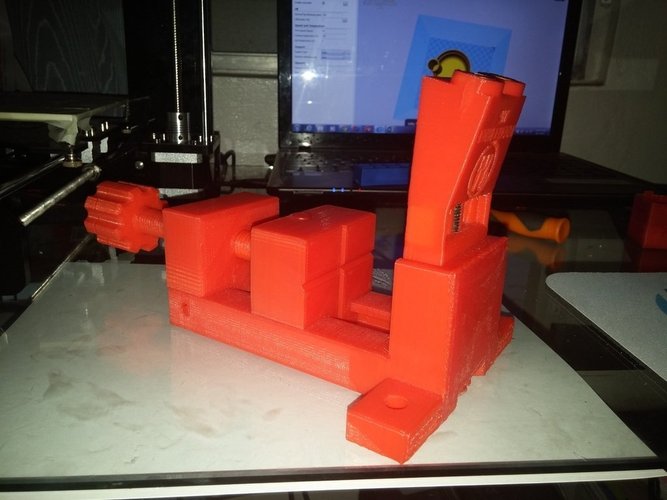
Adjustable Pocket Hole Jig with Vise: A Game-Changer for Assembly To assemble this game-changing tool, you'll need to gather the following essential components: 1. A screw rod measuring between 100mm and 112mm in length 2. A single bolt 3. Epoxy for bonding 4. Two 1/4 copper couplings Using PLA as the printing material with a layer height of 0.250-0.300mm and an infill density of 25%, you'll be ready to create your Adjustable Pocket Hole Jig with Vise in no time. Instructions: First, secure the thread rod and nut to the base using epoxy, ensuring a strong bond that will withstand heavy use. Next, carefully place the nut inside the hole using a soldering iron. This crucial step prevents damage to the drill bit and PLA plastic during drilling operations. Finally, insert the two copper couplings into the drilling holes to protect your valuable tool from unnecessary wear and tear. With these simple steps, you'll be ready to tackle even the most complex assembly projects with confidence.
With this file you will be able to print Adjustable Pocket Hole Jig with Vise with your 3D printer. Click on the button and save the file on your computer to work, edit or customize your design. You can also find more 3D designs for printers on Adjustable Pocket Hole Jig with Vise.