adjustable multi voltage power box for the stacker and trommel
thingiverse
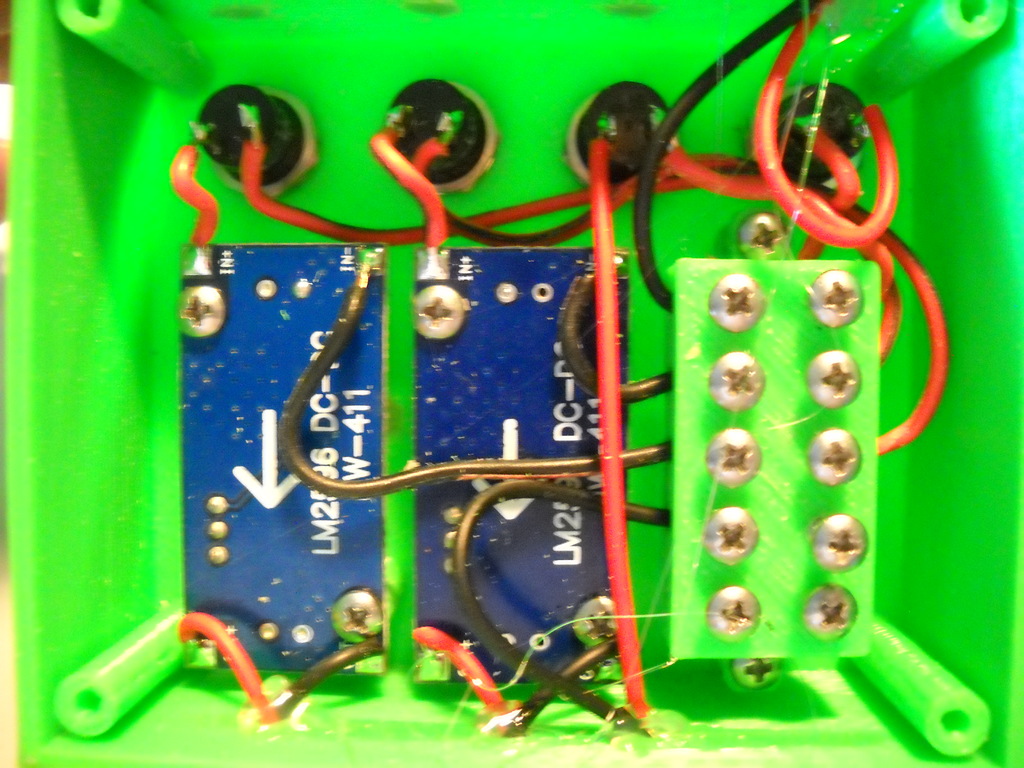
Voltage List: * Marine Water Pump: 12V * Stacker Runs Best At: About 6V * Shaker Motors And Drum Run Best At: About 3V Parts List: 1. 1/2-Inch Screws For Plastic 2. LM2596 DC-DC Converter (4 Buck) 3. On-Off Switches (4 Push Button) 4. Power Jack Plug 2 Pin Wire & Socket Connector (10 Sets) Get The Bus Block Ready: Strip 2 Pieces Of Wire About 28mm And Tin Them, Then Insert Into The Short Side Of The Block Using Grub Screws To Tighten One End To Keep Them In Place. Alternatively, Use 1/2-Inch Screws For Plastic If You Don't Have Grub Screws. Make A Bus Block For The Trommel And Stacker: For Cable Extensions To The Power Box, Follow These Steps: * Extension Wires From The Power Box To Trommel And Water Pump: Figure Out How To Make Them. * Picture Of The Bottom: See The Wires I Tried To Keep Clean. * Ground Wires Go To The Ground Side Of The Bus Strip. * Plus In Goes To Main Switch Then Other Side Of Switch Goes To Bus Plus Side. * Wire Red From The Plus Side To Each Switch And Other Side Of Switch To +In. * Ground From The Ground Side Of The Bus To Each Buck DC-DC -in. * 12V Switched Out Run Plus Side Of Strip To 12V Switch And Other Side To +12v Lead Out. * Solder Other 2 Out Plugs Directly To Buck DC-DC Converter -out And +out.
With this file you will be able to print adjustable multi voltage power box for the stacker and trommel with your 3D printer. Click on the button and save the file on your computer to work, edit or customize your design. You can also find more 3D designs for printers on adjustable multi voltage power box for the stacker and trommel.
