Adjustable Letter Organizer
prusaprinters
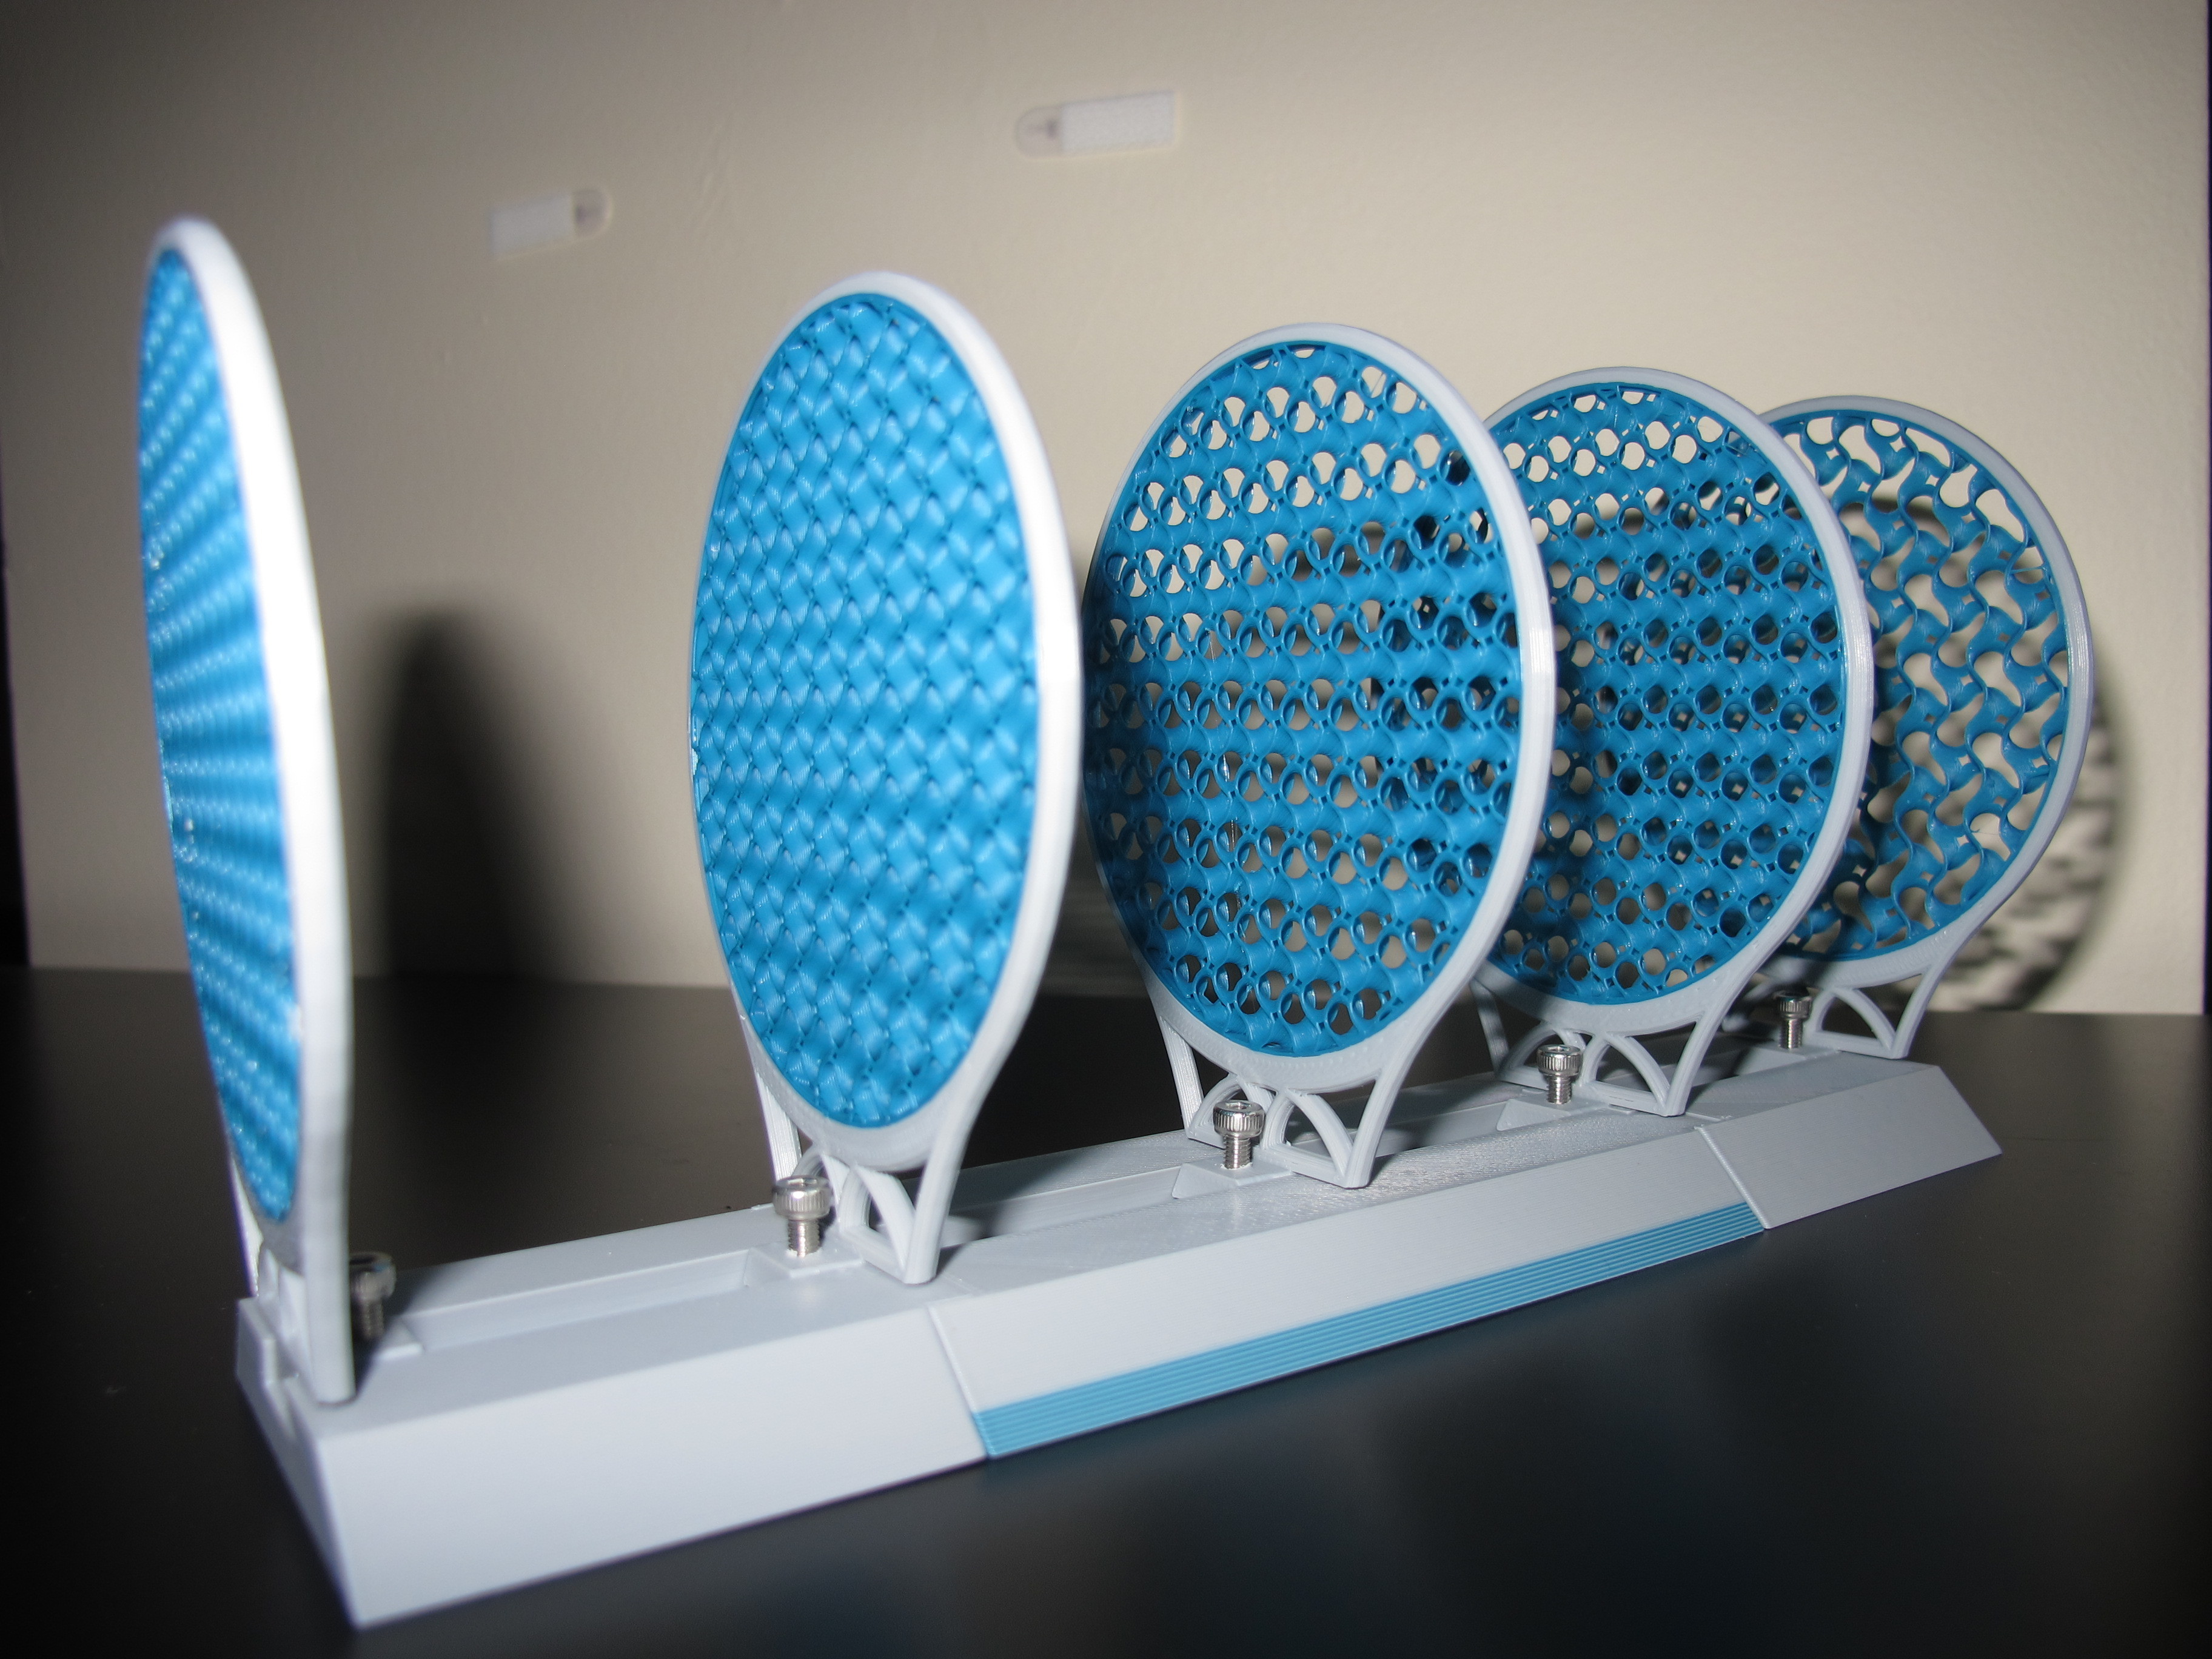
<p>Want a letter organizer for your desk?<br/> Want to show off that sweet, sweet infill pattern?<br/> Get Jo Prusa levels of fanmail that is too much for an ordinary holder?<br/> This is the print for you - sort your mail by bill due date, category, how long you plan to ignore it... or just toss it in any open slot!</p> <h3>Print instructions</h3><p><b>General:</b><br/> Print:</p> <ul> <li>One pair of endcaps</li> <li>As many dividers as you want (Additional pre-sliced infill patterns available on the User Files page, or you can make your own)</li> <li>As many bases (midpieces) as you want</li> </ul><p><b>Assembly:</b><br/> Slot (glue optional, they are designed for a tight fit) the bases and endcaps together. You may need to file or sand the tabs a little if your printer's tolerances are different from mine.</p> <p>Thread an M3x6 (or up to M3x10) screw into the hole in each divider. Turn it through until flush with the bottom.<br/> Then, slide the divider to your desired position, and tighten until you feel it snug up and the divider no longer wiggles. It helps to wiggle the divider a bit while tightening to ensure the screw sets down into one of the recesses in the base.</p> <p><b>Changelog:</b><br/> Jan 30,2020: Initial upload</p> <p><b>Customizing:</b></p> <p>To change the infill pattern/density for your dividers, open the divider .3mf and adjust the infill modifier for the second (inner) part. For something even more un[MM-]usual, print the center disc in a different colour from the outer one!</p> <p>To re-slice it yourself from the raw STLs, import the divider STL, and use the 'split to parts' feature to separate out the inner divider circle. Then add some modifiers to the inner circle:</p> <ul> <li>Infill : Pattern/percentage, as preferred</li> <li> Extrusion width for infill: 0.6 or higher, as preferred. Wider is better for strength and looks. </li> <li> Layers/perimeters: 1 perimeter, 0 top layers, 0 bottom layers</li> </ul><p>I also recommend setting the infill for the outer component higher, like 60% rectilinear.</p> <p>To fit an exact length of space (e.g. inside of a drawer) you can trim the endcaps to length. Each midpiece adds 10cm, each endcap 5 - so if you need to fit a 28cm wide drawer, you could simply rotate the endcaps vertical, and use the z-cut feature in PrusaSlicer to cut 10mm off each of them. (Or, just cut 20mm off one endcap - your choice). If you need longer endcaps, just take the midpiece and trim off the tabs or slots on one side.</p>
With this file you will be able to print Adjustable Letter Organizer with your 3D printer. Click on the button and save the file on your computer to work, edit or customize your design. You can also find more 3D designs for printers on Adjustable Letter Organizer.