Adjustable Headbands for the Prusa V3 Covid19 Face Shield
prusaprinters
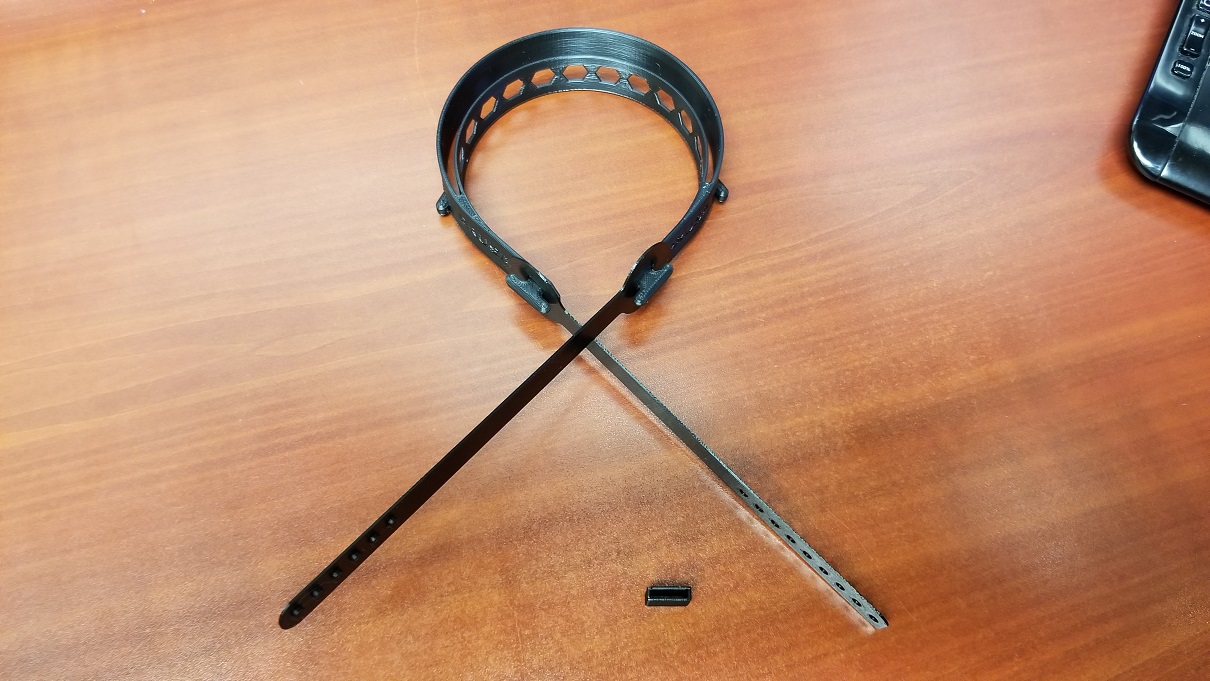
<p>I have included my project files for each of these, but you are welcome to use and/or change them in any way you’d like. All I ask is that if you redistribute them, please mention me as the original creator. If you decide to sell them, please consider a charitable contribution of 10% to Cornerstone Church at <a href="https://cornerstonemi.ccbchurch.com/goto/giving">https://cornerstonemi.ccbchurch.com/goto/giving</a><br/> All of my files are based on my MK3S / MMU2S with a textured bed plate. As with all prints, you may want to adjust the settings to better match your setup.</p> <h3>Print instructions</h3><p>Instructions for printing and assembling the adjustable headbands for the Prusa V3 Face Shield</p> <p>I have included my project files for each of these, but you are welcome to use and/or change them in any way you’d like. All I ask is that if you redistribute them, please mention me as the original creator. If you decide to sell them, please consider a charitable contribution of 10% to Cornerstone Church at <a href="https://cornerstonemi.ccbchurch.com/goto/giving">https://cornerstonemi.ccbchurch.com/goto/giving</a></p> <p>All of my files are based on my MK3S / MMU2S with a textured bed plate. As with all prints, you may want to adjust the settings to better match your setup.</p> <p>Printing the adjustable headbands and clip:<br/> These are the 3 parts for the adjustable headband. 1 ea. male and female band and 1 retainer clip. See the Parts.jpg picture</p> <p>I’ve used PLA so far with great results, but I would think PET would work even better. For the bands, I print them at .15mm layer height using the default Generic PLA profile. Once I start the print, I set my print speed to 135%. For the retainer clip I use the .3mm draft profile, also at 135% speed (set on the printer).<br/> <br/> To assemble the parts, slide one of the bands over the tab for the elastic headband as shown in the Band Install 1.jpg picture.</p> <p>You will need to flex the printed headband slightly to get it to snap over the tab. I intentionally made the hole for the tab small so that it won’t move too much after assembly. Once you’ve snapped the band in place it should look like the Band Install 2.jpg picture.<br/> <br/> Next, rotate the band so that it extends out from the Prusa band. This requires a little bit of force, and again, this is intentional to prevent unwanted movement after assembly. The band will flex quite a bit when you do this. See Band Install 3.jpg and Band Install 4.jpg pictures.</p> <p>Install the other band in the same manner. Your face shield should look like the Adjustable Bands Installed.jpg picture.</p> <p>Slide the retainer clip over one of the bands – it doesn’t matter which. See the Clip Installed.jpg picture</p> <p>Snap the headband together and slide the retainer clip over the snaps. See the Retainer Clip.jpg picture.</p> <p>To complete the face shield, follow the instructions from Prusa at <a href="https://www.prusa3d.com/covid19/">https://www.prusa3d.com/covid19/</a></p>
With this file you will be able to print Adjustable Headbands for the Prusa V3 Covid19 Face Shield with your 3D printer. Click on the button and save the file on your computer to work, edit or customize your design. You can also find more 3D designs for printers on Adjustable Headbands for the Prusa V3 Covid19 Face Shield.
