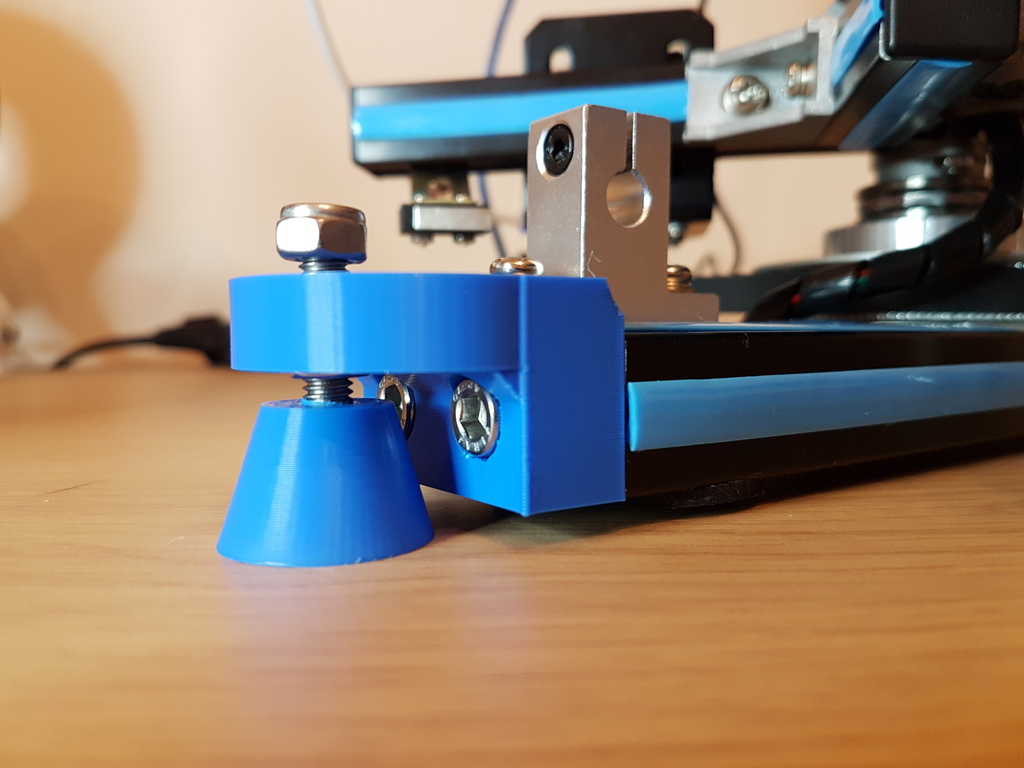
Adjustable feet for Robotdigg SCARA Arm 3D Printer
thingiverse
Here are the printed parts needed to make adjustable-height feet that attach to the ends of the 2040 horizontal extrusions on a Robotdigg SCARA printer. The printer requires three of them. To complete the setup, you'll also need three M6x30mm socket cap head screws (or one M6x30 for the foot and two M6x20 to secure it to the extrusion), two M6 nuts, and a M6 thread tapping tool. Remove the end caps from the extrusions and use the tapping tool to tap the two central holes to the length of the fixing screws minus 5mm. Then, attach the larger printed part to the extrusion using two screws. Next, thread the central hole of the round foot, then screw a M6x30mm cap head screw into it from underneath until it's tight. Place a nut on the protruding screw end and insert this into the underside of the other printed part so that the nut fits in the nut trap. Finally, add another nut to the top side to complete the assembly. For more information on how to strengthen the base frame of your printer, see my blog post at https://miscsolutions.wordpress.com/2017/08/09/testing-the-robotdigg-scara-arm-3d-printer/.
With this file you will be able to print Adjustable feet for Robotdigg SCARA Arm 3D Printer with your 3D printer. Click on the button and save the file on your computer to work, edit or customize your design. You can also find more 3D designs for printers on Adjustable feet for Robotdigg SCARA Arm 3D Printer.
