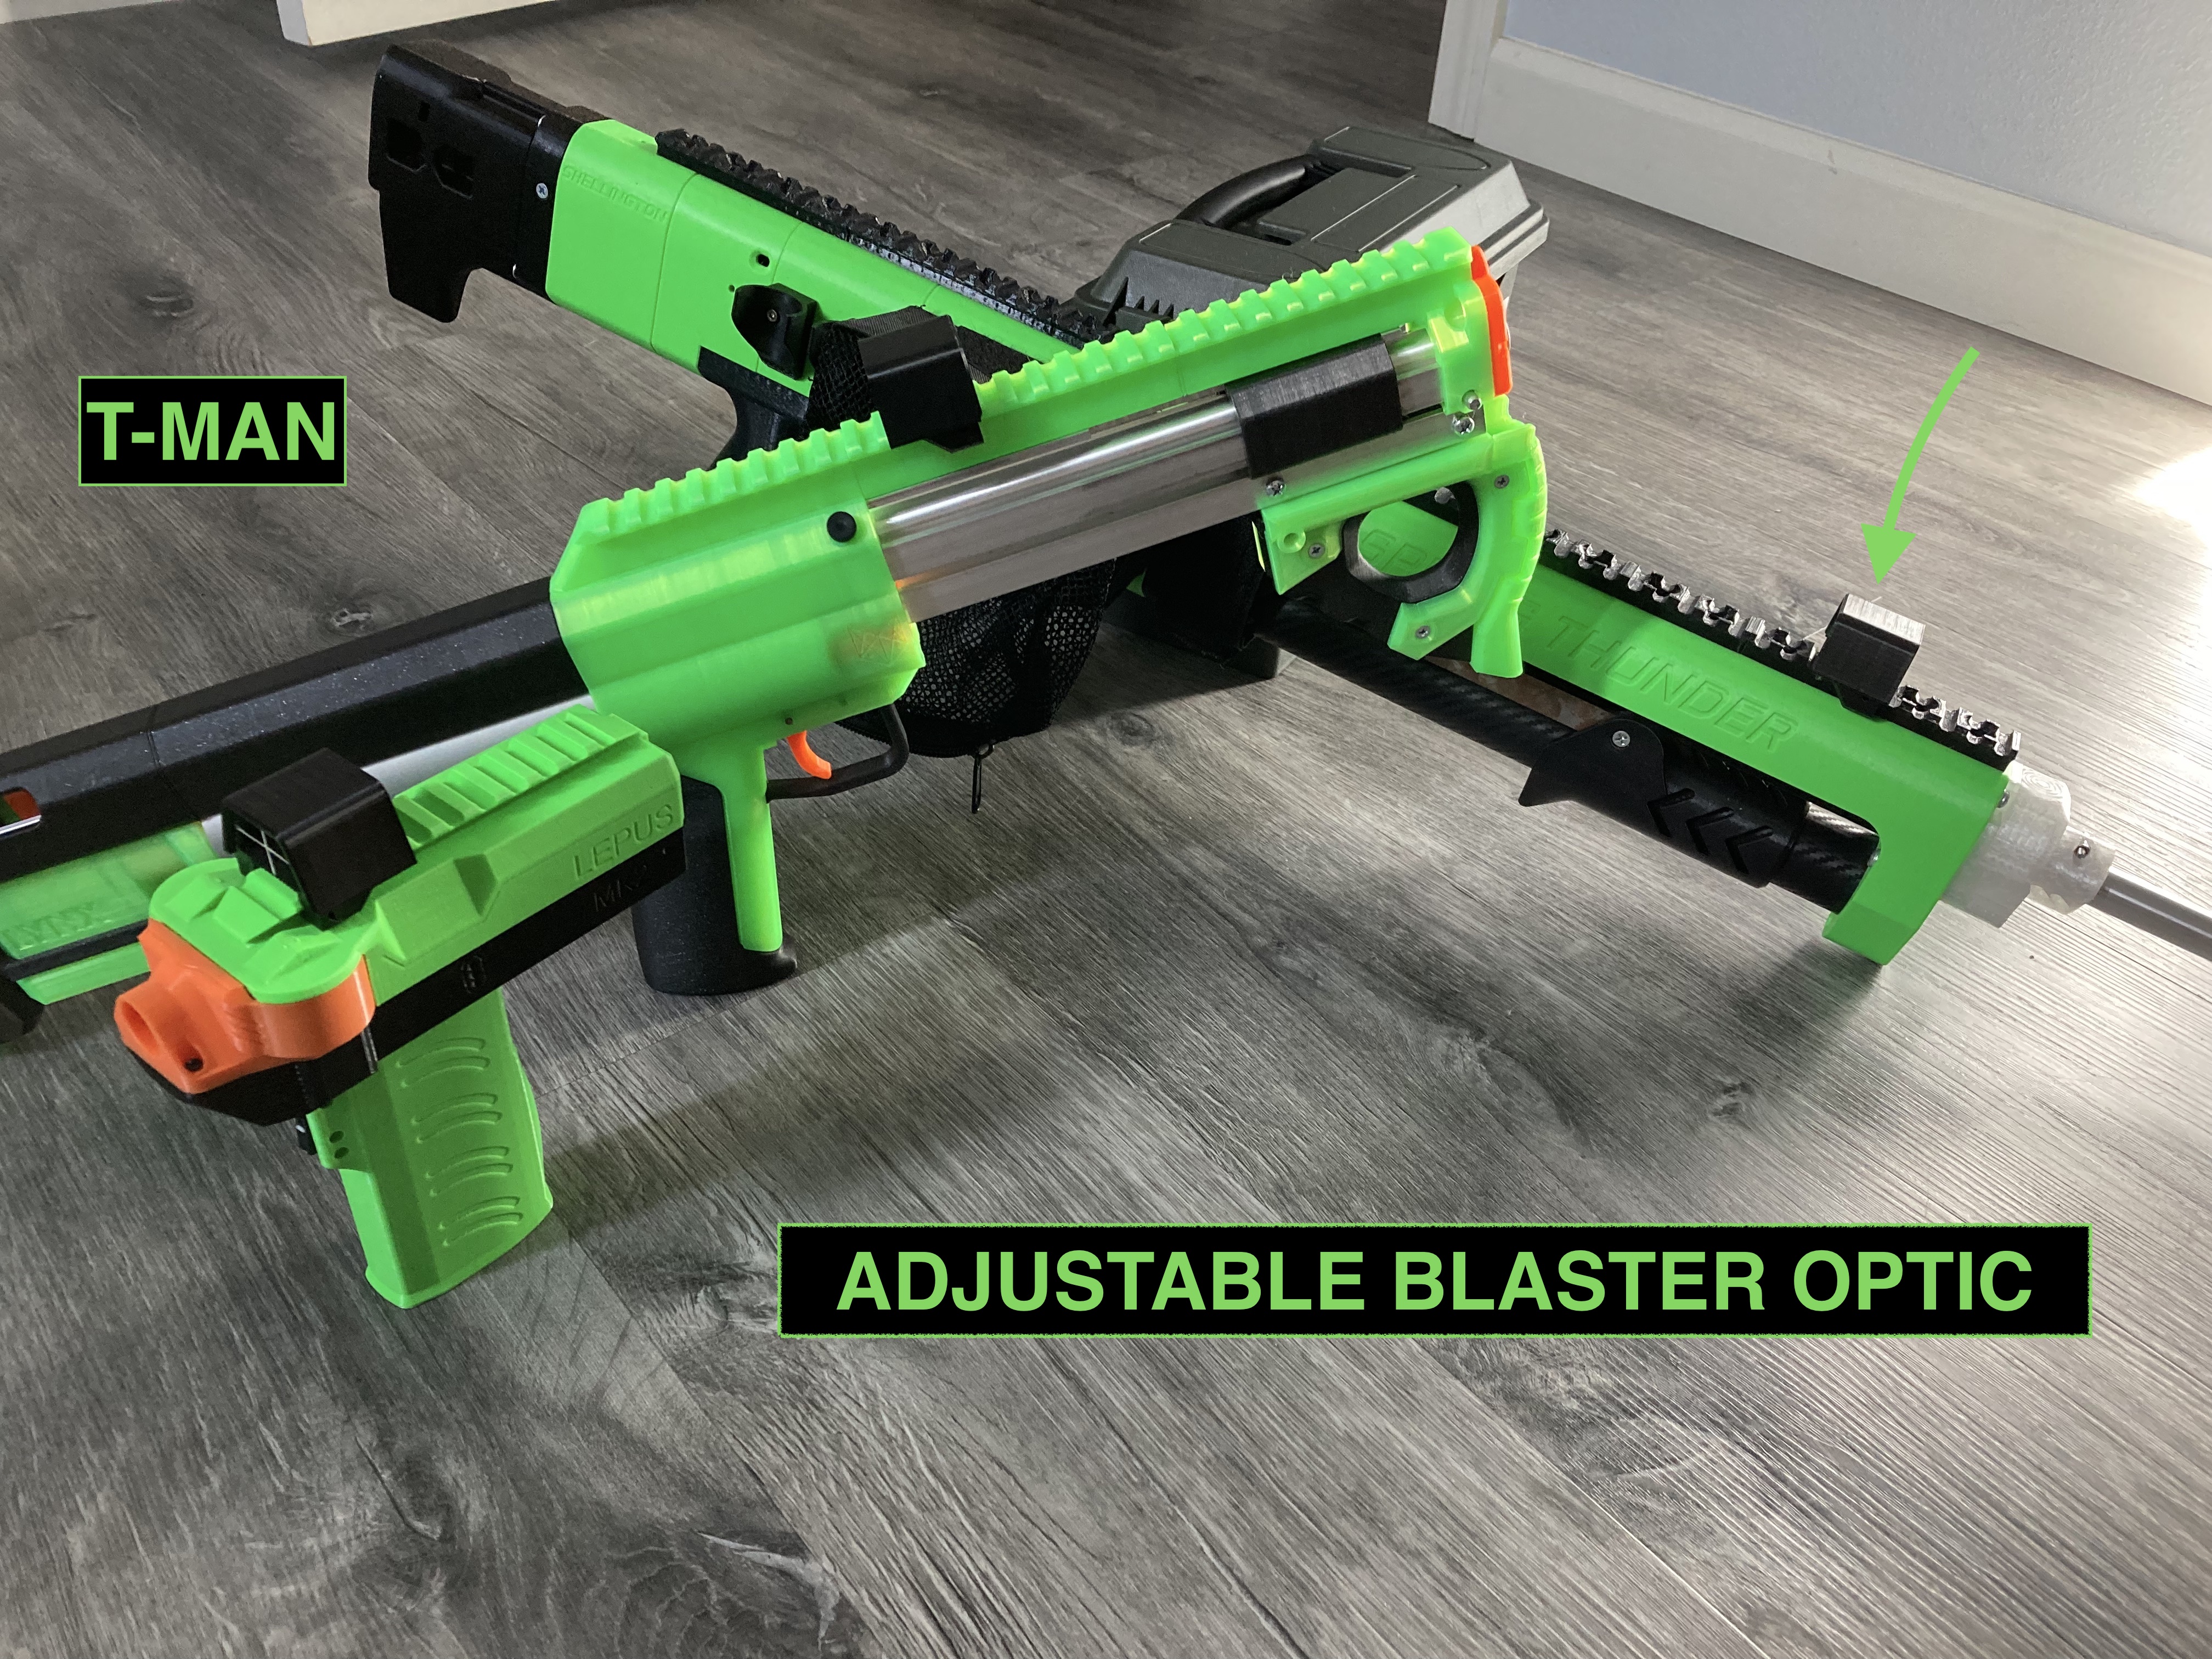
Adjustable Blaster Optic
prusaprinters
<p>This is a adjustable dart blaster sight! It is compatible with picatinny rails as well as nerf rails with an adapter. I did not design an adapter myself but there are a ton on Thingiverse that are available for free. </p><p>Here are the features:</p><ul><li>Support FREE design!!!</li><li>Easy set up and adjustment.</li><li>No screws needed!!! All you need for installation is some fishing string or floss!</li><li>Easy to use.</li><li>Quick-swappable to any compatible blaster</li><li>Notches to show the user the “zero” position on the fly.</li><li>Ability to color match your blaster.</li><li>Protective cover to prevent damage to strings from bumps.</li><li>Compact size means it is compatible with many different sized blasters</li></ul><p>Here is a list of compatible blasters that I have tested or seen this optic on (NOTE: MAY OR MAY NOT USE ADAPTER):</p><ul><li>Spring Thunder</li><li>Lynx</li><li>Lepus</li><li>Nexus Pro</li><li>Aeon pro</li></ul><p>As well as multiple different blasters using an adapter.</p><p>Note: it is NOT compatible with the SPAMF, REKT Jury, or blasters with an enclosed pic rail. This is because it is a slide on design to limit the complexity of the model. </p><p> </p><p><strong>INSTRUCTIONS: </strong></p><p>I tried my best to make this the simplest adjustable optic for nerf yet! As such it has only 3 parts that can easily be printed in under 2 hours.</p><p><strong>STEP #1: PRINTING</strong></p><p>You will need to print out one of each of the parts. </p><p>And to print without supports make sure to use the correct orientation. (Note that the pin has a flat side to make it a little easier :])</p><figure class="image"><img src="https://media.printables.com/media/prints/165226/rich_content/ba260483-cfa2-49b7-86f7-678214d9a5d3/screen-shot-2022-07-20-at-64424-pm.png#%7B%22uuid%22%3A%227698db0f-fa38-4061-957e-a6f00afd1a39%22%2C%22w%22%3A579%2C%22h%22%3A396%7D"></figure><p>.2mm layer height is safe and you will need pretty good bed adhesion. Perimeters are probably the deciding factor for strength but I think default settings will work perfectly for almost all use cases. </p><figure class="image"><img src="https://media.printables.com/media/prints/165226/rich_content/21b2c936-669c-4eb0-ac2b-b419f00d3d7a/img_1051.jpeg#%7B%22uuid%22%3A%22e5f9f16a-6463-45f7-a8c6-d4eddee9ff77%22%2C%22w%22%3A4032%2C%22h%22%3A3024%7D"></figure><p> </p><p><strong>STEP #2: STRINGING</strong></p><p>Stringing this scope is no more difficult than a scar barrel. </p><figure class="image"><img src="https://media.printables.com/media/prints/165226/rich_content/3528b32c-80c8-4e0b-af00-bf77b2b544d8/img_1053.jpeg#%7B%22uuid%22%3A%22c3cc0bc7-f0d6-4899-8485-a303f163fcbf%22%2C%22w%22%3A4032%2C%22h%22%3A3024%7D"></figure><p>THE POSTS ARE MEANT TO FUSE TOGETHER ON THE BOTTOM! This provides some extra grip on the string. You can either use a hobby knife or the string to clear the excess plastic :)</p><figure class="image"><img src="https://media.printables.com/media/prints/165226/rich_content/82f63b5f-041c-4411-b210-2ce56572ae48/img_1054.jpeg#%7B%22uuid%22%3A%221831dc70-8c3b-4986-ae07-79f28f96c3c4%22%2C%22w%22%3A4032%2C%22h%22%3A3024%7D"></figure><p>Start on the side of the optic. Wrap the string around the posts until it isn't going anywhere. <i>Make sure the string begins on the outside of the optic and ends by coming out on the inside of the optic.</i></p><figure class="image"><img src="https://media.printables.com/media/prints/165226/rich_content/2ce84aa5-a951-4523-8271-13103811daa0/img_1056.jpeg#%7B%22uuid%22%3A%22c1fb45b5-871f-4dba-ae03-10cef608c11d%22%2C%22w%22%3A3024%2C%22h%22%3A4032%7D"></figure><p>Next pull the string out of the hole on the side of the optic. Having the string on the inside allows the cover to be added and removed without messing with the tension. Then just align the string to the “zero” groove and pull over the central opening. Finally wrap it around the posts on the other sides. Cut the extra string with a ¼-3/8's of an inch worth of excess on each side for future adjustment.</p><figure class="image"><img src="https://media.printables.com/media/prints/165226/rich_content/d48eb5af-2941-43cd-8230-b3b06a9f4e90/img_1058.jpeg#%7B%22uuid%22%3A%22c849ad35-a357-4097-973a-9bf3fc29f1ec%22%2C%22w%22%3A2279%2C%22h%22%3A2269%7D"></figure><p>Repeat this process for the vertical string and CONGRATULATIONS! You now have a fully strung optic!</p><p><strong>STEP #3: MOUNTING</strong></p><p>Depending on the blaster you are using you may need an adapter. There are plenty on Thingiverse and I hope that we will see some more on Printables in the future.</p><p>All you need to do to mount it is to slide it onto the rail from the front or back. Put it where it will be the most effective and then slide the pin in from the left side. That you are free to put the cover on and begin adjusting the strings to get perfect shots!</p><figure class="image"><img src="https://media.printables.com/media/prints/165226/rich_content/78b1c8bb-5d0f-4722-89ee-c6875d222cd7/img_1062.jpeg#%7B%22uuid%22%3A%22db7310da-7486-4a87-ab04-2ce62f4eb4e5%22%2C%22w%22%3A4032%2C%22h%22%3A3024%7D"></figure><p><strong>(OPTIONAL) STEP #4: ADJUSTMENT</strong></p><p>I personally like to leave these crosshairs at zero and know where my blaster hits relative to that (or adjust my scar barrel to hit straight on). But if you want to adjust the position of the crosshairs you can use the angle on the pin or pliers to move the string along the notches at the front of the frame. Don't forget to re-tighten the strings after you are done by pulling on the little bit of excess string at the wrapping pegs.</p><figure class="image"><img src="https://media.printables.com/media/prints/165226/rich_content/fdec5c40-c9f5-4e62-9330-e939d551e9a5/img_1082.jpg#%7B%22uuid%22%3A%2287e80b91-7327-45cb-a6c9-197333a53cb3%22%2C%22w%22%3A859%2C%22h%22%3A1140%7D"></figure><p> </p><p>If you like this optic consider supporting my future work by leaving a make! Happy Printing!</p>
With this file you will be able to print Adjustable Blaster Optic with your 3D printer. Click on the button and save the file on your computer to work, edit or customize your design. You can also find more 3D designs for printers on Adjustable Blaster Optic.
