Adjustable and Collapsable Dowel Display Rack/Stand
prusaprinters
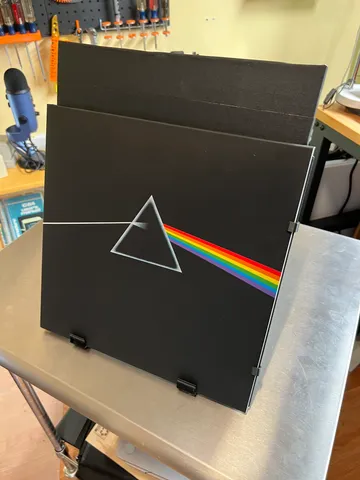
Here is a great way to add a support to a display board. We are using this to display my daughters necklaces, but you can use this to display or organize you collections or sales items. We even added a clip to keep a 1" or 25mm barbell weight in place so the wind will not blow it over if your display is outdoors. One great feature of this design is it is collapsable. When you are done displaying for the day, just fold it up and pack it away. I have used my prototype as a album display as seen in the pictures.Video animation of operation here: PartsYou will need the following:4x - Hinges4x - 3mm x 20mm Screws4x - 3mm Nuts 2x - Sliding Tees2x - Fixed Tees2x - 12.5mm or 1/2" Leg Dowels (*Length depends on your application)2x - 12.5mm or 1/2" Stretcher Dowels (*Length depends on your application)1x - 12.5mm or 1/2" Base Dowel (*Length depends on your application)1x or 2x - Base clip (Number depends on the length of your Base Dowel)2x - 3mm thumb screws to tap into the Sliding Tee to prevent Base Dowels from sliding.Epoxy* Note: The length and positioning of the dowels and hinges greatly depends on your application. If you cut the leg dowels roughy the height of your display, you can trim them later to fit better. The Stretcher Dowels length depend on the angle you want your display. One way to get a rough estimate is to position your display at the desired angle and have the leg dowel vertical, then place the stretcher dowel at the bottom of your display and mark where it meets the leg dowel. Then add an extra ⅓ or more to the stretcher dowel length. You can cut this long and adjust later. Optional or recommended:1 or 2 25mm 1.5kg or 1" 3 lb barbell weights1 or 2 Weight ClipsMultiple Wall hooks - We need this to hold my daughters necklaces. Print as many as needed Please keep in mind the diameters for the dowels used in this model were for what we had on hand (½" and probably overkill for the application) , but yours can be adjusted in the .step files to fit your own needs.AssemblyThis can be a fun puzzle to assemble and get working correctly. Take your time and make sure to cut the dowel the same length as their mates (ie. right and left). Make sure to drill the holes in the dowels at the same location on mates. When positioning holes, make sure the dowels can pivot and clear the base (about 10mm or 3/8" is good). Before gluing up your stand, make sure all your parts fit and function smoothly. We used double-sided tape to check everything was correct and working smoothly before using the epoxy.PrintingMost pieces of the model are pretty obvious, but the Tees I print with one opening vertical with “Organic” supports to preserve the roundness and fit. Filament - PLAInfill - Everything 100% Layer Height - .20mmSupports - Some needed on the TeesParimeters - NA with 100% infillAdditional Parts - See aboveBed Adhesion - You may want some glue stick to ensure good bed adhesion. Rafts - None neededScaling - The STEP files are provided, so you can change anything you want.Filament Change - NonePost Printing Notes: See Assembly NotesHappy Printing!You can helpTo help cover the expenses of printing prototypes for the models I share, please consider a donation by purchasing an item from my Amazon wishlist herePlease leave a comment and let me know how you like this model. Also, if you like this model, check out my other models over here:https://www.printables.com/@HandyHandcrafts/modelsAward winning Model “Japanese Toolbox” for the "Box Contest: here:https://www.printables.com/model/260100-japanese-toolbox-inspired-locking-lid-box
With this file you will be able to print Adjustable and Collapsable Dowel Display Rack/Stand with your 3D printer. Click on the button and save the file on your computer to work, edit or customize your design. You can also find more 3D designs for printers on Adjustable and Collapsable Dowel Display Rack/Stand.