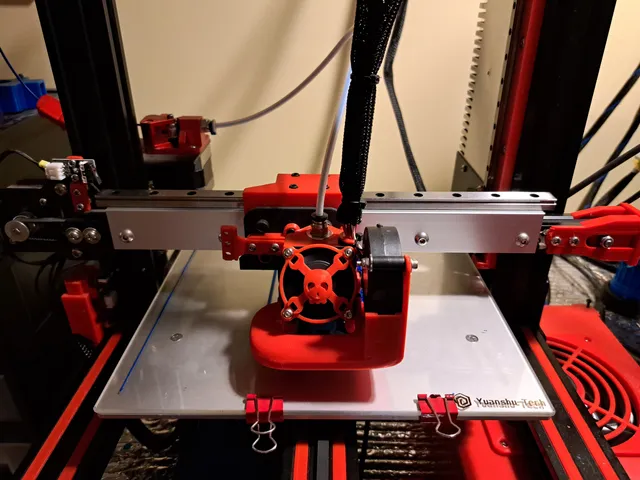
Adimlab Gantry-S Top Mount X-Axis Linear Rail Mod
prusaprinters
This is a modification to the Adimlab Gantry-S printer to add a top-mounted linear rail to the x-axis. Besides 3D printed parts, this mod will require an aluminum extrusion from Misumi, an MGN12H 300mm linear rail, and a Creality x carriage plate which will need to be purchased. By using a Creality x carriage the Adimlab Gantry-S hot end assembly can be easily modified to different hot ends or extruder configurations. This adds versatility previously unheard of for the Adimlab Gantry-S printer.I recommend using the Hero Me Gen 6 system found here: https://www.printables.com/model/39322-hero-me-gen6-master-suiteI suggest using the Hero Me configured for an Ender 3 with a single 5015 fan with dual cooling ducts. This also enables various ABL sensors to be installed. You will also be able to either retain the OEM Bowden configuration or easily switch to direct drive.Here is the Misumi (https://us.misumi-ec.com/) part number for the aluminum extrusion (HFSFIL5-3020-284-V8-XA10-XB76-XC142-XD208-XE274). This will mount onto the front of the Gantry-S x-axis 2020 extrusion with 5mm panhead screws. The linear rail will in turn mount to this extrusion. I recommend using 3mm slider nuts instead of hammerhead t-nuts to mount the linear rail onto this aluminum extrusion.Creality 3-wheel x carriages can be found at many 3D parts suppliers. Here is the one I used as an example: https://www.amazon.com/dp/B08SK4H1S6?psc=1&ref=ppx_yo2ov_dt_b_product_detailsThe rail carriage bracket will require two 5mm threaded inserts to be installed. I used the shortest M5 insert from this kit. https://www.amazon.com/dp/B09TKNJ9YB?psc=1&ref=ppx_yo2ov_dt_b_product_detailsThe belt bracket slides over the belt holder on the Creality carriage and will enable the belt to be positioned in the center of the 2020 x-axis extrusion. It is a tight fit and does not need any hardware to be installed. I highly recommend the use of a belt tensioner. You will not need to replace the OEM belt unless you want to.Finally the endstop bracket positions the endstop so it is centered over the 2020 rail at the correct height to engage the linear rail bracket.Print these parts with 5-6 walls and 40-50 percent infill. For structural parts, I like to use cubic or cubic subdivision infill patterns.UPDATE: 7/3/2022 Added a 3D printable bracket to mount the linear rail. This will allow you to print this mod without getting the aluminum extrusion from Misumi if desired. Use 3mm threaded inserts to mount the linear rail.
With this file you will be able to print Adimlab Gantry-S Top Mount X-Axis Linear Rail Mod with your 3D printer. Click on the button and save the file on your computer to work, edit or customize your design. You can also find more 3D designs for printers on Adimlab Gantry-S Top Mount X-Axis Linear Rail Mod.
