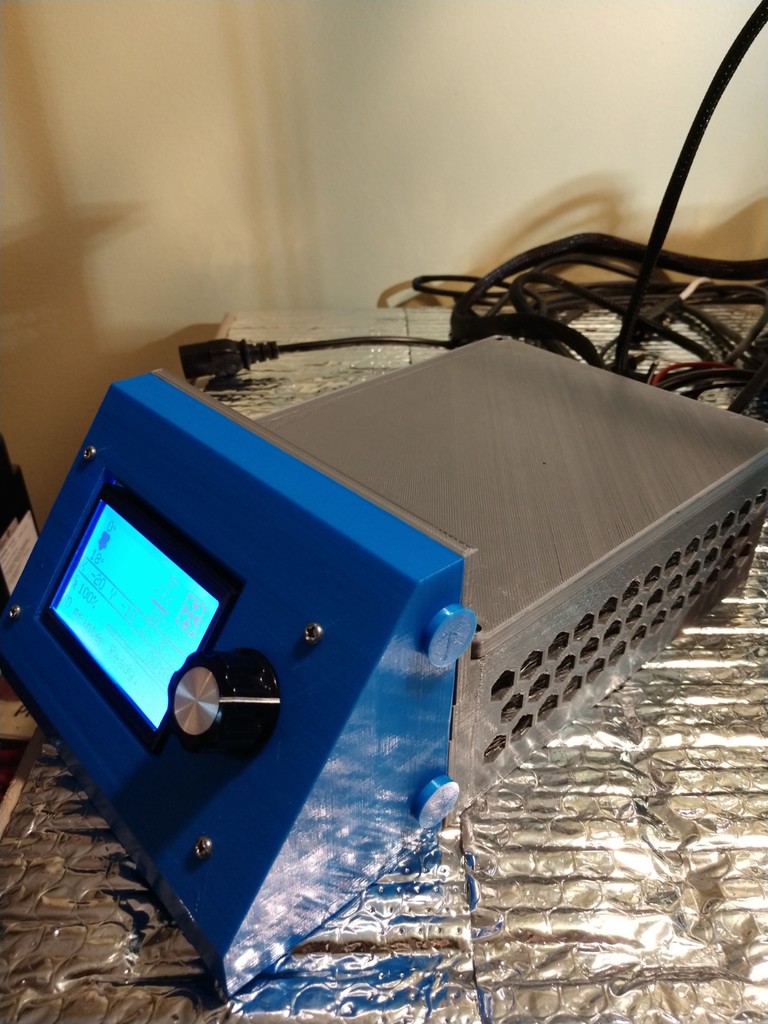
Adimlab 3D Printer LCD & PCB Control Box
thingiverse
This control box can be used with other printers with some modifications for the control board hole positions and LCD panel to make it fit. It's a well-ventilated control box that fits both the LCD panel and PCB board, but not the power supply. The design is made to sit on the side of the printer and will serve as a good platform for a spool holder. The Adimlab i3 Gantry printer has two different controller boards, a black board and a white board, but they have the same hole layout so this control box will fit either version. To use this control box, you'll need to remove your PSU from your controller. Many Adimlab enthusiasts are using the PSU covers designed by cmelson, available on Thingiverse. You'll also need to raise your printer up higher using some feet; my design for printer feet can be found here: https://www.thingiverse.com/thing:3592374 or search under Adimlab or printer feet. Unlike the OEM Adimlab printer, this board is mounted with components right side up with the USB and heater cable inside the box. For the USB cable, a 90-degree adapter is recommended. The buttons will hold the LCD panel in place and make it easy to remove. Hardware needed includes: * Lid: 4 each #4x3/4 inch wood screws * Board: 4 each M3 x 16 * Fan Mount: 1 each M3 x 16 and 1 each M3 nut * Fans: 4 each #4x3/4 inch wood screws * LCD: use the hardware that came with the printer UPDATE: 5/3/20 An adapter was added to put the SKR 1.3 into the box, as well as the SKR version of the box that fits underneath the printer. UPDATE: 8/21/19 A version of the box was made that can be mounted underneath the printer. If you want this version, print the box version 2.5 with "JB_Control_Box_BOX NO_BULKHEAD". You'll also need to print the file "JB_Control_Box_MOUNT_BRACKET" and use 3m x 12 or 4m x 12 to mount the brackets to the box. Use 8mm or 10mm long screws and t-nuts to mount the whole thing to the Y rails. The GCODE for this box with support blockers and .28 layer height is also included, which takes about 20 hours to print. For this box, it's recommended to use a center-mount LCD panel. If you have the white board version of the printer, use this file: https://www.thingiverse.com/thing:3628886. If you have the black board version, use this file: https://www.thingiverse.com/thing:3817078. UPDATE: 8/18/19 A version of the LCD panel was added for the white board Adimlab Gantry printer. This is untested; if you have the white board printer and print this out, please let me know if it works. UPDATE: 5/5/19 Holes were added to the fan mount and the box, and the size of the control board mount holes was increased. The control box was re-sliced and the GCODE file was reloaded. UPDATE: 5/3/19 Over the last few days, the bulkhead to LCD portion was tested and corrected for fitment. The controller board fitment was also tested (good). The bulkhead was attached to the box portion to print as one unit instead of two. Fixed parts have all been uploaded. The box portion was sliced so it will only have support on the ends where the cables go through, and the GCODE file was updated. This part takes 20 hours to print. UPDATE: 4/29/19 The SD card slot was re-positioned since after a test print it was incorrect. UPDATE: 4/28/19 Screw holes were added to the lid and box.
With this file you will be able to print Adimlab 3D Printer LCD & PCB Control Box with your 3D printer. Click on the button and save the file on your computer to work, edit or customize your design. You can also find more 3D designs for printers on Adimlab 3D Printer LCD & PCB Control Box.
