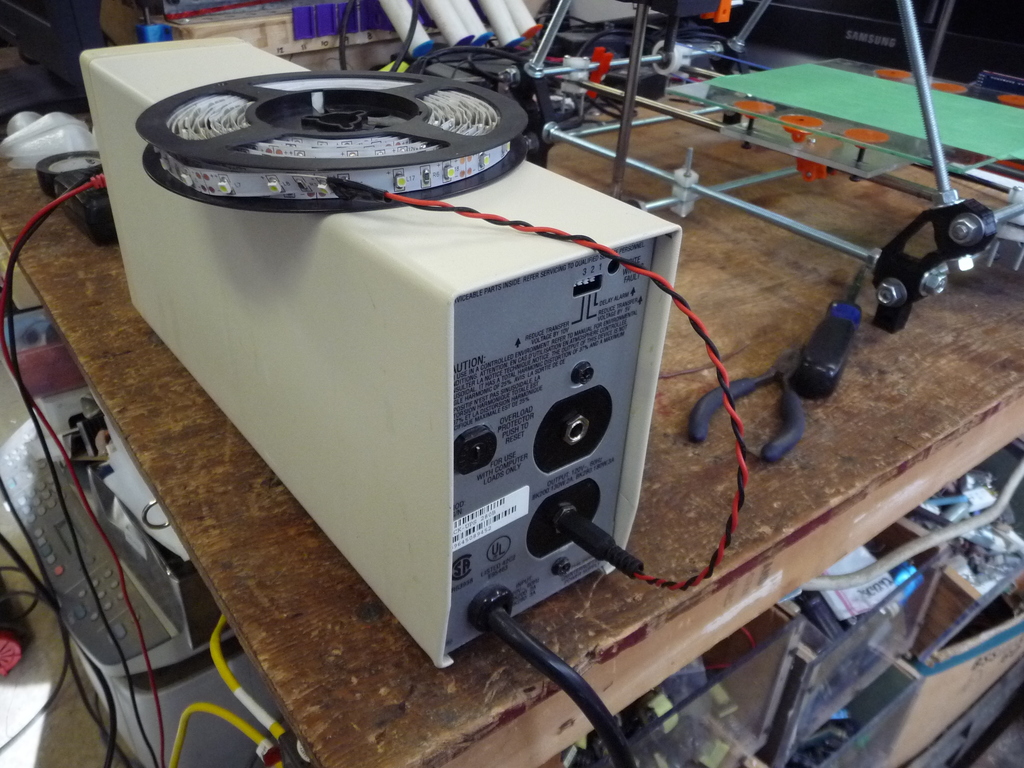
Adapter to convert ups to emergency light controller
thingiverse
This filler is part of converting a small APC UPS to operate power-outage lights (elights), it fits two panel-mount dc jacks that can be used to plug in low-power 12V LED lights. ** Warning: High Voltage ** NO, IT WON'T WORK AS A UPS AFTER THIS. Step 1) Turn UPS off (duh) Step 2) Unplug UPS (duh) Step A (separate thread, you can have your buddy doing this while you continue with the numbered steps): Start printing the thing that came with these instructions. Step 3) Flip over, open battery compartment, remove battery. Step 4) Remove the four screws that hold on the top lid, remove lid. --- This is white space for people who don't or can't read large blocks of text -- Step 5) There are six screws on the top of the circuit board that hold it down, remove those. Step B) Remove the two screws in the back of the case that hold on the output outlet. Step 6) Remove the five wires to the transformer. (Step 5.5 is to Google everything about electronics so you know how to follow these instructions, including knowing what a transformer is.) Step 7) Watch TV for a while (this step is optional). Step C) Remove the black and white wires from the output outlet. Step 8) Gently move the circuit board aside, there is one screw holding the back of the transformer, remove it. Step 9) Wiggle and pull the transformer back; its got its front tab trapped under the battery door brace, will usually pull out. Ditch it. Step D) Solder 20cm wires to the DC jacks, 16 gauge is a good minimum, red to the center post and black to the outer cylinder. Step 10) Unsolder the wires that went to the outlet from the circuit board, optionally, you can also just cut them off really close to the circuit board. Step E) Crimp push-on connectors to the wires; each black wire gets its own crimp connector, but both red wires go into the same connector. Step 11) Screw the DC connectors into the printed piece; their tight, but use the nut anyhow. Step 12) Wait for the other guy. --- This is white space for people who don't or can't read large blocks of text -- Step F) Go get some potato chips (optional step). Step 13) Unsolder the 40A fuse and replace it with something like a 5A or 10A fuse. (Usually, a computer power supply has a 6.3A fuse that I'm sure you can make fit if you try.) Step G) Screw the DC jack plate back into the back of the case (from the inside); you will need two 6-32 screws; you can steal two of four screws holding in the power supply of the other guy's computer, cause why does it need four screws for anyhow? Step 14) Plug in the DC connectors. There is one connection by the fuse you just replaced; the red wires go to that one. Each of the black wires (he used black right?) goes to the connectors by each set of transistors. Step 15) Screw the case lid back on. Step H) Unsolder that tiny, stupid, annoying little buzzer from the circuit board; you can also use the 'removed-with-large-pliers' technique. Step I) Solder a male DC jack onto some LED lights. Positive is center. Step 17) Wait for other guy to finish, eat potato chips. Step 18) Reinstall battery. Step J) Plug in LED lights. Step 19) Turn on UPS. Step 20) Plug in UPS briefly, then unplug; lights should come on. Step 21) Go to Thingiverse and click the 'I made one'! thing number 2798705. Step 22) Plug ups in, wait for power outage.
With this file you will be able to print Adapter to convert ups to emergency light controller with your 3D printer. Click on the button and save the file on your computer to work, edit or customize your design. You can also find more 3D designs for printers on Adapter to convert ups to emergency light controller.
