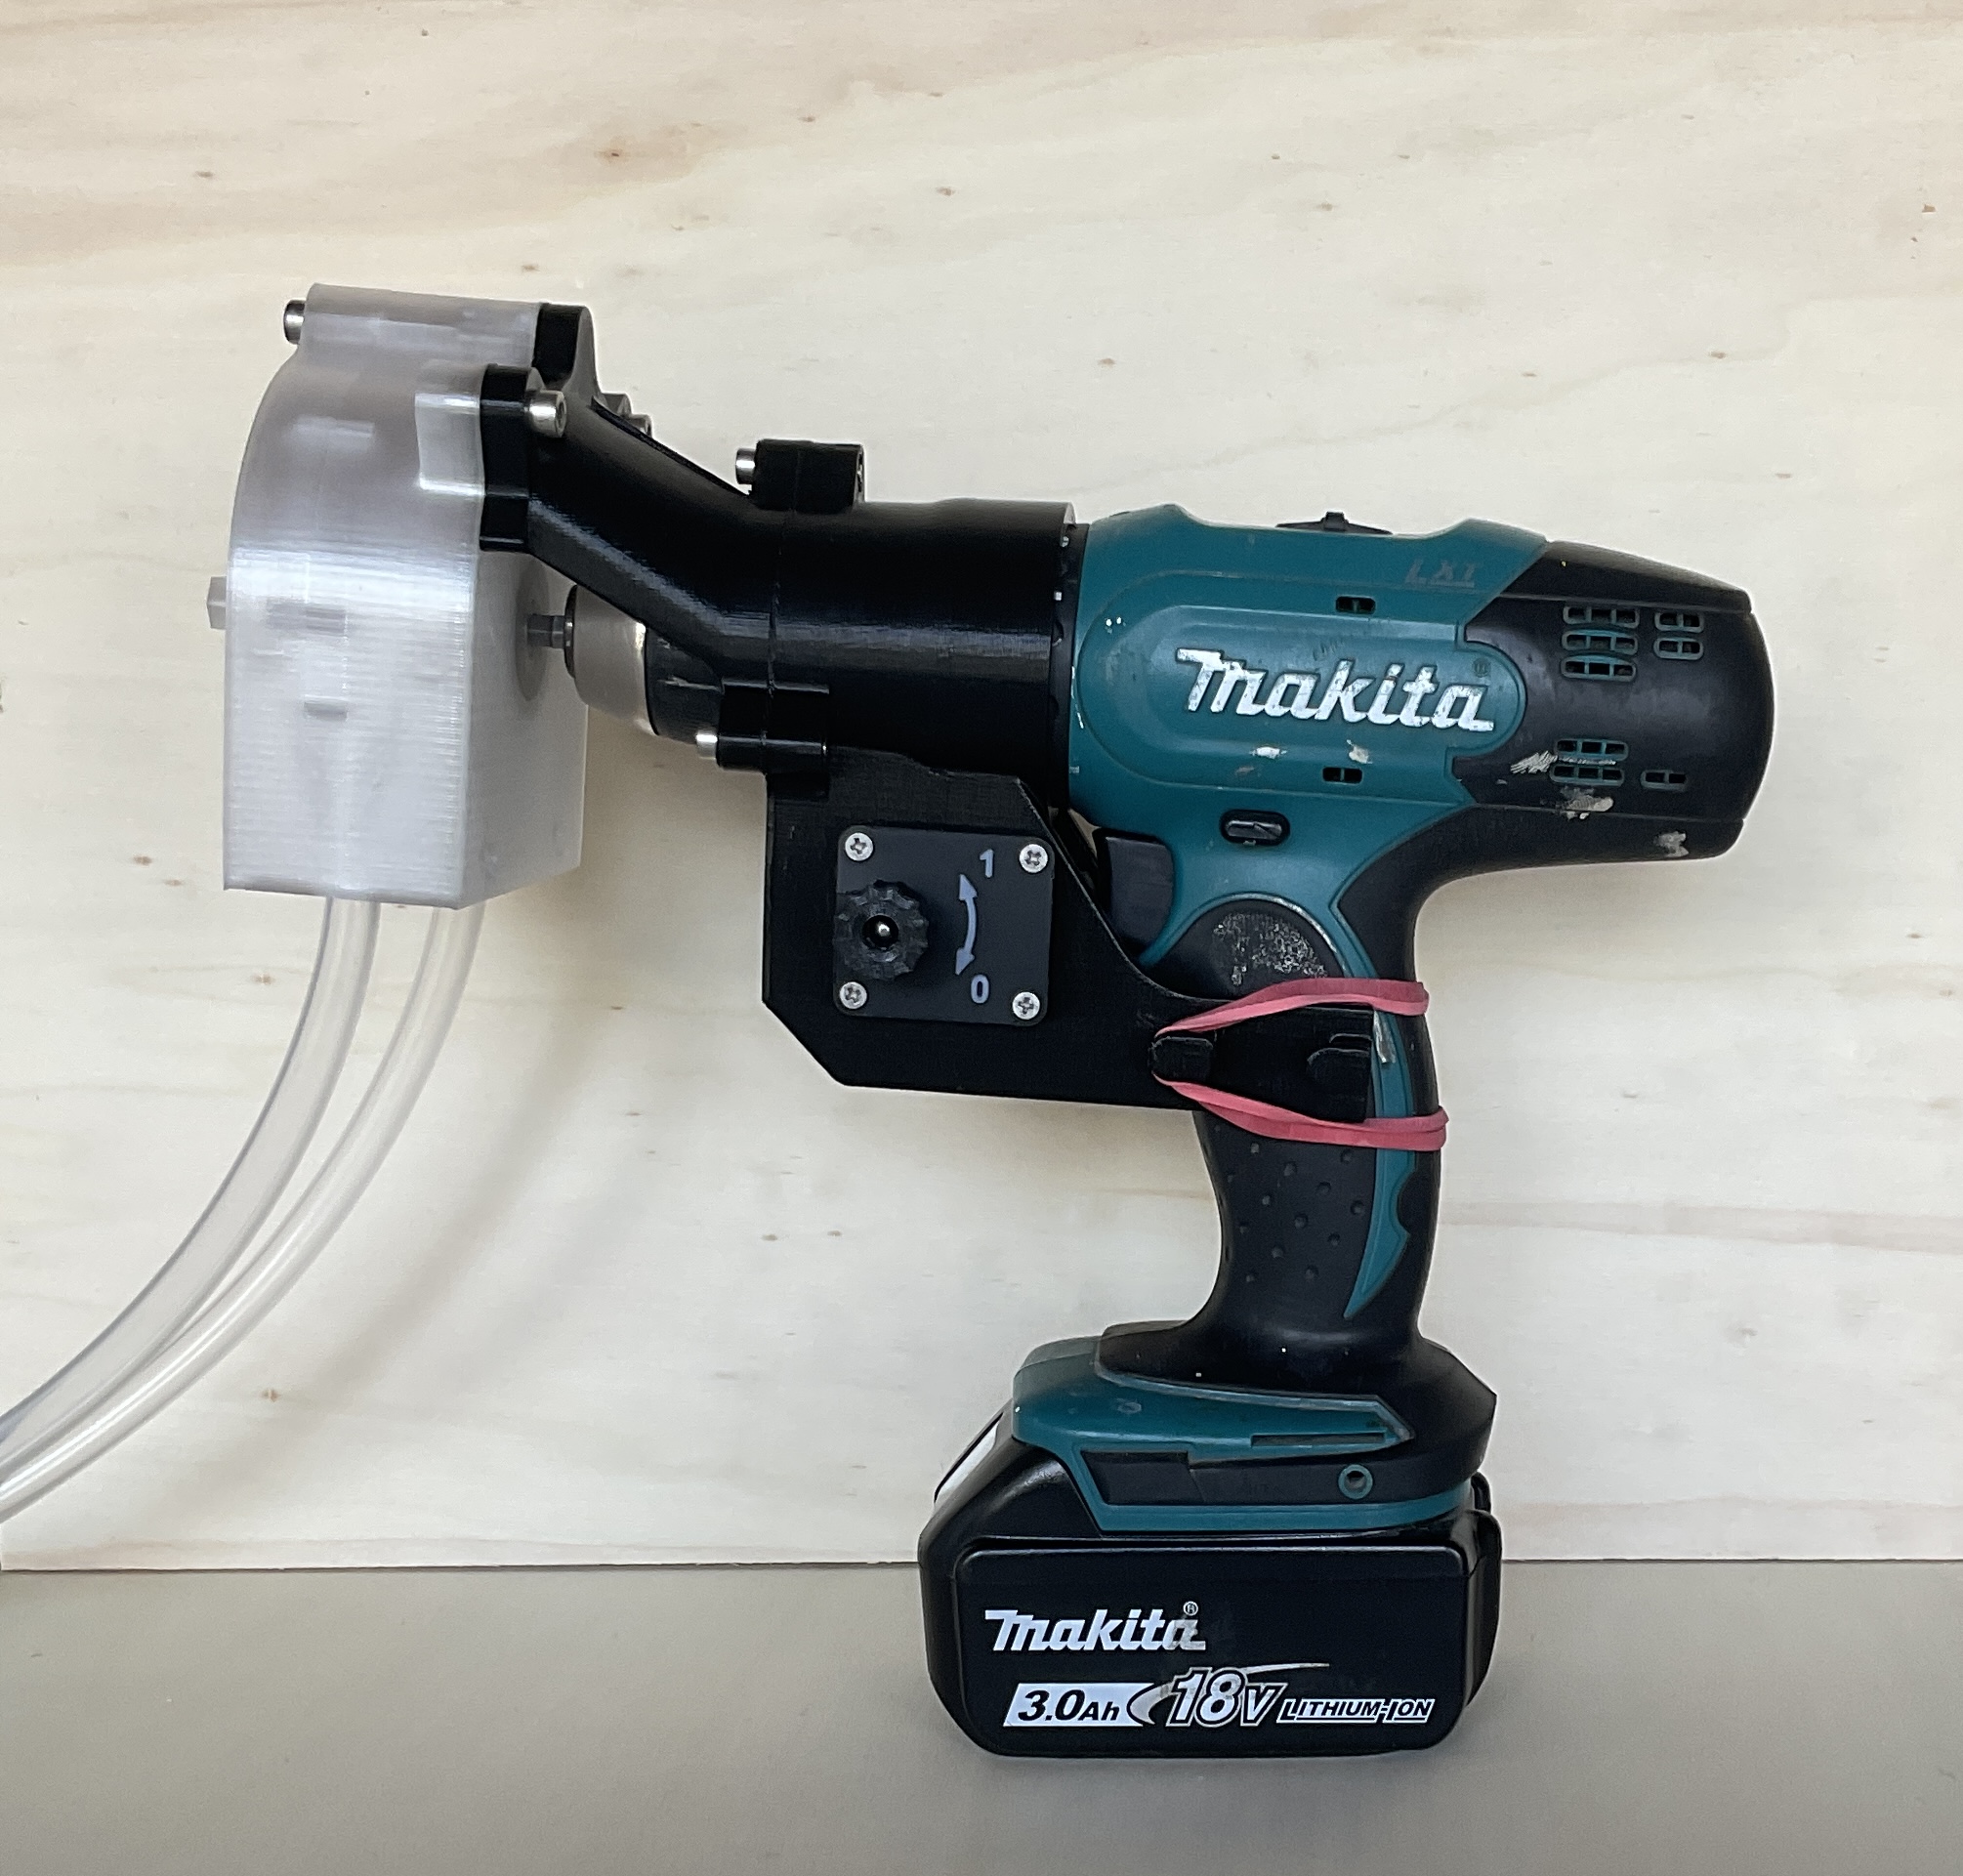
Adapter for cordless screwdriver - suitable for Makita
prusaprinters
<h4><strong>General description</strong></h4><p>The adapter is mainly created for use with a <a href="https://www.prusaprinters.org/de/prints/129756-peristaltic-pump-nominal-diameter-o8mm-for-fluids-">peristaltic pump</a>, where I didn´t want to press the power button of the screwdriver for a while to keep constant speed.</p><p>Using the adapter allows to adjust speed to your needs by rotating an adjustment wheel.</p><ul><li>Rotate in direction “1”: power button of screwdriver will be pushed and speed increases</li><li>Rotate in direction “0”: speed decrease until 0rpm - ensure button is not pushed</li></ul><p>Speed control of the screwdriver is solved by a gear mechanism. For the use of e.g. a peristaltic pump there was no need for a panic switch. In case of power needs to be switched off imediately and could not be achieved by adjustment wheel, remove battery by releasing connection to screwdriver.</p><p>If your application is not safe without having an emergency stop, do not use this adapter.</p><p> </p><h4>Installation of adapter to screwdriver and start up</h4><p>Remove battery before adding the adapter to avoid any unintended operation of the cordless screwdriver. Before mounting parts together, rotate adjustment wheel in direction “0” and ensure power button of screwdriver is not pushed by mechanism. Press the adapter to the cordless screwdriver and fix the screwdriver by a rubber band. Check if parts are fixed together and if power button of screwdriver is not pushed. If everything is okay, add the battery. Afterwards check if speed could be adjusted as expected. If not, do not use and check where´s the failure.</p><p> </p><p><strong>Disclaimer:</strong> The adapter is not checked against legal safety rules. Use of the adapter is on your own risk. </p><p> </p><h4>Printing </h4><p>1. Material: PETG</p><p>2. Parts:</p><p>The main housing and the adapter need partial supports, but it is easy to print. </p><p>For the gear mechanism there are two parts which are designed as print-in-place:</p><ul><li>Adjustment wheel with joint to housing<ul><li>After printing be careful by releasing both parts when knuckling in all directions to get adjustment wheel rotated.</li></ul></li><li>Lever with joint for connection to align with adjustment wheel axis<ul><li>After printing be careful by releasing both parts when knuckling in all directions to get “ball” with insert for hexagon nut rotated.</li></ul></li></ul><p>Cover with text and arrow</p><ul><li>Place the part to an area of the print bed where no reference point is checked before printing. </li><li>Print in two steps. First step is to print text and arrow with a layer height of 0,4mm with e.g. color white. In a second step print the rest with a color of e.g. black.</li></ul><p> </p><h4>Part list</h4><p>Printed parts (see .stl)</p><p>Hexagon nuts M3 | quantity: 7</p><p>Hexagon nuts M5 | quantity: 3</p><p>Threaded bar M3 | length: 60mm </p><p>Countersunk screw M3x12 | quantity: 4</p><p>Cylinder screw M5x20 | quantity: 3</p><p>Pin Ø3x29 | quantity: 1</p><p>Rubber band | quantity: 1</p><p> </p><h4>Assemble adapter</h4><ol><li>Prepare mechanical parts:<ul><li>Connect threaded bar and two nuts together by bonding (e.g. with superglue). Tighten the nuts and ensure surfaces of hexagon are alligned. Distance of nut and end of threaded bar should be about 1mm.</li></ul></li><li>Insert nuts to all hexagons and slut where a thread is needed.</li><li>Assemble threaded bar and adjustment wheel.</li><li>Insert lever through opening in housing .</li><li>Add pin to the lever and ensure same length on both sides.</li><li>Connect adjustment wheel and lever by turning the threaded bar into the nut and check clearence if pin is pushed into the pocket. If there is no clearence of at least 1mm, disassemble, shorten the threaded pin and mount again.</li><li>Assemble lever, cover-1 and cover-2 by using countersunk screws.</li><li>Check function of mechanism by turning the adjustment wheel. Pay attention not to disconnect threaded bar and nut.</li><li>Assemble the spacer by using the cylinder screws to connect the <a href="https://www.prusaprinters.org/de/prints/129756-peristaltic-pump-nominal-diameter-o8mm-for-fluids-">peristaltic pump</a>.</li><li>Prepare <a href="https://www.prusaprinters.org/de/prints/129756-peristaltic-pump-nominal-diameter-o8mm-for-fluids-">peristaltic pump</a> to get connected with the screwdriver, I recommend to use the side with the inner hexagon.</li><li>Mount the <a href="https://www.prusaprinters.org/de/prints/129756-peristaltic-pump-nominal-diameter-o8mm-for-fluids-">peristaltic pump</a> to the spacer by using the cylinder screws.</li><li>Fix a hexagon pin with size 6mm to the drill chuck.</li><li>Rotate adjustment wheel into direction 0 to the end position to ensure power button of screwdriver is not pushed if screwdriver is insert into the adapter.</li><li>Insert cordless screwdriver to the adapter and ensure hexagon pin is alligned with inner hexagon to reach end position in adapter.</li><li>Fix adapter and cordless screwdriver by adding the rubber band.</li><li>Check function and try out your mobile pump unit.</li></ol><p> </p><p>Link to peristaltic pump: <a href="https://www.prusaprinters.org/de/prints/129756-peristaltic-pump-nominal-diameter-o8mm-for-fluids-">peristaltic pump</a></p><p> </p>
With this file you will be able to print Adapter for cordless screwdriver - suitable for Makita with your 3D printer. Click on the button and save the file on your computer to work, edit or customize your design. You can also find more 3D designs for printers on Adapter for cordless screwdriver - suitable for Makita.
