Adafruit Titano Housing
prusaprinters
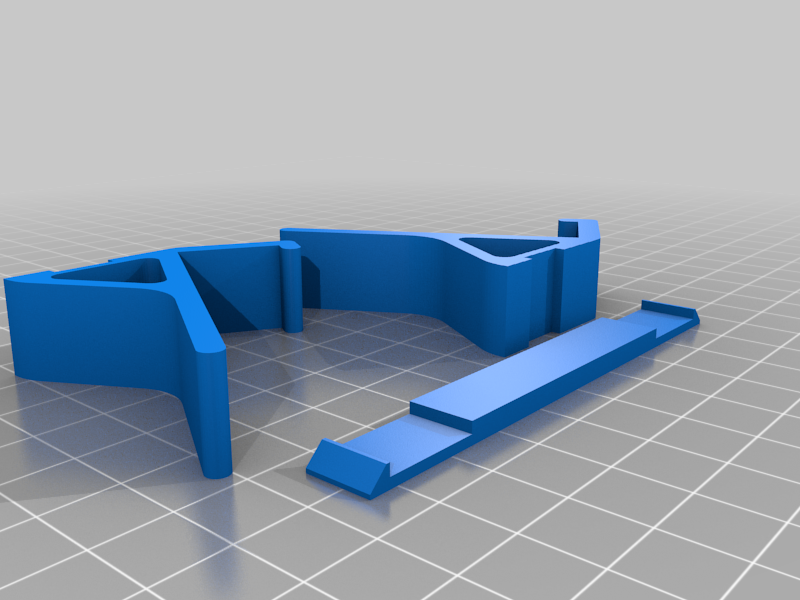
<p>The housing designed jietang1750 very nearly worked for me, but I wanted a few modifications so I imported the Lid and Body (housing) .STL files into Fusion 360 and made some changes.</p> <ul> <li>It was pointed out to me that there is a light sensor on the front of the display. I added a modified version of the lid that should expose the sensor. Please let me know if this works for you. If you are not using the light sensor, you can choose use the version without the whole.</li> <li>The original was in inches or some-such which meant it imported in the wrong scale in my slicer (I scaled the original by 2540). My STL are in millimeters.</li> <li>I wanted holes in the back of the case for Reset, LED, and the Speaker so I added those.</li> <li>I wasn't entire sure how the original Stand attached to the Body / Housing and the writeup said just about nothing. Either way, with my new cutouts in the back, the original stand wouldn't work, so I designed and included a lightweight stand for it. I may improve this in the near-term.</li> <li>As I wasn't using the original stand, I made the back of Housing flat (there was an indention for the stand there before - again, not sure how this was used other than maybe glue, but having a thin void on the bottom of the model is asking for ugly prints IMO).</li> <li>The screw holes in the Body and Lid weren't round so I rounded them making them slightly easier to use. This may have been intentional or possibly an artifact from the original export to .STL?</li> <li>The holes for the screws in the Lid were too small. This may have been intentional, but I didn't see a need for it so I widened them to be consistent with the screw holes in the Body.</li> <li>From the original models, when I put my Titano in the Housing and put on the Lid, there was almost exactly a 1mm gap between the Lid and the Body. Adafruit might have increased the thickness of the Titano since the original release? Either way, I increased the lip around the top of Housing by 1mm so the Lid fits correctly for me.</li> <li>I didn't have 14mm M2.5 screws, but I did have 16mm. Since I already gained 1mm in Housing I added 1mm to Lid.</li> </ul> <h3>Print Settings</h3> <p><strong>Printer Brand:</strong></p> <p>Prusa</p> <p class="detail-setting printer"><strong>Printer: </strong> <div><p>i3 MK3</p></div> <p><strong>Rafts:</strong></p> <p>No</p> <p class="detail-setting supports"><strong>Supports: </strong> <div><p>Yes</p></div> <p><strong>Resolution:</strong></p> <p>0.2</p> <p class="detail-setting infill"><strong>Infill: </strong> <div><p>20%</p></div> <p><strong>Filament:</strong> Prusa Prusament PLA Midnight Black</p> <p><br/> <p class="detail-setting notes"><strong>Notes: </strong></p> </p><div><p>Print in the provided orientations.</p> Especially for the stand, print at 0.2mm. For the Body and the Lid, it printed for me just fine at 0.3mm. <h3>Post-Printing</h3> <p>Attach attach the 3 stand pieces using CA glue (superglue) or similar.</p> <h3>How I Designed This</h3> <ul> <li>Imported the original .STL files into Fusion 360</li> <li>Converted Mesh to BRep</li> <li>Simplified the model</li> <li>Made desired modifications including making the back of the housing flush since I'm not using the originally included stand.</li> <li>Designed a stand in Fusion 360</li> </ul> </div></p></p></p> Category: DIY
With this file you will be able to print Adafruit Titano Housing with your 3D printer. Click on the button and save the file on your computer to work, edit or customize your design. You can also find more 3D designs for printers on Adafruit Titano Housing.
