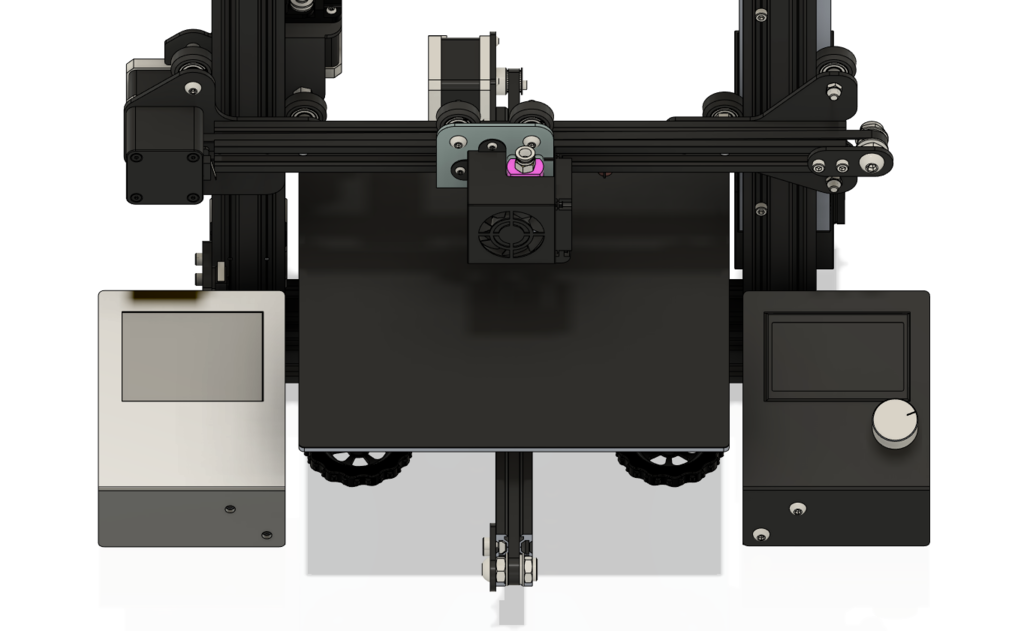
Adafruit PiTFT Plus / Pi 3B+ Display for Ender 3/Pro
thingiverse
Warning: This design is specifically tailored for the exact components listed in the Bill of Materials (BOM) and will not work with any other parts. If you choose to use anything outside of the BOM, your results may vary. For mounting the PiTFT Plus and Raspberry Pi 3B+ in a case on the left side of the Ender 3/Pro that matches the stock screen on the right side of the printer. This design supports using all cables, including the Pi Camera Ribbon Cable, except for the HDMI port. If you have the stock end stop, you cannot use the HDMI port. However, if you have ABL (Automatic Bed Leveling), you can remove the stock end stop and utilize the HDMI port. The temperature of the Pi is approximately 50-55C in a 70F room environment. I've never observed it exceeding 61C during operation. If you plan on performing any soldering on the back of your PiTFT Plus, please check out my Safety Cover to protect the glass screen linked below: https://www.thingiverse.com/thing:4183966 F3Z File Included BOM: * 7x M3x8 mm Screws * Glarks 510Pcs M3 M4 M5 304 Stainless Steel Hex Socket Head Cap Screws (available on Amazon) https://www.amazon.com/gp/product/B0734NVR48 Components: * Raspberry Pi 3 Model B+ (Raspberry Pi website) https://www.raspberrypi.org/products/raspberry-pi-3-model-b-plus/ * LoveRPi Performance Heatsink Set for Raspberry Pi 3 B+ (Amazon) https://www.amazon.com/dp/B018BGRDVS * Adafruit PiTFT Plus 480x320 3.5" TFT+Touchscreen (Amazon) https://www.amazon.com/dp/B017PDWNKE Software Installation: Due to Thingiverse's formatting issues, I have created a Gist for this project: https://gist.github.com/ChaosBlades/1ff48d121fbcc263c35681e13705328b Case Assembly Notes: * Install the Pi Camera Ribbon Cable now if using one * Sandwich the Pi between the Support and Base * Install the 3 Screws * Feed your Wires / Pi Cam Ribbon Cable through the I/O hole on the Face * Install the remaining 4 Screws * When installing onto the Ender 3, start both screws loose * Press down firmly on the section of the Face just below the Touch Screen * Then, while holding it down, tighten the screws. The screen should now be secure and not wobble up and down when touched.
With this file you will be able to print Adafruit PiTFT Plus / Pi 3B+ Display for Ender 3/Pro with your 3D printer. Click on the button and save the file on your computer to work, edit or customize your design. You can also find more 3D designs for printers on Adafruit PiTFT Plus / Pi 3B+ Display for Ender 3/Pro.
