Action CAM pattern grid (Denver 5030/8030)
thingiverse
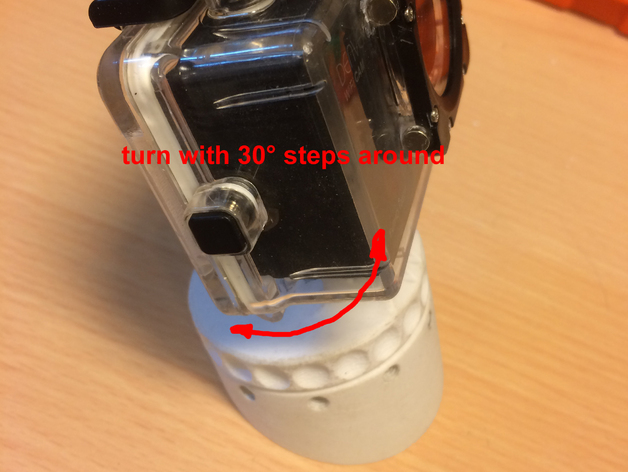
The bottom part is a straight line, not an angle. To attach it to the mirror of my motorcycle, I need a part with an angled design that matches the 30° turning pattern. That's what you'll be creating: Print two parts with supports in place. 1. Insert 6 M5 threads into the holes on the bottom part. 2. Assemble top and bottom parts using one Allen head socket screw (M6x22mm) from the top, followed by a compression spring (optional), then a self-locking nut (M6). 3. Insert six spheric balls with a 4mm diameter, obtained from a destroyed ball bearing. 4. Cut six O-ring seal parts with a cord diameter of 3.5-4mm to 6mm in length and insert them into the corresponding holes. 5. Thread six headless screws (M5) into these holes and check their torque strength by rotating the upper part. Well done! Print Settings: Printer: Prusa i3 Rafts: Yes Supports: Yes Resolution: 0.1mm Infill: 50% Notes: I printed with white ABS at 225°C and 100°C bed temperature. To prepare your glass bed for a good print, apply an ABS slurry made from old support material mixed with acetone. How I Designed This I needed more than just a straight bracket. First, I designed a fixed bracket shoe for my action cam, which worked fine. But after my last motorcycle trip, I realized it would be great to capture sideview or self-videos. That's why I created this turnable pattern grid bracket. Get it and print it!
With this file you will be able to print Action CAM pattern grid (Denver 5030/8030) with your 3D printer. Click on the button and save the file on your computer to work, edit or customize your design. You can also find more 3D designs for printers on Action CAM pattern grid (Denver 5030/8030).
