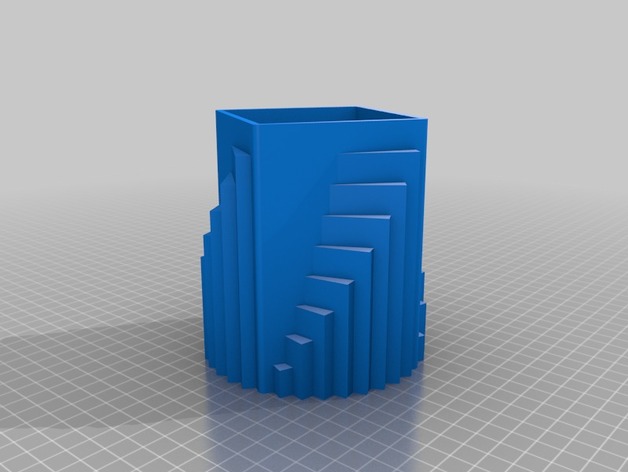
A Step-based Design of a Pencil Holder
thingiverse
This is just a random sketch I came up with while I was bored in study hall at school. I still don't have a 3D printer so I can test these out as a practical 3D print. I'm just modeling for now and preparing to get enough money to buy a $200 XYZPrinting Da Vinci Junior 1.0 since I'm now in the process of getting my first job. Please check out on how I built this model below. If you'd like to, please go ahead and download this STL and let me know if printing this was successful! Thanks for reading and go check out some of my other models on my profile. How I Designed This The Building Process of the "Stepped Pencil Holder" First, I went into Adobe Illustrator and created a 3" square. Then, I copied and placed the copied square in front. Next, I double-clicked the rotate tool and turned it by 10 degrees. I repeated those steps until I got a complete "circle" in the middle of the multiple squares. I saved it as an SVG file and imported it into a new drawing in 123D Design. From there, I extruded each side up, starting from the top being 4.5" and slowly shortening each by .5". After that, I made a smaller square (2.75" x 2.75") on the top and the bottom. The top square got extruded -3.75", while the bottom square got extruded .5", giving me a gap in the middle for the pencils and a hole in the bottom to keep it lightweight and save on plastic if it was printed. Finally, I added some fillets and chamfers until I was happy with the model. If you're a beginner at 3D modeling and this helps you learn a bit more about it, you can ask me more questions if you'd like. Iso view of the Pencil Holder Bottom view of the Pencil Holder
With this file you will be able to print A Step-based Design of a Pencil Holder with your 3D printer. Click on the button and save the file on your computer to work, edit or customize your design. You can also find more 3D designs for printers on A Step-based Design of a Pencil Holder.
