A-Frame Birdhouse
prusaprinters
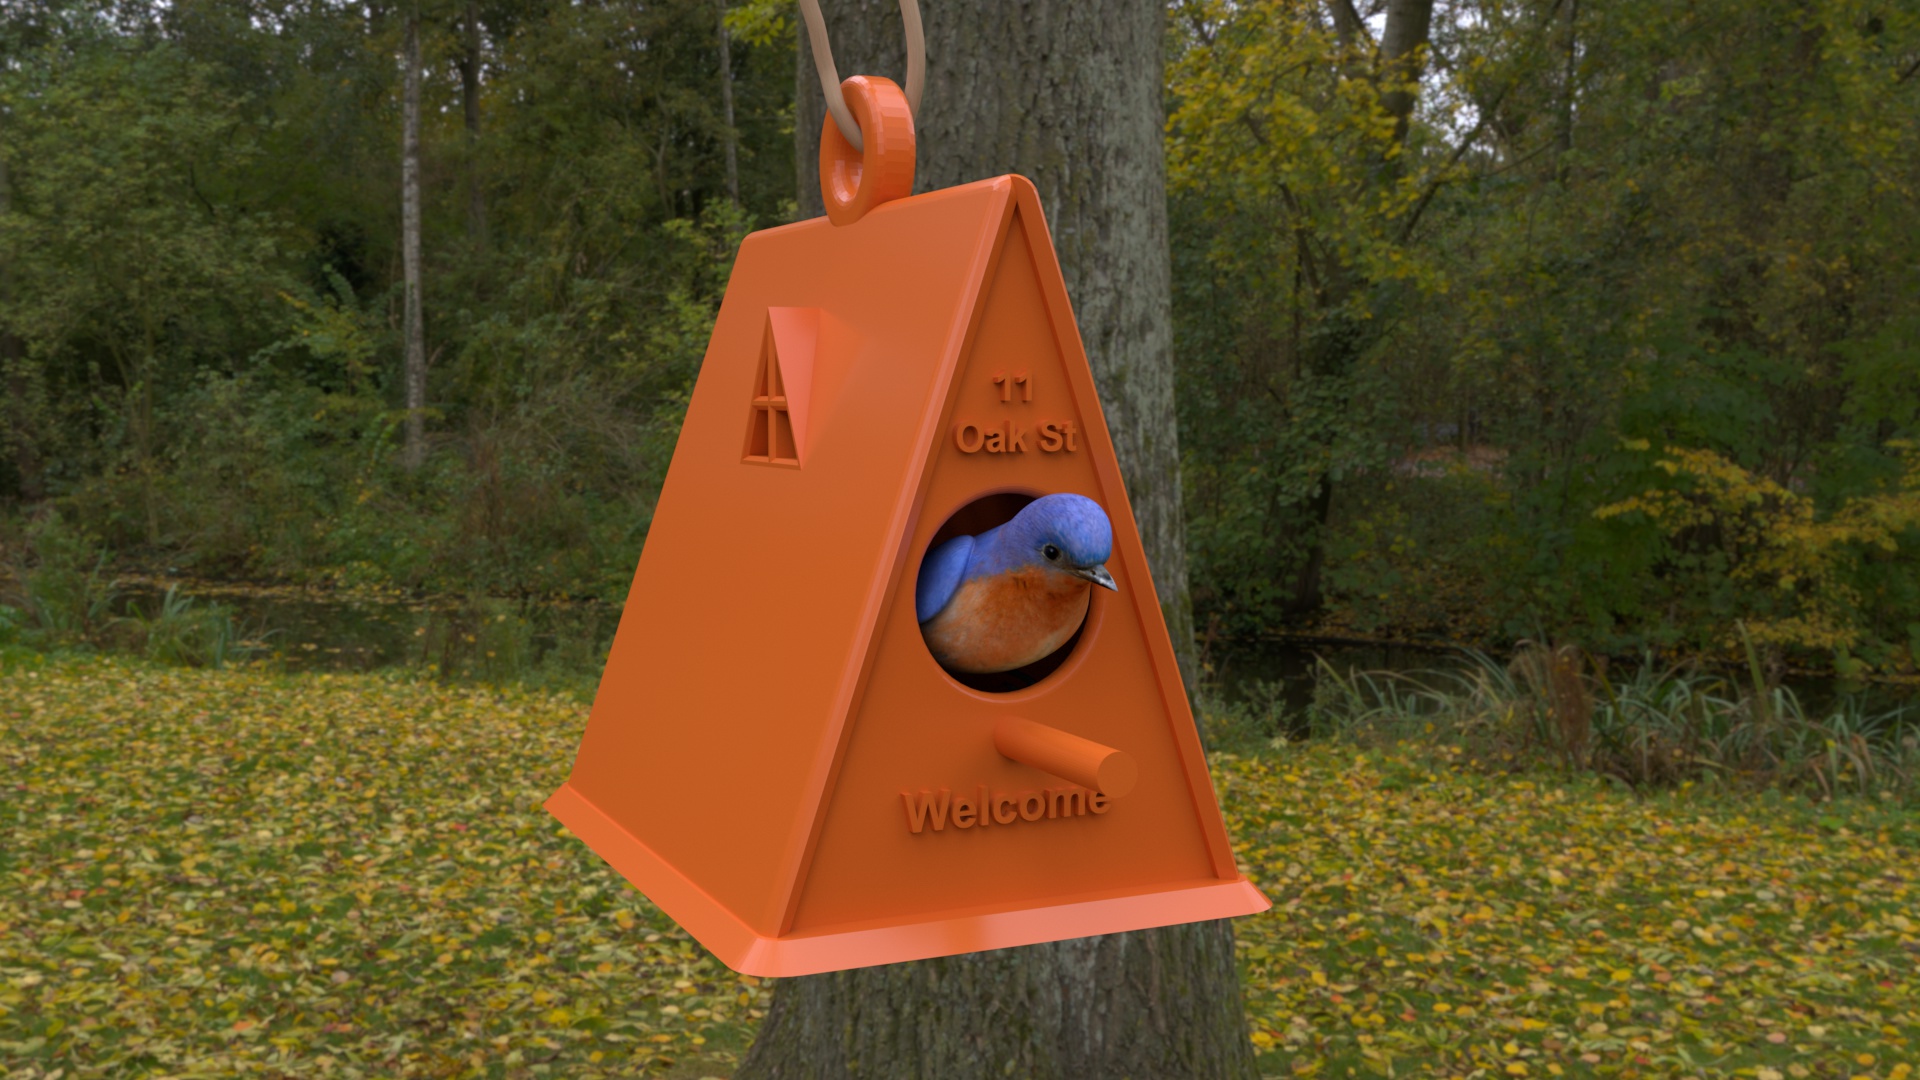
<p>Give your feathered neighbors a place to raise a family! This is an A-Frame Birdhouse designed to be printed in two parts and without supports. The first part is the birdhouse and the second part is the perch. I printed this in ASA, but I'm sure that PETG would be fine as well (at least for a year or two outside.) This was designed in Fusion 360. The first picture is a render in Cinema4D with the Arnold renderer. The second picture is a render within Fusion 360 to show the two parts. The last picture is an actual print.</p> <h3>Print instructions</h3><p>The gCode file is set up to print in PETG. However, I believe the best material for this is ASA, which is what I used. (The picture of the print is in PETG to test the file.) If you do use ASA (or ABS), this must be printed in an enclosure because it will most likely split due to the design. Additionally, the gCode and amf file have the perch at 40% infill with the default extrusion width at 0.9.</p> <p>Choose your color carefully. Darker colors are probably fine if it will be used in a shaded area. The birds will want the interior warm for the eggs, but a very dark color can make it too warm if it is placed in direct sunlight. I have added some vents (the side windows) to help keep the temperature from getting too hot.</p> <p>Finally, I included the step file. Some people like to personalize prints, so have fun! I mean, 3D printing is all about making something unique, or customizing a design for your needs.</p> <p><b>Using The gCode</b><br/> The gCode is all set for the Prusa MK3/s in PETG because I believe PLA may not work well in the summer in most places. This file has the perch set at 40% infill with a default extrusion width of 0.9 (up from the default of 0.45.) I also have the entire print at a 0.2 layer height to help add strength.</p> <p><b>Using The amf File</b><br/> You can use the included amf file if you want to use a specific material more suited to your needs. Again, the infill for the perch is set to 40% with a default extrusion width of 0.9. Make sure you adjust the layer height to 0.2 and set your material correctly. Also make sure that you do not have supports turned on! If you do, the print time will double and you will have a bad day trying to remove the supports inside. They are not needed; this was designed to be printed without supports. PursaSlicer's aggressive support generation will have a field day with this!</p> <p>If you have not used an amf file in PrusaSlicer, simply go up to the '<i><b>File</b></i></b>' menu, and select '<i><b>Import</b></i></b>'. Under the Import menu, select '<i><b>Import STL/OBJ/AMF/3MF...</b></i></b>' and select the file called "<i>birdhousev2zip.amf</i>".</p> <p><b>The stl Files</b><br/> I have included two stl files, if this is what you are more comfortable with. You should use a layer height of at least 0.2 to provide added strength, since this will be outside and may get bounced around in poor weather. Additionally, the perch may be the part that gets knocked around the most so I strongly suggest printing the perch at 40% infill and increasing the default extrusion width to 0.9. This is designed to not use any support.</p> <p><b>Putting It Together</b><br/> All that is needed is to screw the perch into the opening in the front. Because of the print orientation, the hole for the perch may need to be cleaned out a little if the perch is too tight to screw in.<br/> Then hang it from a tree, shepherd's hook, or any other place.</p> <p><b>UV Spray For Non-ASA Materials</b><br/> If you do use PETG or ABS on this print, you can try some UV-resistant clear spray (such as Krylon K01305.) I have not tried this yet but I will this summer. I have read of people spraying this on their car headlights and it has been reported that this lasts for many years. However, I would test the UV spray on a small print of the material you use to make sure that there is not an unexpected reaction.</p> <p><b>Final Comments</b><br/> As in my other prints, I downloaded the files from this site and tested each one (just to make sure nothing went wrong during the upload.) I know this is probably not necessary, but I would feel bad if I wasted your time and filament.</p> <p>Please let me know if there are any issues so I can address them. While this is not a difficult print, it does take most of a day to print and uses a significant amount of filament (just over 200g.) So I would like to make any needed adjustments to help out and avoid wasting others' time and material. While the many copies I printed all worked out, each material, printer, and environment is unique.</p> <p>Finally, let me know if I can make any other improvements!</p>
With this file you will be able to print A-Frame Birdhouse with your 3D printer. Click on the button and save the file on your computer to work, edit or customize your design. You can also find more 3D designs for printers on A-Frame Birdhouse.