63mm Ball Valve Type Non-Clog Blast Gate for Workshop Dust Extraction Network
prusaprinters
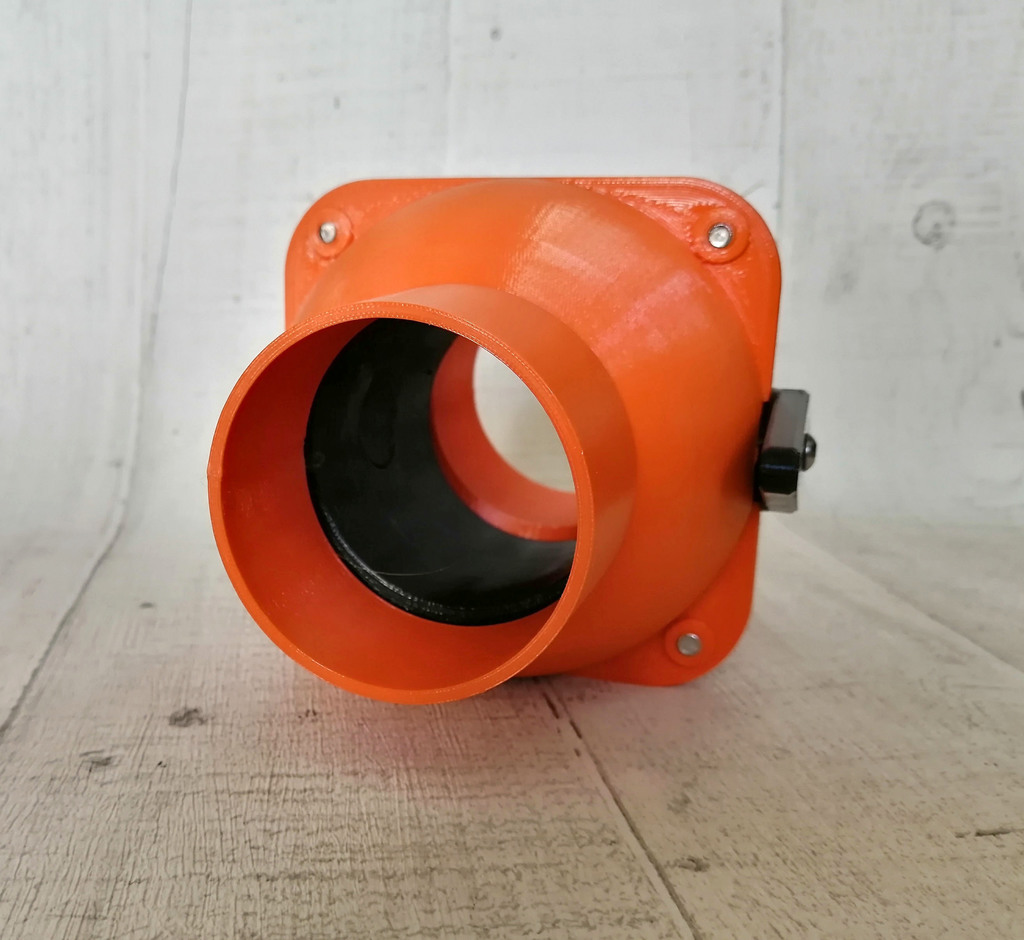
<p>Update 26 Jul 21</p><p>See this YouTube video by Nils Rasmusson ([<a href="/nilsynils/designs">https://www.thingiverse.com/nilsynils/designs</a>]) for a performance comparison of this blast gate with other commercially available designs [<a href="https://www.youtube.com/watch?v=epJ929kZzc4&t=8s&ab_channel=LRN2DIY">https://www.youtube.com/watch?v=epJ929kZzc4&t=8s&ab_channel=LRN2DIY</a>]</p><p>Update 10Nov20</p><p>At the request of Michael Tipman (WoodFlipWorkshop), STEP files added.</p><p>Update 01Sep20</p><p>A 100mm version of this ball valve is here: Print <a href="https://www.prusaprinters.org/prints/137794-100mm-ball-valve-type-non-clog-blast-gate-for-work">137794</a> </p><p>I have two previous designs of blast gate that I hoped would be clog free, a sliding blade (Print <a href="https://www.prusaprinters.org/prints/137802-63mm-sliding-blade-non-clog-blast-gate-for-worksho">137802</a>) and a butterfly valve type (Print <a href="https://www.prusaprinters.org/prints/137801-63mm-butterfly-throttle-valve-type-non-clog-blast-">137801</a>)</p><p>The sliding blade works OK but needs enough space either side / end for the slider to operate. The butterfly valve type is contained within it's own volume when operated, and works well for dust and small particles, but does catch longer/ larger shavings on the butterfly (such as from my planer/thicknesser) and these back up along the extract ducting. So, I had another think...</p><p>This latest design is based on a ball valve. I've printed two and had them working successfully for a few weeks without clogging. One has been fitted where it extracts fine sawdust from my bandsaw, and one where it extracts the larger shavings from my planer/thicknesser. The downside to this design is that it's a bit bulky when compared to the other two, but it's fit wherever I needed it to and it does operate within it's own volume.</p><p>In addition to printing filament you'll need 4 short M5 bolts to fasten the two halves of the tube together (I used M5 x 10mm socket head set screws), an M4 x20mm bolt to hold the bearing on to the ball, and an M4 x25mm bolt to hold the lever onto the ball. The holes in the tube / ball housing may need to be eased with a suitable drill bit - 5mm on one side and 4.2mm (for tapping to M5) on the other.</p><p>You need to print 2 tubes, 1 ball, and 1 lever and bearing set for each gate. It's useful to use different colours for the lever and for the tube so that the position of the ball (open or closed) can be seen easily</p><h3>Print Settings</h3><p><strong>Printer Brand:</strong></p><p>Anycubic</p><p><strong>Printer: </strong></p><p>Kossel</p><p><strong>Rafts:</strong></p><p>No</p><p><strong>Supports: </strong></p><p>No</p><p><strong>Resolution:</strong></p><p>0.25mm</p><p><strong>Infill: </strong></p><p>10% (grid)</p><p><strong>Filament:</strong> Ooznest PETG Orange & Midnight Black</p><p><br> </p><p><strong>Notes:</strong></p><p> </p><p>I printed the ball with a small brim to help keep it attached to the build plate.</p><p>Post-Printing =============</p><p><strong>Assembly</strong></p><p>To assemble the blast gate: First drill out the 4 fixing holes in one of the tubes to 5mm diameter so that M5 bolts can pass through. Drill out the holes in the second tube to 4.2mm diameter and tap them to M5. (M5 bolts should be able to self tap into the undrilled holes in the second tube but these may need easing slightly for this to happen. Clean away the brim (if you've used it) on the base of the ball.</p><p>Fasten the lever to a square socket on one side of the ball with an M4 x 25mm bolt. I orientate this along the flow axis so that it shows whether the gate is open (along axis) or closed (across axis).</p><p>Fasten the bearing to the other square socket with an M4 x 20mm bolt.</p><p>Place the ball inside one tube with the bearing and lever set into the recesses.</p><p>Fit the second tube over the top and bolt together with M5 x 10mm bolts.</p><p>You should be able to turn the ball using the lever.</p><p> </p><p> </p><p> </p><p>Category: Machine Tools</p>
With this file you will be able to print 63mm Ball Valve Type Non-Clog Blast Gate for Workshop Dust Extraction Network with your 3D printer. Click on the button and save the file on your computer to work, edit or customize your design. You can also find more 3D designs for printers on 63mm Ball Valve Type Non-Clog Blast Gate for Workshop Dust Extraction Network.