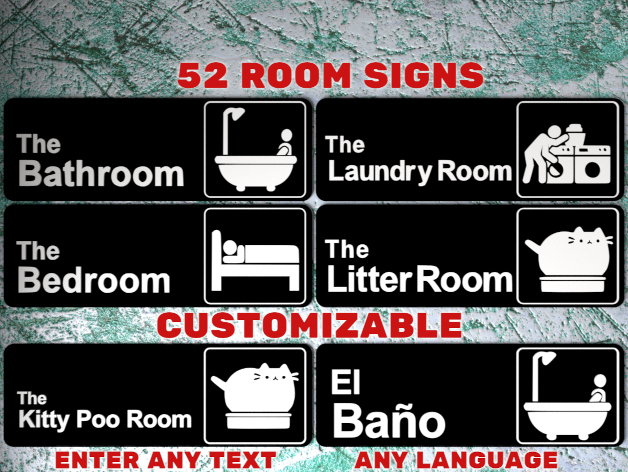
54 Room Signs Like "The Office" Logo
prusaprinters
<h4>54 Room Signs Like "The Office" Logo</h4><p>These are residential room signs designed in the style of the logo for "The Office" TV show.</p><p>Please post your makes so I can see which signs/pictograms are the most popular.</p><h3>Dual Colors with a Single Extruder</h3><p>Printing multiple colors with a single extruder is really easy as long as the design has only a single color on each layer, such as is the case with these signs.</p><p>I printed them with a single extruder by pausing the printer after the black part had completed and then swapping in a spool of white filament. My printer doesn't support the M600 pause command so I have to pause it manually. The printer shows me the height it's at while it's printing and as soon as it finishes the layer at 2 mm I pause it using the menu on the printer control panel.</p><p>Most printers support the M600 G-code command, so you may be able to add pauses in using your slicer program. You may find the Colorprint tool useful if your printer supports the M600 command, but your slicer doesn't support adding pauses: <a href="https://www.prusaprinters.org/color-print/">https://www.prusaprinters.org/color-print/</a></p><p>After switching filament colors, the nozzle may not be primed and the first bit printed may be under-extruded, so to compensate for this, I always add in a little cylindrical tower and get the slicer to start the layers on that tower. For Cura, the settings that control this are Layer Start X and Layer Start Y, which are in the Travel section. I put the cylinder above the top right corner and set Layer Start X and Layer Start Y to a high number like 500. I've included the tower I use.</p><h3>Using the Customizer</h3><p>This thing has a customizer .SCAD file that allows you to enter your own room names. It creates a model with the text, the square outline, and the rectangular base. Just add any one of the 55 pictograms from this thing and it's ready to slice and print. The customizer also creates a text only STL and the base and the square outline are included in this thing, combined and separate, in case you have a dual or multi extruder and want separate STLs for each part.</p><p>You will have to first install OpenSCAD (free software) on your own computer to process the .SCAD file and present the customizer parameters. <a href="https://openscad.org/downloads.html">Download OpenSCAD</a> and get started. For further details on running the customizer see DrLex's instructions on <a href="https://www.dr-lex.be/3d-printing/customizer.html">How to Run Customizer on Your Own Computer</a>.</p><p>Each of the parts is in the correct location to make a complete sign, so as long as your slicer leaves them there you won't have to reposition anything.</p><p>Alternatively you could use any other 3D modeling software, such as Fusion 360, to create the text if you don't want to install OpenSCAD.</p><h4>Font Used in Customizer</h4><p>By default, the font specified to be used for the text is Arial Bold, but you can use any font available on your system. The OpenSCAD "Help=>Font List" menu item shows what fonts are available. If you specify a font that is not available it will use the OpenSCAD default font, which is Liberation Sans.</p><p>To make a font available to OpenSCAD you have three options:</p><ul><li>Install the font to the system. The procedure for installing system fonts is dependent on what operating system and what version you are using (Ubuntu Linux 16.01, Ubuntu Linux 20.04, Windows 7, Windows 10, Mac OS 9, Mac OS X, etc. ). If you don't know how to install a font on your system then search the web for instructions.</li><li>Add the font file to your fonts folder, creating the folder if it doesn't already exist. On Linux this would be something like "/home/YOURUSERNAME/.fonts" and on Windows 10 it would be something like "C:/Users/YOURUSERNAME/.fonts".</li><li>Add the font to the folder that contains the OpenSCAD file that you want to use the fonts. You will also have to add to the OpenSCAD file the 'use <fontname.ttf>' command substituting the filename of the font for "fontname.ttf".</li></ul><p>Close OpenSCAD if it was open while you were making the font available and then relaunch it after you have installed/added the font.</p><p>For additional details, see the Using Fonts and Styles section on the following page:<br><a href="https://en.m.wikibooks.org/wiki/OpenSCAD_User_Manual/Text">https://en.m.wikibooks.org/wiki/OpenSCAD_User_Manual/Text</a></p><h4>Combining parts in Slic3r:</h4><p>First load in the base part STL or the combined part STL. Then click the "Settings..." button - a window will pop up. Click the "Load part..." button and load each of the other parts needed to make a complete sign. It's then ready to slice.</p><h4>Combining parts in Cura:</h4><p>I haven't been able to figure out how to get Cura 3.6.0 to leave the models in their original locations when they're loaded into the slicer. It always moves them to the center of the build plate or the closest spot if the center is already occupied. I've found the relevant settings, but they're ignored. I can move them after they're loaded, but it's annoying to have to do that so I always use the FlashPrint slicer to merge any multi-part models and then save as a single part to load into Cura. If your slicer is giving you the same grief, here are the part locations specified as [X,Y,Z] coordinates:</p><figure class="table"><table><tbody><tr><td>Part</td><td>Location</td></tr><tr><td>Base</td><td>[0, 0, 0]</td></tr><tr><td>Square</td><td>[58.275, 0, 2]</td></tr><tr><td>Text</td><td>[Xᵗᵉˣᵗ, Yᵗᵉˣᵗ, 2]</td></tr><tr><td>Pictogram</td><td>[58.125, 0, 2]</td></tr></tbody></table></figure><p><i>If you want, you can just place the text part where you think it looks good, in which case you can just ignore the next paragraph.</i></p><p>The location of the text is dependent on the letters in the text and the scaling of the text . The text is automatically scaled if there are more than 8 letters in the room name. For unscaled text, the Y coordinate is -7.07. The following formula aren't exact but they should place the text in a good location close enough to where they should be:<br>Xᵗᵉˣᵗ = -84 - (TextXsize/2)<br>Yᵗᵉˣᵗ = -7.07 - (27.67-TextYsize)/2.66</p><p>If your print won't be dual-extrusion, you can use the combined model and then you only have to place the pictogram.</p><h3>Available Signs</h3><p>There are signs for the following rooms:</p><ul><li>The Attic</li><li>The Ballroom</li><li>The Basement</li><li>The Bathroom</li><li>The Bedroom</li><li>The Billiard Room</li><li>The Cold Room</li><li>The Computer Room</li><li>The Deck</li><li>The Dining Room</li><li>The Dressing Room (alternative pictogram also included)</li><li>The Dungeon</li><li>The Exercise Room</li><li>The Exit</li><li>The Furnace Room</li><li>The Games Closet</li><li>The Gaming Room</li><li>The Garage</li><li>The Grow Room</li><li>The Guest Bedroom</li><li>The Jam Room</li><li>The Kitchen</li><li>The Laundry Room</li><li>The Library</li><li>The Linen Closet</li><li>The Litter Room</li><li>The Living Room</li><li>The Makerspace</li><li>The Man Cave</li><li>The Nursery</li><li>The Nurse's Office</li><li>The Office</li><li>The Pantry</li><li>The Party Room</li><li>The Playroom</li><li>The Poo Room</li><li>The Private Room</li><li>The Reloading Room</li><li>The Sauna</li><li>The Sewing Room</li><li>The Shack (amateur/ham radio)</li><li>The Studio</li><li>The Study</li><li>The Sunroom</li><li>The Theatre</li><li>The Top Secret Room</li><li>The Toy Room</li><li>The TV Room</li><li>The Utility Room (oops, should be called Electrical Room, I thought a utility room was where the utilities came into the house, but it's basically a laundry room)</li><li>The VR Room</li><li>The Washroom</li><li>The Wine Cellar</li><li>The Woman Cave</li><li>The Workshop</li></ul><p>Update 2022-05-19 - Added the pictogram for the original "The Office" sign. </p><p>If you have any requests for other rooms, feel free to drop me a message with your request.</p><h3>Print Quality Tip</h3><p>For the best looking sign, you'll want the top infill area of the (black) base part of the model to be a single continuous solid print from one corner to the other. To accomplish this in Cura, set the Skin Expand Distance to a high number like 30. For most signs, 5 is enough, but setting it higher has no adverse effect.</p><h3>How I Created The Room Signs</h3><p>The text, the rounded rectangular base and the rounded square around the pictogram were created with OpenSCAD.</p><p>The pictograms were created with Gimp (bitmap) → Inkscape (vector drawing) → OpenSCAD (OpenSCAD program) → STL.</p><p>The fine details of all pictograms are precision crafted to ensure that all printed details are at least 0.4 mm wide so that the slicer won't have any drop-out areas for a standard 0.4 mm nozzle. Wherever design space allowed, printed details were made 0.8 mm or larger.</p>
With this file you will be able to print 54 Room Signs Like "The Office" Logo with your 3D printer. Click on the button and save the file on your computer to work, edit or customize your design. You can also find more 3D designs for printers on 54 Room Signs Like "The Office" Logo.