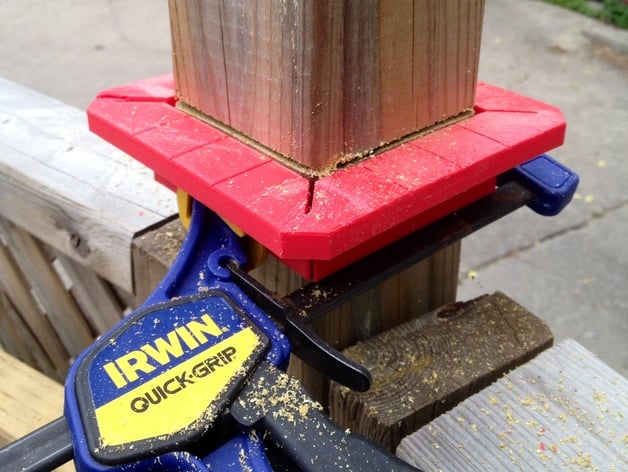
4x4 Post Cutting Guide
thingiverse
Cutting a 4x4 Post Like a Pro: A Guide Using a Hand Saw or Power Tool. Whether you're tackling fence post maintenance or simply cutting down timber for DIY projects, knowing how to effectively use a hand saw or power tool is crucial. For this particular guide, I used the approach to remove the tops of my own fence posts and achieved flawless results in mere minutes. My solution involved utilizing a cutting guide designed specifically with versatility in mind. This custom-cutting guide makes the entire process surprisingly easy. You merely need to slide it along the length of your 4x4 post until you reach the desired cut line, secure it firmly in place using clamps, and then proceed to run the saw directly across the designated path. One of the notable advantages is that once printed accurately according to instructions (don't forget to read up on proper use!), you can rest assured that your cut surface will end up being as flat as can be, and a level on it is enough for precision alignment. Moreover, the slots embedded at the corners grant just the right amount of flexibility so it easily slips past any irregularities in your fence posts' shape. If there were any issues with this method due to uneven fencing materials I did come up with an alternate approach; as it happens to work quite effectively too. Actually the primary use case is not to serve as a handsaw cutting guide at all but as an auxiliary tool for holding a circular saw steady and smooth out the cut line precisely when handling those awkwardly long 4x4 boards that you encounter in most fence installation scenarios or general DIY building endeavors alike; however following the path outlined here did end up being more expedient then utilizing said saw setup after initially considering so. Please take note though: since plastic is subject to significant degradation upon impact, especially once subjected to force and cutting operations (handsaws are no exception) therefore repeated use will cause them eventually give way hence leading possibly requiring an immediate need to have an extra print on hand. My own experiences included such instances notably after making it last only a handful of attempts at which point upon handling that first one which ended cracking when being driven through curved uneven sections. For creating your own replica follow my instructions: You will require a printer setup capable enough to process larger models at moderate resolution settings (.3mm height). Given that I chose the specific layer heights to print mine (for optimal structural stability during build-out process as opposed to mere aesthetics alone); do make sure you select dimensions suitable allowing an uninterrupted span in range up-to around five-and-three-eighth's by a half of that across. Printing from provided orientation (.STL format included below). Point your surface away at angle - upwards, thus negating unwanted stress which generally could result should any degree level deviations within machine calibration prove difficult leading potential curl formation. One quick fix is to use those easily sliced mouse ear shaped cuts near each corner with precision blade type cutters; specifically items in line similar but not limited exact brands - 'Olfa' and 3m branded models can easily get that piece neatly separated right off.
With this file you will be able to print 4x4 Post Cutting Guide with your 3D printer. Click on the button and save the file on your computer to work, edit or customize your design. You can also find more 3D designs for printers on 4x4 Post Cutting Guide.
