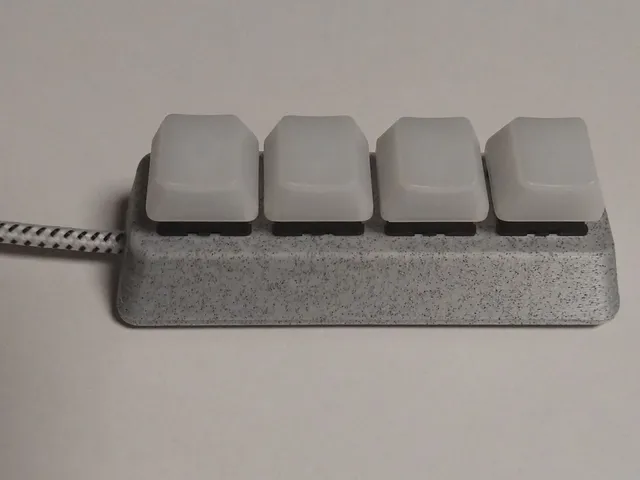
4x1 Macro Keypad
prusaprinters
Required hardwareRaspberry Pi Pico (RP2040) microcontroller boardUSB cable (as it has to be cut and soldered a USB 2.0 is preferred, because it only has 4 wires)4x Cherry MX key switches or other with similar size4x Keycaps (or print your own)4x M2x6 flat head self-tapping screws (overall length should be between 6 and 8 mm)(optional) 2x M2x5 flat head self-tapping screws (to fix the microcontroller board)(optional) 4x small rubber feet (I used 2 mm height with a diameter of 8 mm)2 small zip ties (to fix the cable, should be less than 3 mm in with) 5x short cable peices and a soldering iron/station (to connect the switches with the microcontroller board)A multimeter or tester is strongly recommended to test the cable connections, as the cable colors can be random (mine had +5v on black and ground on red)Note: This model was created with the intent to directly solder the USB cable to the microcontroller board, because of space constrains. It may also be possible to get a cable (or modify one) that can be directly connected.Printing My print used PLA with 0.2 mm layer height and a 0.4 mm nozzle without support.I used Filament PM Marble Jet Dark which gave nice results, other filaments may require a finer layer height.Build instructionsInsert the four key switches in the top partCut a USB cable and solder it directly to the test points(If the cable has different cable colors, you could connect the other end to the micro USB port and measured for continuity to the test points to find the correct cable color.)TP1 to groundTP2 to USB D-TP3 to USB D+VBUS to +5 VConnect one side of all switches to one pin (ex. GP5)Connect the other sides of the switches to four other pins (ex. GP6, GP7, GP8, GP9)Insert the cable in the cutout of the bottom piece and fix it with zip tiesFix the microcontroller board to the bottom piece by using two small screwsConnect the Raspberry Pi Pico to the computerDownload and install Circuit Python on the Picosee https://circuitpython.org/board/raspberry_pi_pico/Download KMK from https://github.com/KMKfw/kmk_firmwareExtract the kmk forlder onto the pico “CIRUTPY” drivesee https://github.com/KMKfw/kmk_firmware/blob/master/docs/en/Getting_Started.mdPlace a “code.py” which defines your keymap etc. (see below as starting point)(optional) If the “CIRCUITPY” drive and serial port should be hidden, create a “boot.py” as well (see below as starting point).If you use the example below, press and hold the first button when connecting to re-enable the drive and serial port to allow configurationModify your macro keypad as you likeExample code.py:print("Starting") import board from kmk.kmk_keyboard import KMKKeyboard from kmk.keys import KC from kmk.scanners import DiodeOrientation keyboard = KMKKeyboard() keyboard.col_pins = (board.GP5,) keyboard.row_pins = (board.GP9,board.GP8,board.GP7,board.GP6,) keyboard.diode_orientation = DiodeOrientation.COL2ROW keyboard.keymap = [ [KC.A, KC.B, KC.C, KC.D,] ] if __name__ == '__main__': keyboard.go()Example boot.py:import supervisor import board import digitalio import storage import usb_cdc import usb_hid from code import keyboard from kmk.scanners import DiodeOrientation # If this key is held during boot, don't run the code which hides the storage and disables serial # This will use the first row/col pin. Feel free to change it if you want it to be another pin col = digitalio.DigitalInOut(keyboard.col_pins[0]) row = digitalio.DigitalInOut(keyboard.row_pins[0]) if keyboard.diode_orientation == DiodeOrientation.COLUMNS: col.switch_to_output(value=True) row.switch_to_input(pull=digitalio.Pull.DOWN) else: col.switch_to_input(pull=digitalio.Pull.DOWN) row.switch_to_output(value=True) if not row.value: storage.disable_usb_drive() # Equivalent to usb_cdc.enable(console=False, data=False) usb_cdc.disable() usb_hid.enable(boot_device=1) row.deinit() col.deinit()
With this file you will be able to print 4x1 Macro Keypad with your 3D printer. Click on the button and save the file on your computer to work, edit or customize your design. You can also find more 3D designs for printers on 4x1 Macro Keypad.
