4WD robot rebuild
thingiverse
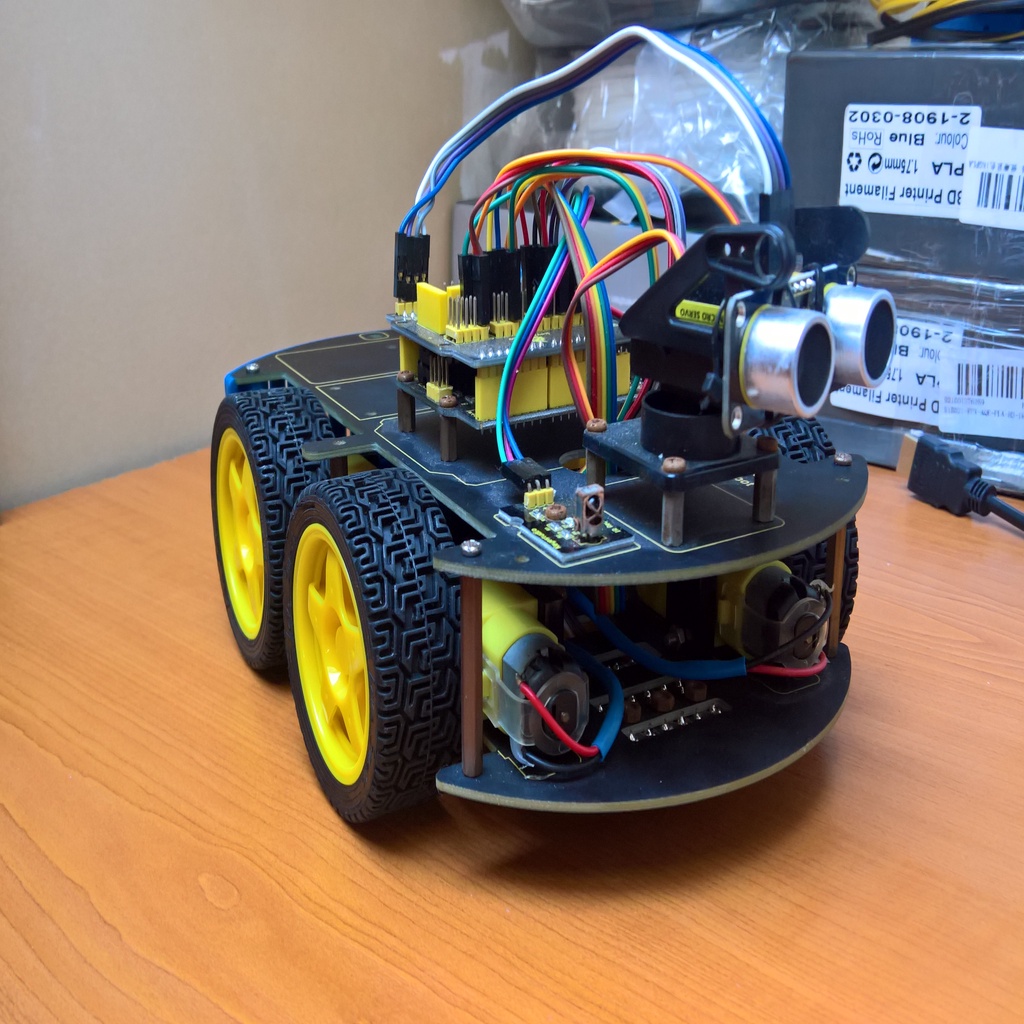
Few months ago my path crossed with this 4WD robot from Keyestudio, and let me tell you, there are literally tons of clones available online. I wasn't satisfied with the look of this funny thing and some features were missing, so I decided to give him a little rebuild - or rather a big one. So here's my work in progress. TLDR: 1. Rear bumper / cover: done. 2. Holder for 10000mAh powerbank: done. Next step: Front bumper with integrated ultrasonic sensors. That's the next item on my list. Last step: Power motors directly with a step-up converter/booster for better performance. And finally, last but not least, wireless charging with auto-homing. ------------------------------------------------------------ Step 1 rear bumper: It was pretty simple to design and print. No need for explanation there. Step 2 powerbank bracket: It's not the most beautiful piece, but it's sufficient for prototyping purposes. I decided to use a common noname powerbank that can charge 5V appliances for simplicity and convenience. Be careful though - I encountered some hick-ups along the way. The motor driver used in this particular robot (L298N) isn't very efficient, so there's a big voltage drop-out on output. With a 5V power supply, you can expect around 3.3V to reach the motors. One of my future todos is powering the motor through a step-up converter - it might just do the trick for those 9V used motors that should take 6V input.
With this file you will be able to print 4WD robot rebuild with your 3D printer. Click on the button and save the file on your computer to work, edit or customize your design. You can also find more 3D designs for printers on 4WD robot rebuild.