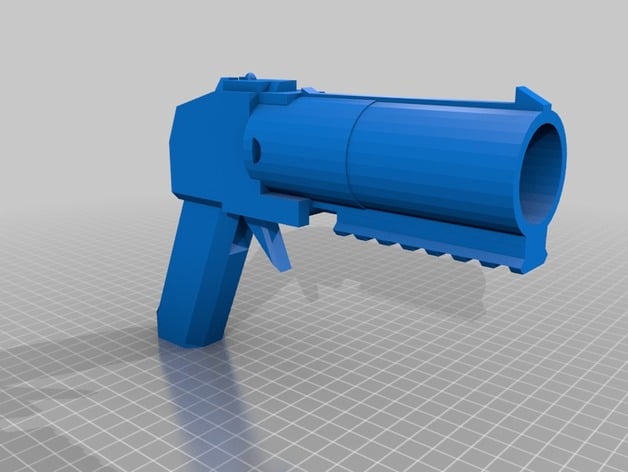
40mm grenade launcher (airsoft)
thingiverse
As of 3/31/15 I have been notified that there is a significant flaw in the unit, thanks to meendiz for bringing it to my attention with the following details. It has been pointed out that the barrel diameter is incorrectly sized to accept 40mm grenade shells as I have mistakenly identified the external diameter as 40mm rather than specifying an internal diameter of 40mm. I will attempt to post updated files by mid-June or sooner, I apologize to anyone who may have invested time and resources into printing a defective unit. Please note that this is a prototype for a 40mm grenade launcher intended for use with 40mm Airsoft gas grenades, marking my first attempt at designing something like this. Therefore, it will require some sanding and fine-tuning before it functions properly. Some assembly is required, always wear protective eyewear when shooting airsoft replicas. Major update time! (5/27/15) I began working on this prototype on 5/27/15, and now it's time to share the revised version! I spent about 3 hours refining the design, adding a few new elements, changing some others, and overall making a better launcher (hopefully). Changes: - Added slots in top of grip/receiver for latch rails - Installed front and rear "iron" sights - Included maker's marks on backside of grip/receiver - Resolved the issue of a free-floating firing pin (hopefully) - Cleaned up edges on trigger and grip for better ergonomics (the grip will need some sanding) - Resized latch - Corrected possibility of latch coming off if pulled too far - Added cutout on side of barrel for easier reloading That's all for the changelog so far. I'll remove the old files and replace them with new ones, along with improved instructions and an exploded model for everyone to review. Instructions: I designed this using TinkerCad, combining reference images and physical components to obtain measurements, devoting a few hours of my life, and fuelled by caffeine to create this small project Instructions for assembly: 1. Print each piece, sand, and/or refinish each component as needed 2. Combine the trigger and firing pin parts, ensure they fit together securely, move freely (sand contact points if necessary) 3. Join the grip, trigger/firing pin assembly, and 5x5x32mm peg, position the trigger/firing pin assembly in the cutout on the grip, align holes in trigger with upper part of grip, insert pin through (some sanding required for smooth pivoting) (use metal substitute for plastic printout for best results) 4. Bond backplate and grip assembly using acetone or other adhesives; verify firing pin moves freely before permanently bonding surfaces together; ensure top, bottom, and sides align properly (use square ruler to verify edges are smooth and aligned correctly) 5. Allow adhesive to dry according to label instructions 6. Position the latch on finished grip assembly between recesses, insert rails into recesses, test latch operation before gluing in place; after sanding, glue rails securely, ensuring no glue enters recesses or onto the latch! 7. Allow adhesive to cure for time specified on the label 8. Bond the body assembly to the barrel using a 4x4x32mm pin or metal equivalent 9. Attach 20mm rail to bottom of barrel; place as far back or forward as desired, allow adhesive to dry 10. Enjoy your 3D printed 40mm airsoft grenade launcher! Note: I am not liable for injuries resulting from improper use or modified versions of this object, do not attempt to make this device fire live munitions or any pyrotechnics; always wear safety equipment and only fire at consenting individuals. Thank you for reviewing my creation and producing your own!
With this file you will be able to print 40mm grenade launcher (airsoft) with your 3D printer. Click on the button and save the file on your computer to work, edit or customize your design. You can also find more 3D designs for printers on 40mm grenade launcher (airsoft).
