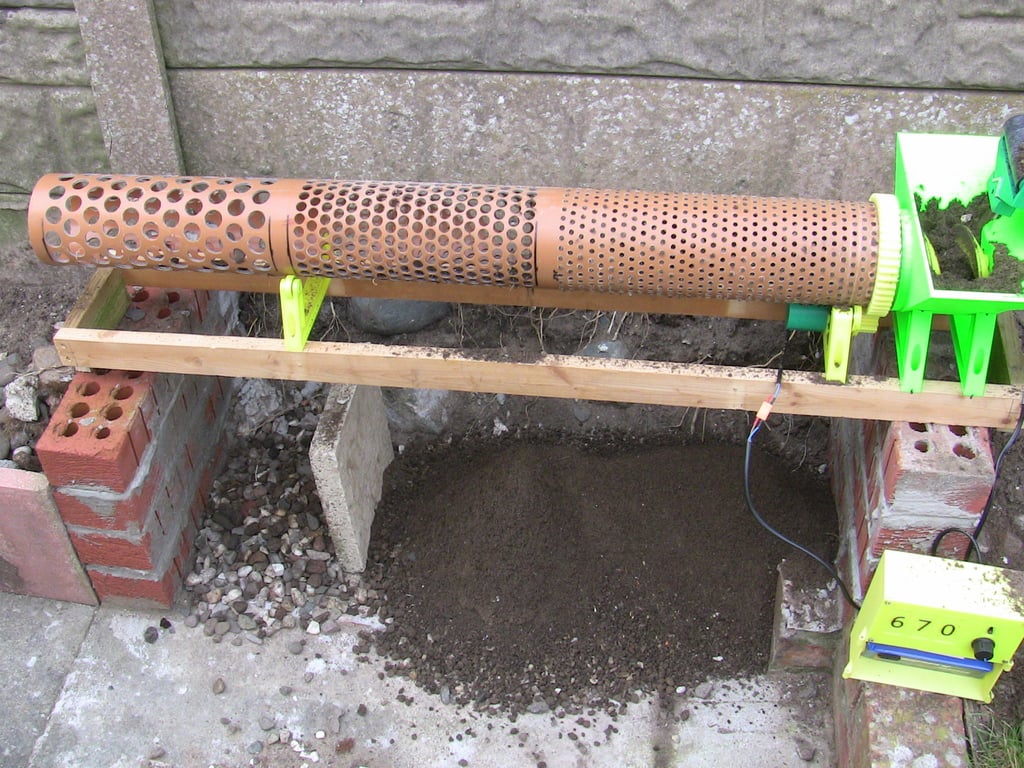
4" Waste Pipe Trommel
thingiverse
A Revolutionary Take on the Classic Trommel - A 1/14th Scale, Heavy-Duty Model Built from 3D Printed Parts and a 4" Waste Pipe...the Ultimate Underground Installation. Updates: 1. I've added two essential "Separators" that can be glued to the top of the roller mounts to prevent dirt and debris from accumulating. 2. The ring gear and drive pinion have been incorporated, which were initially omitted for unknown reasons - apologies! 3. Type "37GB555" motors are used, available on eBay and other online marketplaces. Check out this link: https://www.ebay.co.uk/sch/i.html?_from=R40&_trksid=m570.l1313&_nkw=37GB555&_sacat=0 4. Note that skateboard bearings are utilized in the rollers. What sets this trommel apart from my other designs is that instead of printing the main tube, which may break under heavy use, I've provided files for three drilling jigs that fit snugly over 4" waste pipe. These jigs enable you to drill endless holes - six-millimeter, twelve-millimeter, and twenty-millimeter - with the twenty-millimeter holes being drilled first as six-millimeters then enlarged using a twenty-millimeter hole saw. If you're not familiar with metric measurements, don't worry; imperial sizes like one-quarter, half, and three-quarters will work just as well. You'll need two twelve-volt, thirty-seven-millimeter (one-and-a-half inch) gear motors for this project - one to turn the trommel and another to drive the auger. Both motors are being driven by a single three-ampere PWM controller. Search online for "37mm 12v gearmotor" to find suitable suppliers at affordable prices. Opt for slower motor speeds if you want more realism and endurance. Note that the motors shown in the video are not the same as the recommended ones; I used those slower, lower-powered motors because they were readily available. Watch this YouTube video to see the trommel in action: https://www.youtube.com/embed/dNpakfSTVTk https://www.youtube.com/watch?v=dNpakfSTVTk One thing to keep in mind when printing is that the auger requires a two-part print. Here's how I combined them using Cura: 1. Load both parts into your slicer. 2. Select only the screw part of the auger and use the "Make Overhang Printable" option under per-model settings. 3. Right-click, then Merge Models. By doing this, additional material will be added to the screw part for better bed-adhesion and strength while leaving the shaft unchanged. If you'd like to modify anything, check out the original files here: https://www.tinkercad.com/things/6gA9C4d1YUg-waste-pipe-trommel If you enjoy this trommel, you might also want to print my Speed Control Cabinet (https://www.thingiverse.com/thing:3426490) to go with it.
With this file you will be able to print 4" Waste Pipe Trommel with your 3D printer. Click on the button and save the file on your computer to work, edit or customize your design. You can also find more 3D designs for printers on 4" Waste Pipe Trommel.
