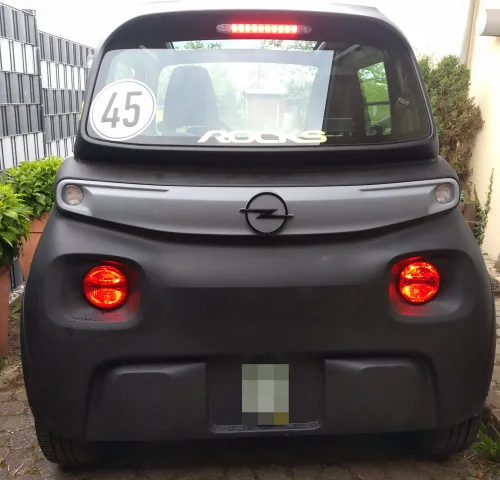
3rd brake light for Opel Rocks-E
prusaprinters
As it says in the title - a third brake light for an Opel Rocks-E (or probably also Citroen Ami). Well, the plastic parts for it. In addition to the plastic parts, you'll need:a brake light (duh!). I used (and designed the holder) for a Hella 2DA 343 106-221. There are various lights from Hella in this series with only minor (if at all) differences and package contentstwo sheet metal screws 3.5x9.5 mm (in the case your light comes without screws)some cables and connectors to make up the inards of the distributor box (I used 2.8 mm faston connectors here, but use whatever you got in the spares box)a few waterproof automotive connectors - I used one pair of three-poles and one pair of two-poles, an additional two-pole is already built into the box but not used yet.two M5 screws, something like 20 mm longtwo M5 nutstwo M5 washerstwo M4 screws (something like 12 mm should do it) and nutstwo 10 mm inner diameter, 1.8 mm thick O-ringssomeone to hold the parts in place - or a few dabs of blu-tack or equivalenttools to work with the connectors (i.e. a pair of suitable crimp pliers)Print the parts. I used Prusament recycling PETG, and I'd recommend PETG or similar outdoorsy stuff. You should have:the outside brake light holderthe inside platethe distributor box (two parts)a cap to close up the fourth connectorSolder (or whatever) your distributor board and wire up the distributor. The incoming connector (female 3-pole) usesrear lightgroundbrake lightThe outgoing (male) 3-pole is of course just wired 1:1 and delivers those three lines to the built-in light. One of the outgoing 2-poles gets the brake light and ground on 1 and 2, the other gets the rear light and ground on 1 and 2 and is covered by the cap (intended for future expansion - I want a reversing light, too).My box required a bit of sanding before the connectors woudl fit into the holes - be sure to test fit before the next step.Then liberally deploy some silicone glue all along the gap in the both the box bottom and top, put the connectors in the corresponding recesses (you did remember to make a dry test fit first?), close the box and keep it together with the M4 screws and nuts. It's a bit messy, but I hope the seal will hold.Leave glue to cure for a couple of hours, then clip the box in place behind the left rear light and secure in any way you see fit (like with a long tie wrap).Find the place to mount your light. It should be centered and othogonal to the cars axis - but who am I to tell you what to do to your car? Again, a few dabs of blu-tack can help with marking the centers of both the car and the holder. Place the (future inner) plate between the holder and the roof, then remove the holder. The plate as printed has 2 mm center guides to drill through and mark the holes in the car roof. Once that's done, enlarge the holes in the car roof to 10 mm (a step drill is very useful here) and cut the center guides from the plate.Push the brake light cable through the cable hole in the holder and in the roof. Put the two M5 nuts in the recesses and secure with blu-tack. Put the two O-rings in the dents around the screw holes, then place the holder under the roof. Either get someone to hold it in place or secure it with blu-tack. Proceed to the inside of the car.Take the plate and push the cable inside the car throught the cable hole. Put the M5 screws and washers in place, then put the plate over the holes and carfully fish for the nuts. Once the screws have caught, you can remove the blu-tack on the outside holder. Tighten the screws.Ok, the holder is now in place. Push the rest of the cable through to the inside of the car, then mount the light to the holder (with the adhesive tape and the two sheet metal screws). Don't forget the end covers.Now find a way to push the cable back outside (e.g. through the foam seal between the plastic cover and the steel frame at the left side of the rear window. Guide the cable near the distributor box, crimp on the female two-pole and connect to the open connector on the box. Test everything.Re-attach the rear bumper, and you're done. Except for finding a way to clean up the cable routing inside the cabin - if you have a good idea for that, tell me…
With this file you will be able to print 3rd brake light for Opel Rocks-E with your 3D printer. Click on the button and save the file on your computer to work, edit or customize your design. You can also find more 3D designs for printers on 3rd brake light for Opel Rocks-E.
