3in Laser Exhaust Cover
thingiverse
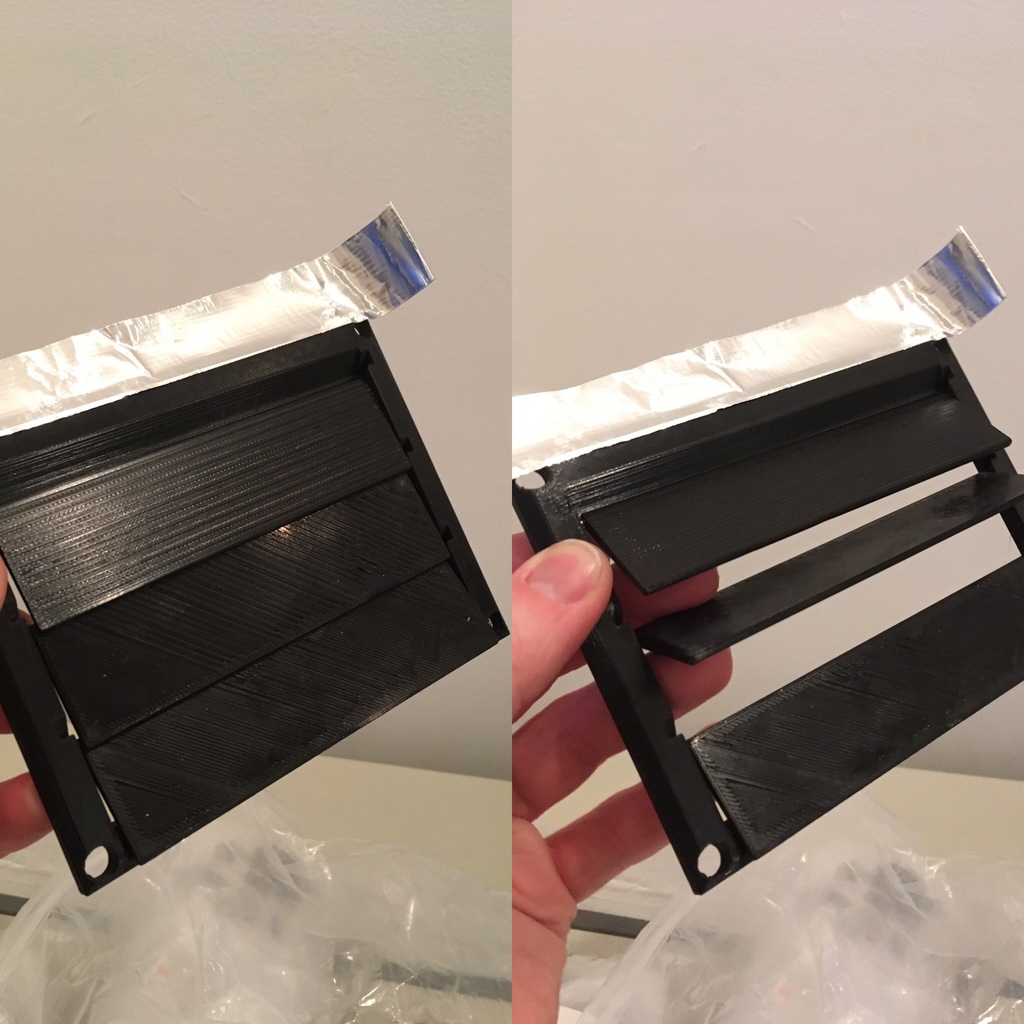
This exhaust cover was crafted to shield my laser's air system from snow and bugs. It also helps keep the lab insulated, preventing wasted energy from heating up cold air in winter or cooling down hot air in summer. To build this design, you'll need 1/16" (1.5mm) steel rod, one baffle frame, and three blades. You'll also require metal tape to secure the blades during rough weather and more tape or caulk to seal the frame. Begin by cutting three rods between 118 and 120mm long. Pass a piece of rod through each hole on your baffle blade until equal lengths protrude from both sides (approximately 4mm). This may necessitate considerable force, depending on your printer's settings. To overcome this challenge, I secured the rods in a vice one at a time, pushing the blades onto them while twisting the blade. Once they were almost fully seated, I used a hammer to tap them home and then evened out both sides. Next, install the baffle frame onto your exhaust. This design was created to fit over a 3in exhaust flange without requiring disassembly or modification of the flange itself. I experimented with metal tape and silicone caulk for attaching the frame, finding both methods effective. Finally, attach the blades by sliding them into the slots on the frame. Be cautious not to drop your blades as you're inserting them. After that, apply a strip of tape along either side of the frame to cover up the slots and prevent the blades from dislodging during a storm. Turn your exhaust on and conduct a test. The blades should swing freely, allowing ample airflow. If they don't move smoothly, it's likely one of your rods is slightly bent. In this case, remove the sluggish blade, use pliers to straighten the rod, and reattach.
With this file you will be able to print 3in Laser Exhaust Cover with your 3D printer. Click on the button and save the file on your computer to work, edit or customize your design. You can also find more 3D designs for printers on 3in Laser Exhaust Cover.