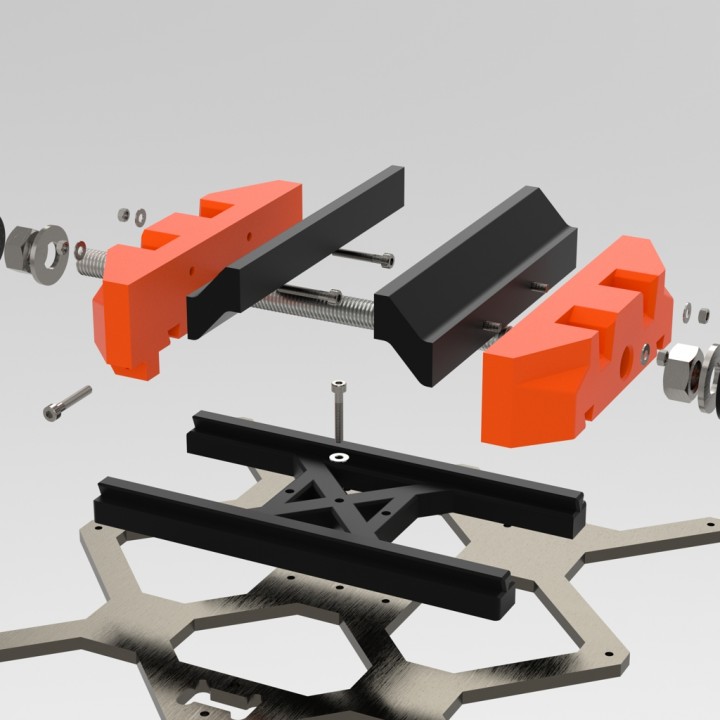
3D PRINTER VISE
myminifactory
This versatile tool is specifically engineered to unlock the full potential of a Prusa printer by enabling it to tackle objects from multiple angles, mirroring the capabilities of CNC machines. The precision of the tight piece can be effortlessly adjusted by manually operating the extruder with software tools like Pronterface. A demonstration of its functionality can be seen in the presentation images, where a 'P' was successfully printed onto the surface of a hard-plastic pepper mill (a video documenting the printing process is also included in the attached folder). However, printing on various objects is just one possible application; this system can also be used to easily overcome undercuts by splitting an object in two and printing one side over the other. Moreover, it makes perfect spherical shapes achievable! Future experiments will explore the feasibility of welding together separate pieces by printing a bridge between them or creating hinges with flexible materials. NOT REQUIRED PARTS: - 1 M10 X 250mm screw - 2 M10 nuts - 2 M10 washers - 2 M3 X 20mm screws - 2 M3 nuts - n M3 bolts depending on how you secure the base to the printing plate or frame (optional for bite extensions) - 4 M3 X 20mm screws - 4 M3 nuts A comprehensive guide will soon be published, allowing users to initiate printing at a specified Z coordinate using the Cura slicer. Recognizing that calibration and printing can be intricate processes, a firmware extension for this system could greatly simplify future endeavors! Work is ongoing; stay informed!
With this file you will be able to print 3D PRINTER VISE with your 3D printer. Click on the button and save the file on your computer to work, edit or customize your design. You can also find more 3D designs for printers on 3D PRINTER VISE.
