3D Printer
cults3d
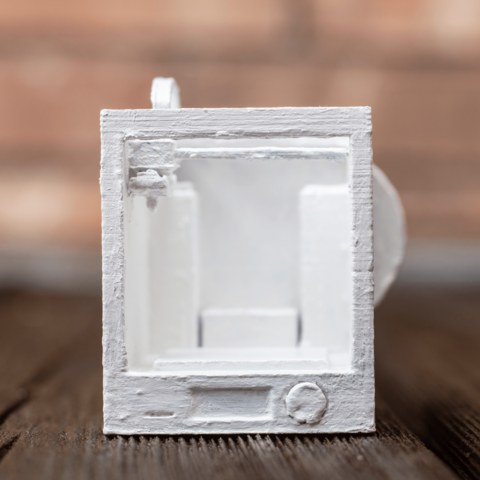
This object is crafted in Tinkercad: tinkercad.com/things/4WZD3Zj3gRg. It's an intricate model of a 3D printer, packed with details like a detachable roll of filament, a miniature LED screen, SD slot, and knob on the front. To add more detail to this object, this print comes with three parts that can be glued together and placed inside your 3D printer - the extruder with fans on either side, the print head, and the filament guide looping around to the back of the 3D printer. Assembly 1) Print this object using the Printing Tips listed below. 2) Carefully remove all five parts of this 3D printer from the print bed, removing all supports. Be cautious when removing supports from the back wall, as you can easily tear columns in the back. To avoid this, remove the first layer or two of supports, press your thumb against each column one at a time, and use a knife or your other hand to remove supports. 3) Slide the roll of filament onto the back of the 3D printer. 4) Arrange the printhead so that beams holding it up face toward the back wall and right wall of the printer. The printhead itself should rest against the left wall of the printer. Apply a dot of glue to the side of the printhead, lay the 3D printer on its side, and glue it in place. 5) Attach the extruder to the printhead using a dot of glue. Hot glue is recommended so you don't have to clamp it down for too long. 6) Attach the filament guide to the printer by applying a dot of glue to both ends and pressing the short end onto the printhead, and the long end onto the box housing the motor on the back, right where the bowden tube would go. 7) You're done! Have fun with your newly printed 3D printer. If you want to show it off to friends, take a picture of it fully assembled inside the Ultimaker 2+, the 3D printer it was based on.
With this file you will be able to print 3D Printer with your 3D printer. Click on the button and save the file on your computer to work, edit or customize your design. You can also find more 3D designs for printers on 3D Printer.