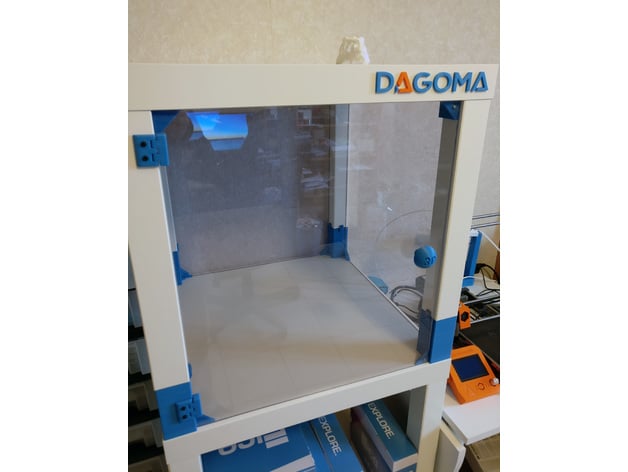
3D printer case with Lack tables (Ikea)
thingiverse
Human: Here are parts to build a 3D printer case with Lack tables from Ikea. Edit: To regulate temperature within the case, you can use two 12V fans and a w1209 for example; that's what I will do. Here is a w1209 case I made too. After printing parts, you need: 2 or 3 Lack tables from Ikea 4 x acrylic glass (plexiglass) 4mm (0.157") thin, measuring 50cm x 44.5cm (19.68" x 17.52") Wood screws and hex screws While mounting the plexiglass panels, you will have to cut a little piece in plexi to fit with top links. It's normal and easy to do with a jigsaw (or handsaw). For those who want to use plexiglass of different thickness than 4mm, here are the files (only the files that change; you still have to download the master folder): Box with 2mm thickness plexiglass Box with 3mm thickness plexiglass Box with 5mm thickness plexiglass Note: The L_shape.stl is used to join the first table from floor and the second together. Rods of plastic are provided to center the L without measuring; cut them when you find their good place. Print Settings: Printer: Dagoma DiscoEasy200 Rafts: No Supports: No Resolution: 0.2 Infill: 50% Notes: There is no need for supports on all parts, except for the door knob. An infill of 30% is good as parts need strength, except for the door knob, which can have a 10% infill. For the hinge, print them upside down to avoid supports! More pictures are available: The L_Shape (plastic rods already cut)
With this file you will be able to print 3D printer case with Lack tables (Ikea) with your 3D printer. Click on the button and save the file on your computer to work, edit or customize your design. You can also find more 3D designs for printers on 3D printer case with Lack tables (Ikea).
