3D Printed Telescope
myminifactory
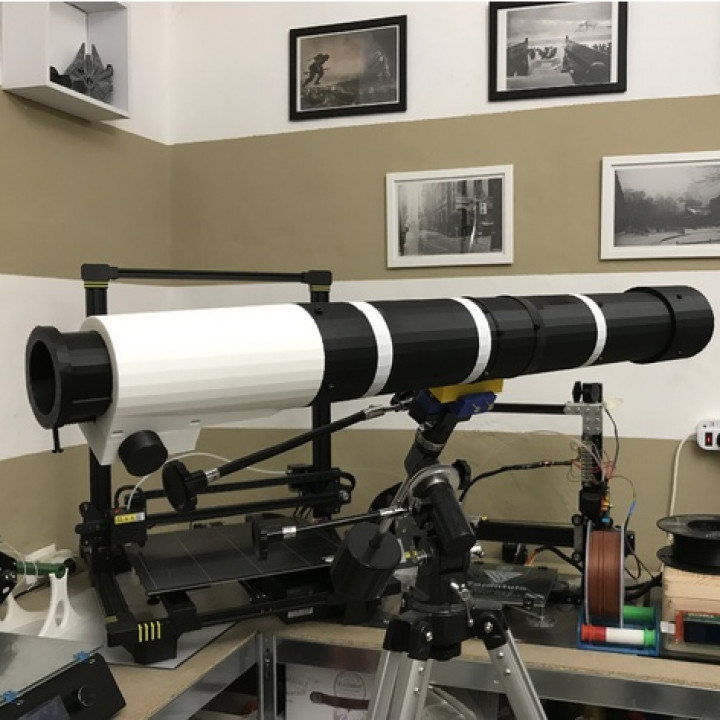
This is a fully functional 3D printed telescope that requires no parts except for a main lens, eyepieces, and a few screws and nuts to assemble the various components. Designed specifically for lunar and planetary observation, this telescope features a 93 mm achromatic lens that offers great performance at an affordable price. The entire telescope can be built with just $10 worth of filament, $38 for the primary lens, and a few dollars for the necessary screws. Here are the purchase instructions: The telescope consists of 10 distinct components: 1) Focuser 2) Tube n. 1 3) Tube n. 2 4) Tube n. 3 5) Lens Block 6) Traveler 7) Handler - Knob (requires two) 8) Rod (requires two) 9) Gear 10) Cover In addition to the basic telescope, there are four useful accessories: - Dovetail Bar: attaches to the telescope and secures it in most telescope mounts - Adapter 2" to 1.25": use existing adapters if possible - Screw Handler: allows hand tightening of flat hex head screws for adapters or eyepiece holding - Telescope Plug: prevents lens contact with dust Depending on your printer's precision, you may encounter pieces that don't fit or are difficult to assemble. In this case, sanding with sandpaper or adding a thickness (such as insulating tape) should solve the issue. If your prints suffer from elephant foot, simply cut it away. To complete the telescope, you will need: 1) Primary lens: purchase the exact D 93 f800 lens specified, which is available at http://s.click.aliexpress.com/e/c4PGs4Ak. This lens offers great performance and a low price. 2) Screws: - M4 x 10 (number 16): use these screws from https://amzn.to/2DtkYBN - M4 x 25 or 30: need three flat hex head screws, such as those found at https://amzn.to/2DvLWZy - M4 x 35 or 40: need four of these screws, which can be purchased at https://amzn.to/2DyuvHV 3) Nuts: use the M4 nuts provided in the screw package. 4) Cable ties: purchase heavy-duty nylon zip ties, such as those available at https://amzn.to/2DAPD0d. 5) Eyepieces: you will need oculars for this telescope. If you already have a telescope, you can use your existing eyepieces. For first-time users, consider purchasing three eyepieces with magnifications of 35x, 80x, and 200x from https://amzn.to/2IF35nZ. Assembly Instructions: 1) Once all the components are printed, assemble the tube by installing the focuser, tube n. 1, tube n. 2, and finally tube n. 3 lens holder in that order. 2) Ensure the holes for the screws match, and use M4 x 10 screws with nuts even if the holes were designed to hold them. 3) Install the two rods inside the gear, which should have a square part as long as the gear that fits inside. Attach the knobs to the squared end. 4) Insert this part into the cover and secure it by inserting data in the appropriate slots and tightening with M4 x 40 screws. 5) To install the main lens, push it from the tip of the telescope (tube 3), keeping the concave part outside. For added security, insert the lens block and fix it with four M4 x 10 screws. 6) Insert the traveler, move the knobs to zero, and your telescope is ready! Simply insert nuts into provided spaces (traveler, focuser, and reducer from 2" to 1.25") and tighten screws using a wheel for manual adjustments. 7) Finally, secure the dovetail bar with cable ties.
With this file you will be able to print 3D Printed Telescope with your 3D printer. Click on the button and save the file on your computer to work, edit or customize your design. You can also find more 3D designs for printers on 3D Printed Telescope.