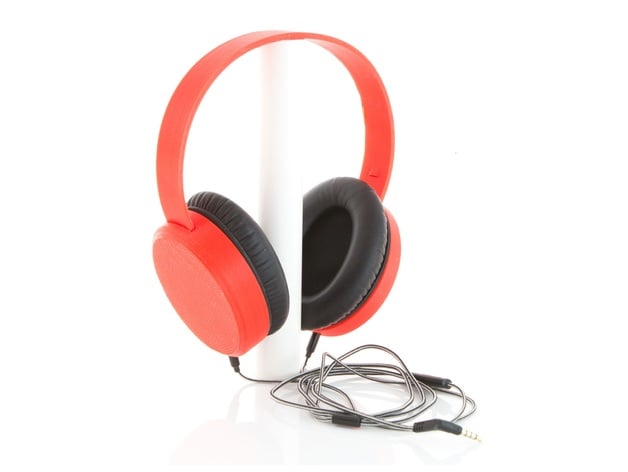
3D Printed Headphones
thingiverse
Here is a set of great-looking and awesome-sounding headphones you can print yourself. The parts that cannot be printed (drivers, cushions, etc.) are all readily available and will cost around $25 (plus shipping). How I Designed This Unlike loudspeaker enclosure design, there's almost no publicly available information on designing great-sounding headphones (that I could find anyway!). Therefore, I had to do a heap of development and testing to understand how the design variables affect the sound. If you're interested, details of my work can be found here: http://homebrewheadphones.com/design/detailed-design/. Info on the test rig I built for sound development can be found here: http://homebrewheadphones.com/closed-back-test-method/. Overview and Background Recently there's been a lot of hype about 3D printing being the way of the future, including how it will replace store-bought items. With this project, I set out to explore two aspects of this: firstly, whether people will readily 3D print things they're likely to otherwise buy, and secondly, how mass manufacturing and 3D printing will realistically have to coexist for the foreseeable future (as some things such as the magnets and mylar film in the driver cannot easily be printed yet). Lesson Plan and Activity The lesson can comprise of two elements: a hands-on demonstration of 3D printing, how it works, and what it can do; and a discussion exploring the implications of 3D printing, including implications on existing industries and the consumer (eg increased personalisation of products etc). Materials Parts to purchase: 2x drivers: http://bit.ly/Dayton-ce38mb-32 Cushions: Bose QuietComfort QC15 QC2 replacements https://amzn.to/2KfEcMK Cable: Sol Republic Master Tracks HD V8 V10 V12 X3 replacement http://amzn.to/2kAyrkb 2x 2.5mm female audio jacks http://amzn.to/2niNn8n Hookup wire. These come cut and stripped http://amzn.to/2jv59Qk Gel consistency glue for plastic http://amzn.to/2liPTXh Plasticine https://amzn.to/2tC6dHl Solder Parts to print: 2x covers 2x baffles (printed with the driver mounting side facing up) 1x headband I made mine from ABS using the printer's default settings, except for reducing the headband infill to 5-10%. The parts Assembly Instructions Step 1: Solder the hookup wire to the 2.5mm jacks Solder two sets of hookup wire to the 2.5mm jacks as per the photo. On the jacks we used, the negative (black) wire is the large tab and the positive (red) wire is the small tab. Step 2: Tune the sound Now for step that took me tons of testing to figure out! In a closed-back design, the Dayton Audio CE38MB-32 drivers are too bass-heavy and lacking in high-end detail. To even things out a bit, we need to reduce the mids/bass to make them more equal to the treble. Don't worry, there will still be plenty of bass after this step! Using plasticine or similar, roll a small amount into a sausage then block all except one of the holes under the black fabric on the back of the driver. Step 3: Assembly Press the baffles into the covers, making sure the headband end of the baffle corresponds to the headband end of the cover (ie the two square holes line up). It may take a bit of force to assemble them – they are deliberately a tight fit so that they don’t require glue and can be disassembled. Using the double-sided tape which comes on them, attach the pieces of fabric to the baffle. Fit the cushions to the baffle. Insert the headband and cables. They are handed, so make sure you put them on the right way around! Crank up some tunes and enjoy! Please share pics of your build, I would really love to see them! Press the baffle into the cover Fit the cushions Your done - now enjoy them!
With this file you will be able to print 3D Printed Headphones with your 3D printer. Click on the button and save the file on your computer to work, edit or customize your design. You can also find more 3D designs for printers on 3D Printed Headphones.
