3D Printed CO2 Car - Part Two Race Time!
thingiverse
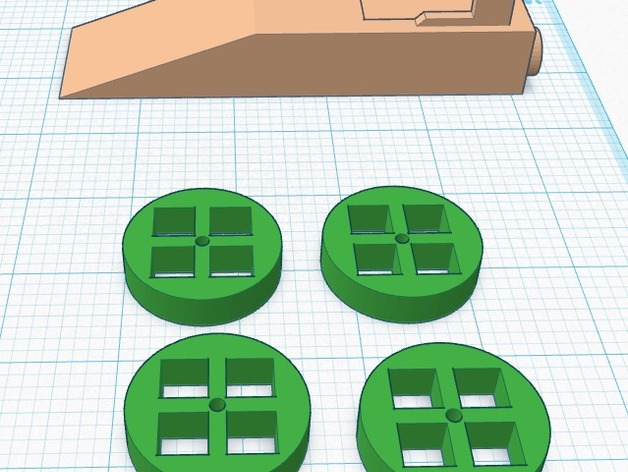
This is part two of the 3D Printed CO2 Car project posted here: http://www.thingiverse.com/thing:1594511. This lesson assumes you've completed one car and have some experience with timer races. In this part, we'll discuss redesigning for improved time, stability, and testing weight change vs speed ratio. If you made it this far, you've already learned how long it takes to print one car. The first time I did this lesson, I chose to only reprint the wheels. I talked to my students about wheel redesign options, mostly using the "hole" feature in Tinkercad to make lighter wheels. If you have time to remake the cars, there's plenty that can be done for redesigning. Let's get started! Print Settings: Printer Brand: MakerBot Printer: MakerBot Replicator (5th Generation) Rafts: Yes Supports: No Resolution: 0.3 Infill: 10% Notes: You can test different infills to produce more weight, but 10% works well enough. Most wheels take about 45 minutes to print. Standards: NGSS Overview and Background: Objectives: Students will redesign their CO2 car while applying math skills to measure progress. Standards: STEM Standards: Standard 1: Analysis, Inquiry, and Design Students will use mathematical analysis, scientific inquiry, and engineering design to pose questions, seek answers, and develop solutions. Standard 3: Mathematics (Revised 2005) Students will understand the concepts of mathematics; communicate and reason mathematically; become problem solvers by using appropriate tools and strategies; through the integrated study of number sense and operations, algebra, geometry, measurement, and statistics and probability. Standard 6: Interconnectedness: Common Themes Students will understand relationships and common themes that connect mathematics, science, and technology and apply these themes to other areas. Lesson Plan and Activity: There's a lot to explore in this lesson. Let's break it up into specific categories: Redesign/Weight Reduction: Using the hole tool, students can redesign their wheels in two ways: making them thicker/thinner or reducing weight. However, if they change the diameter of the wheel, the launcher won't align with the air tube. It's better to change one parameter at a time for simplicity. This is where the timer comes in handy! Using the timer, students can compare race times before and after redesigning their cars. This is also a great way to teach decimal value knowledge through comparison in a real-world setting. Many sports use this measure, including Nascar, Olympics, and horse racing. Calculations can be helpful for high-grade students. Teaching them how to use formulas like "Speed = Distance ÷ Time" in a real-world application can have a huge impact on information retention. Here's a link to a calculation website: http://www.machinehead-software.co.uk/bike/speed_distance_time_calc.html
With this file you will be able to print 3D Printed CO2 Car - Part Two Race Time! with your 3D printer. Click on the button and save the file on your computer to work, edit or customize your design. You can also find more 3D designs for printers on 3D Printed CO2 Car - Part Two Race Time!.
