3D-Printed Circuit Board library (solder-free)
myminifactory
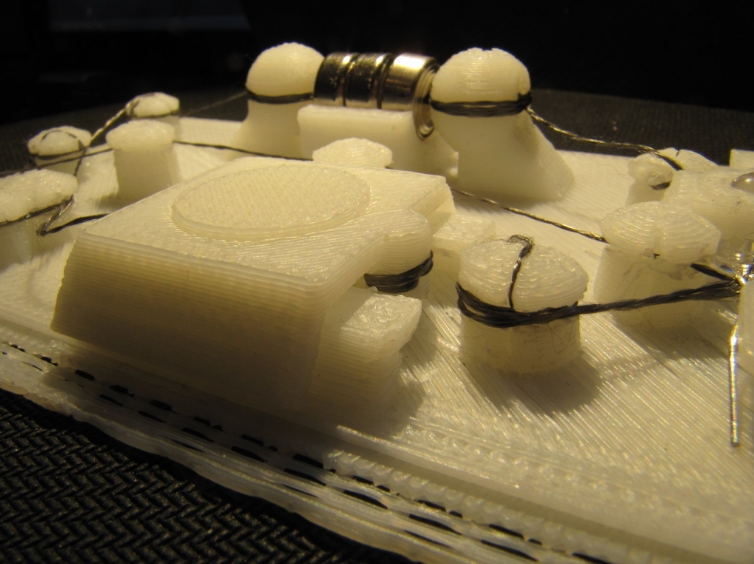
You can support us by visiting our Etsy! http://etsy.me/16o3ZGE The goal of this project is to enable personal manufacturing of simple electronics, especially for Open Source Hardware, using nothing except a 3D printer, your hands or equivalent, and basic electronic components. Instead of solder, wires, and breadboards, OpenSCAD generates a peg-board PCB and component holder, and a circuit can be hand-wound together with conductive thread. This code base is intended to replace conventional etched PCBs for very simple applications. Included is a basic feature set, described in the Instructions. The pictures and uploaded STL files demonstrate these features: a battery holder, a momentary push-button, a toggle switch, and an LED holder. So far I have printed a proof-of-concept on my Up! (pp3dp), and best results are with this type of conductive thread: http://www.sparkfun.com/products/10118 Check out the instructions for details and next steps. Also check out the etsy shop and find us on Facebook! https://www.etsy.com/shop/CarryTheWhat? https://www.facebook.com/carry.the.what.replications Instructions Feature set: peg: basic structure for winding thread, articulating circuit paths, and as end-stops for the thread. battery_holder: implemented for AA and a stack of 3 watch batteries. A sphere is at either end holding them in place, with holes and grooves for winding thread to contact the batteries when inserted. LED_holder (and similarly, resistor_holder): 2 sets of pegs are spaced apart, such that when each set is wound together, an LED (or other two-terminal component) can be inserted over the thread but under a latch. The result is a firm connection to the circuit. push_button: very simple momentary switch; 2 sets of pegs, one diagonal at a lower plane than the other such that if you thread the upper together and the lower together they will cross, but with a gap. If you push on the X, the threads touch and the circuit is completed. SPST_slide_switch: simple slide switch (don't forget to print the 'toggle' separately!). There are two pegs with a slot in between. After threading and wrapping the toggle for the switch with conductive thread, it can be inserted into the slot and wrapped to the back peg. When you slide this toggle forward, it makes a connection with the forward peg. Known issues: I've tried only a couple different types of conductive thread -- not all are effective. One type (Inventables purchase) had only part of the thread conductive with the rest being structural, and gave lots of problems. Additionally, the resistance per cm adds up pretty quickly -- http://www.sparkfun.com/products/10118 This thread however has been best so far. 9 Ohms per linear foot is pretty negligible, and the whole of the thread is conductive. However, it has a tendency to fray, which might be a problem. Applications with high voltage or high current are not advised, as all connections are unshielded I know high frequency applications will also cause problems going forward, and I haven't yet tried to run a signal over connections Next steps: github if there is interest in helping me! Apply basic feature set to simple printable OSHW applications; a flashlight, a desk lamp, and try again with my light ring: http://www.thingiverse.com/thing:11904 Verify print-ability on the MakerBots, RepRaps, etc (let me know!). Also tweaks to increase the ease of threading Expand feature set to include more switches, including a clicky-clacky push button, and more basic electronics components such as transistors, 8-pin ICs, and 9V battery connector. 3D-Printed Circuit Board library (solder-free) by CarryTheWhat is licensed under the GNU - LGPL license.
With this file you will be able to print 3D-Printed Circuit Board library (solder-free) with your 3D printer. Click on the button and save the file on your computer to work, edit or customize your design. You can also find more 3D designs for printers on 3D-Printed Circuit Board library (solder-free).
