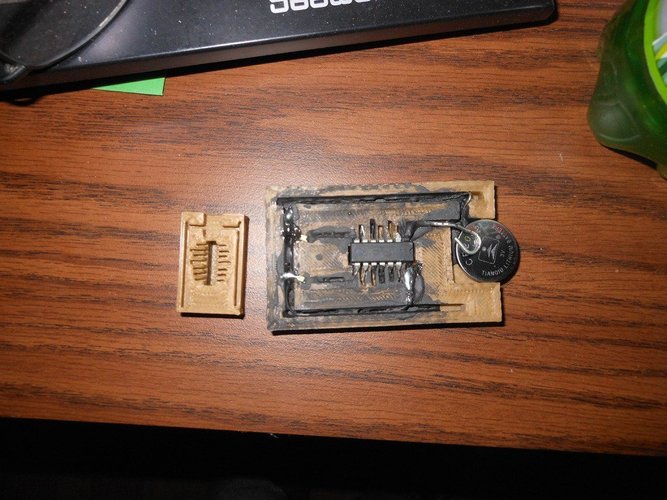
3D Printed Circuit
pinshape
I'm trying a 3D-printed circuit. I painted this model with conductive glue, and then attached it to a CR2032 battery using a wire. Many ATTINY chips can be programmed using the Arduino IDE. Check out http://www.arduino.cc/ for more info. You can also use http://highlowtech.org/?p=1695 as a reference. I recommend using Arduino as an ISP or In-Circuit Programmer. My previous attempt at conductive ABS from Makergeeks was unsuccessful due to high resistance, so I had to switch to a conductive paint or paste. The Attiny84 Datasheet is available here: http://www.atmel.com/Images/doc8006.pdf. Since the circuit runs at 3V, resistors aren't really needed to limit current for LEDs. However, I did try using an SMT LED, but couldn't get a good connection. This project was my first attempt at learning AutoCAD Inventor, and I'm excited to see what other projects I can tackle. I used AutoCAD Inventor to create the design, which I then exported as an STL file. To avoid issues with scaling, make sure to force it to scale in millimeters during the export process. My 3D printer of choice is a Flashforge Creator X, and I printed this circuit using PLA at a resolution of .1mm. For optimal results, I recommend using a glass plate with aquanet hair spray and adjusting the nozzle temperature to 215 C and the heated bed to 55 C. Keep in mind that most users prefer to use makerware software, but other options may yield better results.
With this file you will be able to print 3D Printed Circuit with your 3D printer. Click on the button and save the file on your computer to work, edit or customize your design. You can also find more 3D designs for printers on 3D Printed Circuit.
