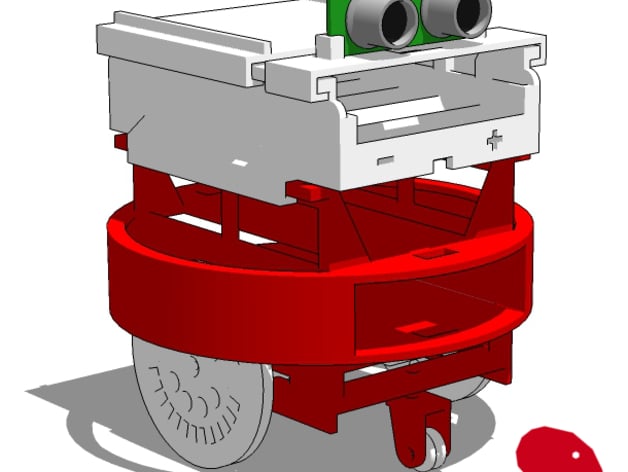
3D Printed Arduino-Driven Robot
thingiverse
UPDATE: We've upgraded the battery holder and mounted the ultrasonic sensor to solve several problems. There's now a wider gap under the new battery holder, so the soldering points won't get stuck on the rail. The new ultrasonic sensor mount is also longer, giving space for its connectors beneath the battery case. This kit is still in development, and we will remove old files as they become outdated, replacing them with improved versions. This basic Arduino robot platform can be printed out and used to learn fundamental programming and robotic skills, or serve as a starting point for more practical projects. The rail system allows you to slide new components into place, including AA battery packs, ultrasonic sensor mounts, and breadboard holders - many more options are planned in the future. To make improvements without rebuilding the entire robot, redesign its mounts rather than the framework itself. Building Instructions Constructing this Robot 3D Printing: We printed out the base of this robot at a very low resolution using our MakerBot Replicator 2. Using rafts and supports proved useful for most components but it's recommended that you only use them with the main body if there isn't enough time. Feel free to upgrade the resolution or print individual components without any support materials, depending on your resources. This robot will need two 9g micro servos that can be modified for continuous rotation. We provide a tutorial for doing so on our website (www.makerzoo.co/converting-servos-for-continuous-rotation). Additionally, several bolts and nuts of varying lengths are required, along with small rubber bands to enhance the traction between the wheels and their bearings. If desired, use friction welding on the casters rather than relying solely on fasteners which tend to loosen over time. Due to our access only having long 3mm bolts available, we employed a rotary tool to shorten them for easier usage in the design - however please exercise caution by wearing safety goggles during this process! Both main wheels now fit more securely compared to their predecessors. For installation simply fasten the wheel to the servo armature using screws provided with your micro servos. Our new battery case and ultrasonic sensor holder both need some adjustments, we combined them and noticed that soldering creates problems when trying to mount batteries on rails or reaching under ultrasonic sensors' contacts - so keep checking this page for our latest updates.
With this file you will be able to print 3D Printed Arduino-Driven Robot with your 3D printer. Click on the button and save the file on your computer to work, edit or customize your design. You can also find more 3D designs for printers on 3D Printed Arduino-Driven Robot.
