3d-printable Onion cutter
thingiverse
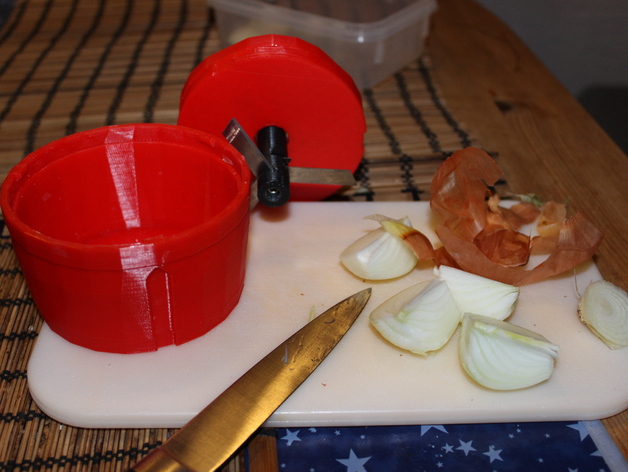
Onion terrors no longer exist in your kitchen as you're about to conquer slicing these pesky vegetables in a matter of seconds! The custom-built 4:1 involute planetary gearset, along with an easy-to-grip bowl and ring gear, packs big torque capacity and blade speeds reaching up to 340 rpm. Say goodbye to those stubborn onions once and for all! This incredible onion cutter was designed with the help of a fully 3D-printable design, leveraging the fact that an M3 tap screw fits perfectly through the hole of 9mm stainless steel cutter blades. When compared to its functionality, this print is remarkably easy. Here are some notable features of the design: * No support is needed during printing * Only small bridges (11mm wide) and some hole bridging are required * No overhangs above 45 degrees * A big bottom surface ensures good bed adhesion * No tweaking of the parts is necessary, as internal surfaces have been integrated for correct hole bridging and coordinate systems have been reoriented to automatically place the parts in the correct printing orientation Even with imperfect print quality or tolerances, this design has you covered. Plus, small edge chamfers on the bottom side of the gears prevent over-squished first layers, so you won't need to clean the teeth. One user successfully printed this design on their poorly calibrated Prism 3D printer (a Mendel derivative) with a damaged nozzle and uneven print bed, proving that even challenging printers can still achieve great results. However, it's recommended to reduce the first layer speed for the shaft gear if you're experiencing difficulties printing. Here are some steps to follow once you've successfully printed your onion cutter: 1. Clean the parts by pushing through holes using a hex key of the given size 2. Remove over-squished layers and teeth from the gears (if necessary) 3. Insert bearings into the top part of the shaft gear Now it's time to assemble the onion cutter: 1. Insert bearings, including a 608 bearing and three 624 bearings 2. Place the shaft gear and insert the blades, ensuring they cut counterclockwise when the shaft turns 3. Make sure all holes align properly 4. Add an M3 nut into the shaft gear and screw in the M3x50 screw Once assembled, place the ring gear on top of the assembly (or simply attach it if you used the easy-print version). Use your new onion cutter to peel and cut onions with ease! Clean-up is simple: just empty and repeat as needed. Make sure to use cold water and soap for cleaning, as this is a food-safe design made from PLA material.
With this file you will be able to print 3d-printable Onion cutter with your 3D printer. Click on the button and save the file on your computer to work, edit or customize your design. You can also find more 3D designs for printers on 3d-printable Onion cutter.